AVer XR8032_RACK User Manual
Page 47
41
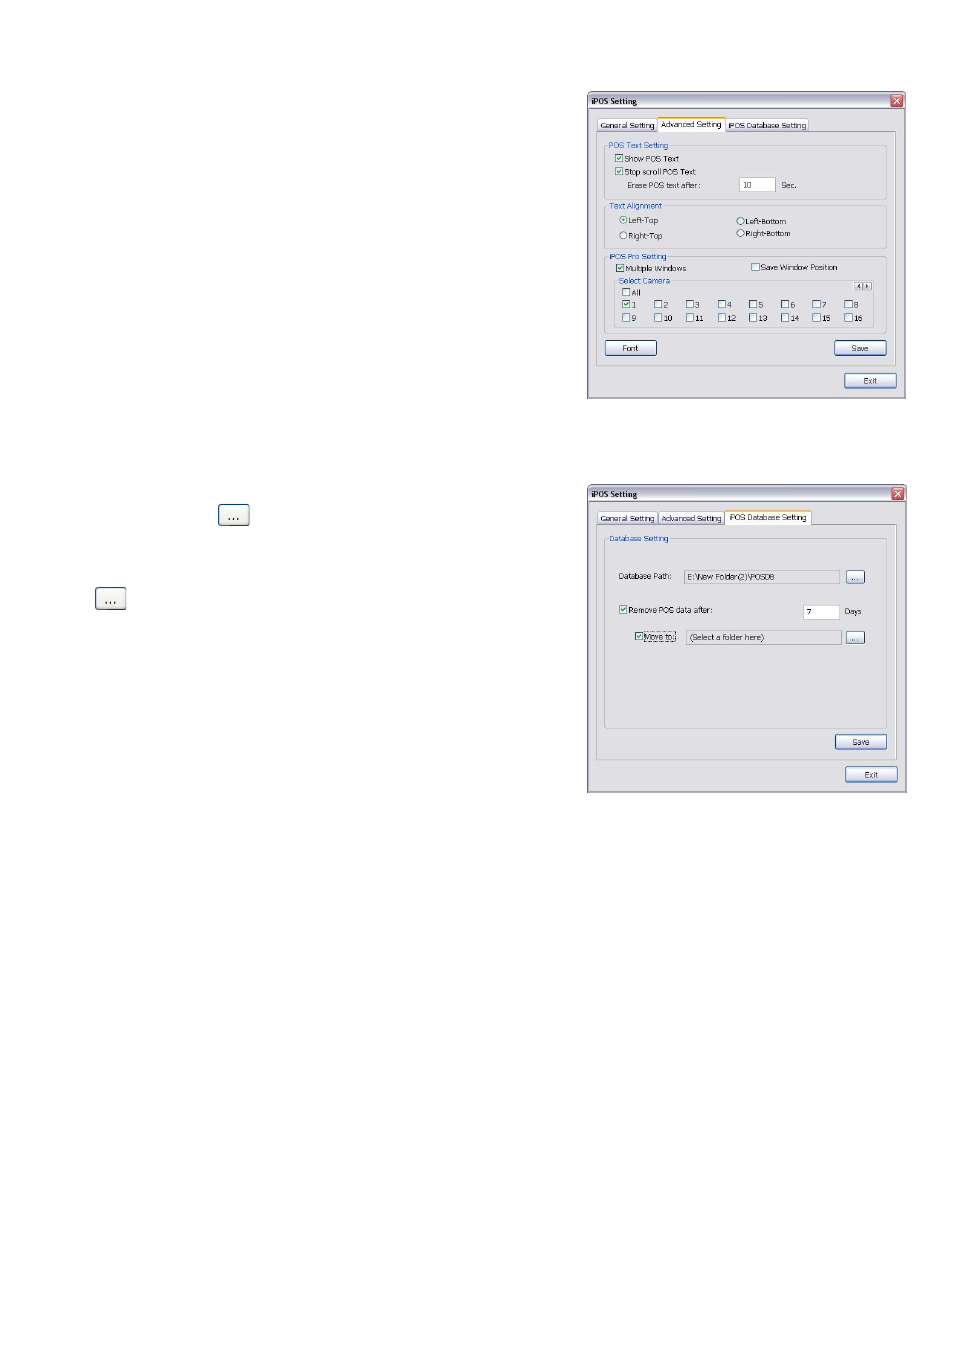
Advanced Setting
To setup POS text display position, text font and color.
1. In the System Setting dialog box, POS section, click Setting >>
Advanced Setting
2. Mark Show POS Text to allow POS data to be display on
surveillance screen.
3. If user doesn’t want POS data to be scroll up, mark Stop scroll
POS Text
and enter the time to delete POS text at Erase POS
text after
column.
4. Select the POS data display position on surveillance screen –
Left-Top, Left-Bottom, Right-Top, or Right-Bottom.
5. To change the POS data font and color, click Font.
6. Enable Multiple windows for viewing multi-channels of real
time iPOS data. To save the real time of iPOS data window
position on the UI, mark the Save window Position. To select
all channels, mark All check box. Or mark each channel one by
one.
7.
When it is done, click Save to complete the configuration.
POS Database Setting
User can export the POS database to another save location or
storage device. Click
to change the save path. Mark Remove
POS data after the POS data will be delete from DVR hard disk on
the day that user has setup. Also, mark Move to: user can save the
POS data to another folder on DVR when the POS data is removing.
Click
to set a storage path. Click Save to complete the
configuration.