Dell OptiPlex GX280 User Manual
Page 294
2. Check the documentation for the drive to verify that it is configured for your computer.
3. If your replacement hard drive does not have the bracket rails attached, remove the rails from the old drive by
removing the two screws that secure each rail to the drive. Attach the bracket rails to the new drive by aligning the
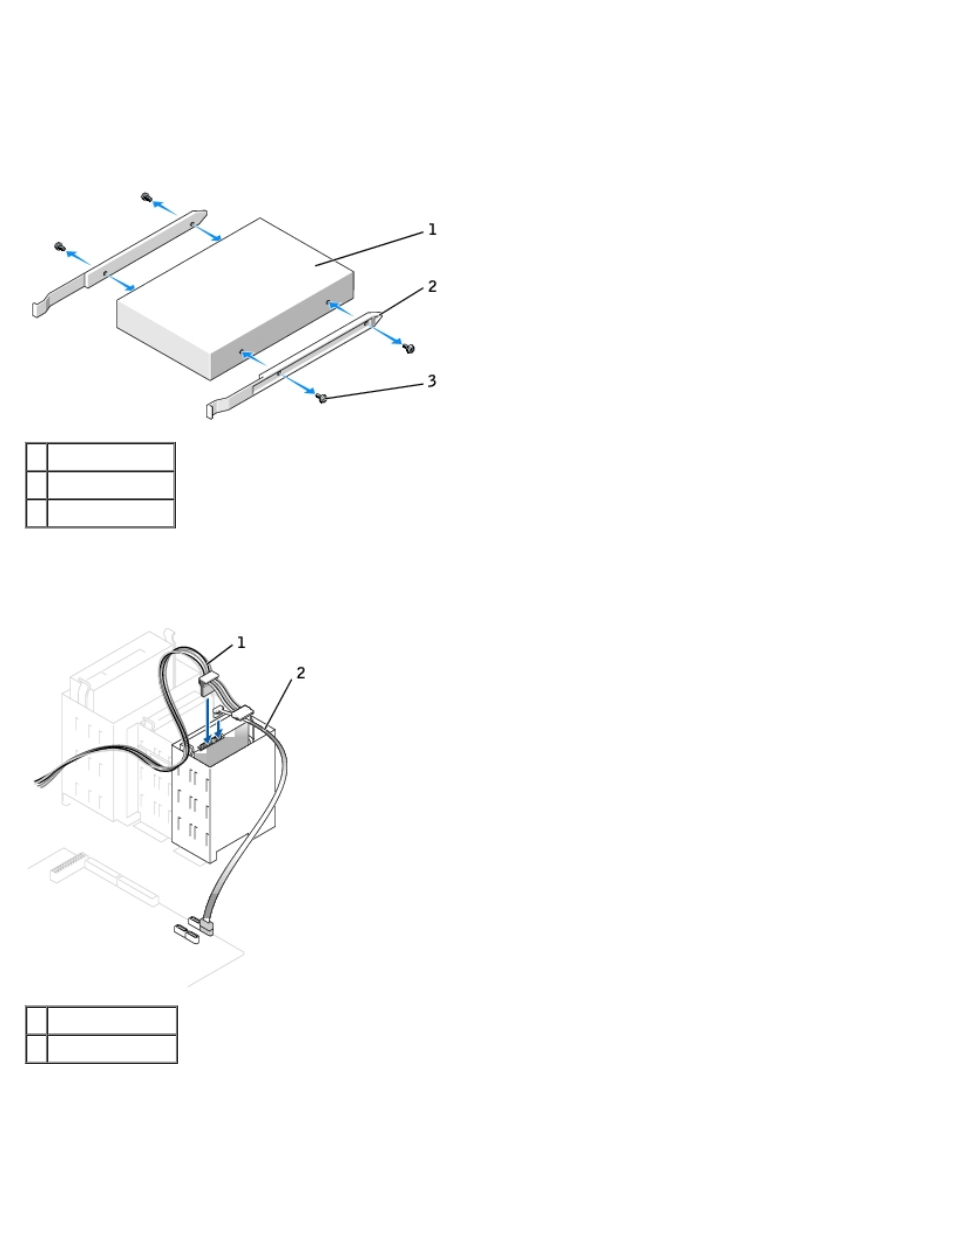
screw holes on the drive with the screw holes on the bracket rails and then inserting and tightening all four screws (two
screws on each rail).
1 drive
2 bracket rails (2)
3 screws (4)
4. Gently slide the drive into place until you hear a click or feel the drive securely installed.
5. Connect the power and hard-drive cables to the drive.
1 power cable
2 hard-drive cable
6. Check all connectors to be certain that they are properly cabled and firmly seated.
7. Close the computer cover.
- Inspiron 530 (2 pages)
- OptiPlex 755 (82 pages)
- OptiPlex 755 (45 pages)
- OptiPlex 755 (248 pages)
- OptiPlex 755 (622 pages)
- OptiPlex 755 (528 pages)
- OptiPlex 760 (76 pages)
- OptiPlex 760 (203 pages)
- OptiPlex 745 (212 pages)
- OptiPlex 745 (360 pages)
- OptiPlex 745 (428 pages)
- OptiPlex 780 (14 pages)
- OptiPlex 780 (89 pages)
- OptiPlex 780 (10 pages)
- OptiPlex 780 (74 pages)
- OptiPlex 780 (80 pages)
- OptiPlex 780 (73 pages)
- OptiPlex 780 (40 pages)
- OptiPlex GX620 (338 pages)
- OptiPlex GX620 (221 pages)
- OptiPlex GX620 (294 pages)
- Inspiron 530 (226 pages)
- OptiPlex 960 (Late 2008) (16 pages)
- OptiPlex GX260 (100 pages)
- OptiPlex GX260 (235 pages)
- OptiPlex FX160 (Late 2008) (132 pages)
- OptiPlex FX160 (20 pages)
- OptiPlex FX160 (Late 2008) (20 pages)
- OptiPlex 210L (258 pages)
- OptiPlex 210L (150 pages)
- OptiPlex 210L (130 pages)
- OptiPlex 210L (128 pages)
- OptiPlex 210L (300 pages)
- OptiPlex 320 (140 pages)
- OptiPlex 320 (132 pages)
- OptiPlex 320 (312 pages)
- OptiPlex 320 (266 pages)
- OptiPlex 320 (356 pages)
- OptiPlex 320 (44 pages)
- OptiPlex GX240 (86 pages)
- OptiPlex GX240 (283 pages)
- OptiPlex GX240 (298 pages)
- OptiPlex GX240 (182 pages)
- OptiPlex GX240 (144 pages)
- OptiPlex GX240 (121 pages)