Installing a serial port adapter – Dell OptiPlex GX280 User Manual
Page 271
Installing a Serial Port Adapter
1. Follow the procedures in "
2. Gently push the release tab on the retention lever.
3. Remove the filler bracket (if applicable).
NOTE:
See the documentation that came with the adapter for information on configuring the adapter, making internal
connections, or customizing it for your computer.
4. Place the serial port adapter bracket in the connector and press down firmly. Ensure that the adapter is fully seated in
the slot.
5. Gently press the card retention lever to secure the adapter bracket.
NOTICE:
Do not route card cables over or behind the cards. Cables routed over the cards can prevent the computer
cover from closing properly or cause damage to the equipment.
6. Connect the adapter cable to the serial port adapter connector (SER_PS2) on the system board.
7. Connect any cables that should be attached to the serial port adapter.
NOTE:
See the documentation for the serial port adapter for information about the cable connections.
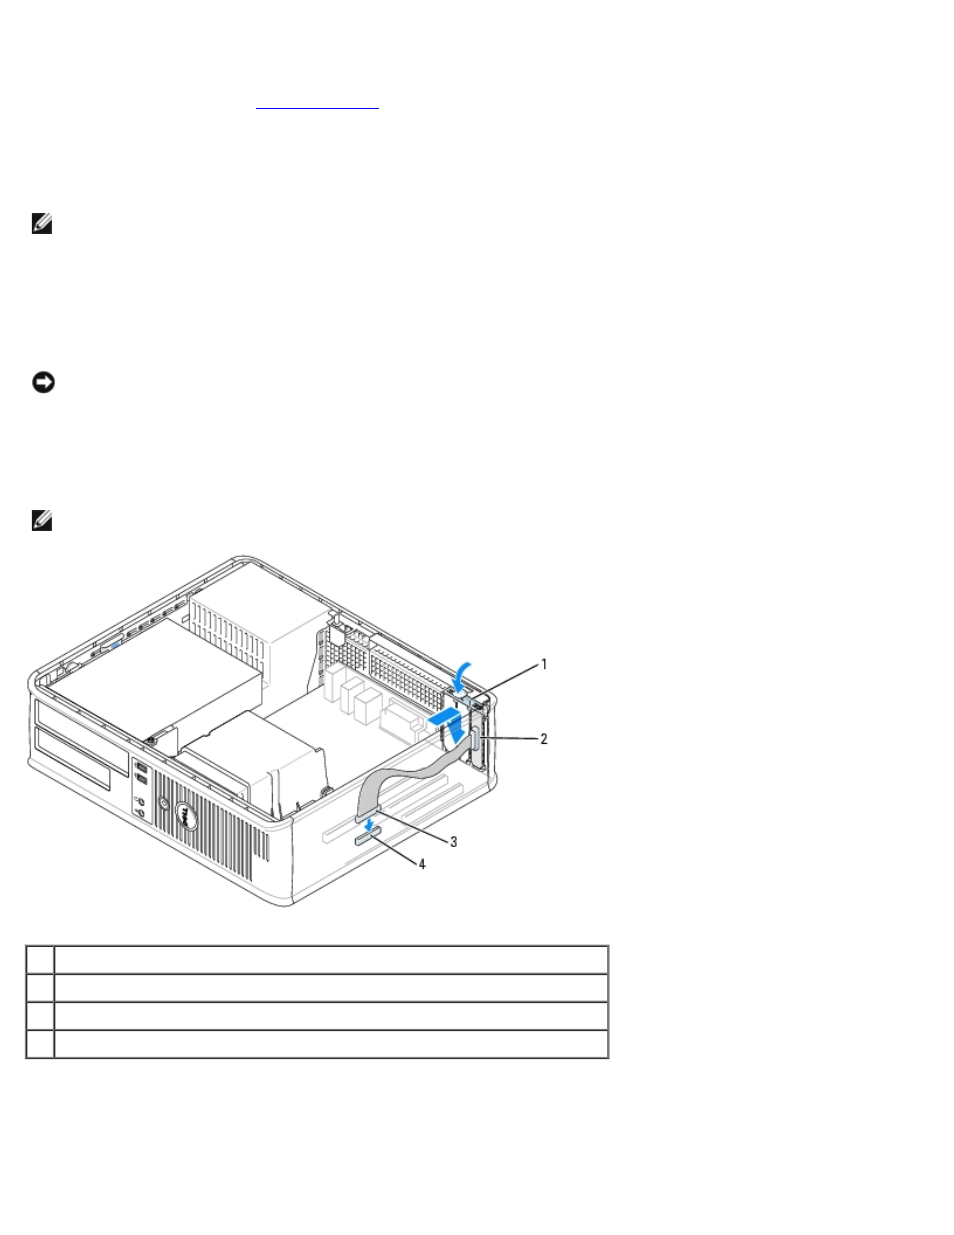
1
retention lever
2
serial port adapter bracket
3
serial port adapter connector
4
serial port adapter system board connector (SER_PS2)
8. Close the computer cover, reconnect the computer and devices to electrical outlets, and turn them on.
After you open and close the cover, the chassis intrusion detector, if installed and enabled, causes the following
message to appear on the screen at the next computer start-up:
ALERT! Cover was previously removed.