Quick start – Banner PresencePLUS BCR 1.3 Series User Manual
Page 65
• Any double quote encountered in the Barcode or String Tool will be converted to its ASCII Hex
equivalent, “\x22”.
For RCC input strings, the formatting rules are expanded to accommodate readability as follows:
• Carriage return can be specified as character sequence "\r" (backslash-r).
• Line feed can be specified as character sequence "\n" (backslash-n).
• Double quote can be specified as character sequence "\"" (backslash-doublequote).
• Backslah can be specified as character sequence "\\" (backslash-backslash).
• tab can be specified as character sequence "\t" (backslash-t).
• Embedded NULLL characters are not allowed.
6.2.3 PresencePLUS/Kawasaki Vision Guidance and Inspection
Integrating Banner Vision Sensors with Kawasaki Robot Controllers
Quick Start
This document describes how to integrate a Banner PresencePLUS sensor with Kawasaki Robot Controllers,
and:
• includes instructions for establishing communications between the PresencePLUS sensor and a
Kawasaki Robot Controller
• describes how to set up a sample PresencePLUS vision inspection
• provides a sample Kawasaki AS Language program
Below is a quick overview of the procedure for integrating PresencePLUS sensors with Kawasaki Robot
Controllers and, where noted, more details are provided in the document subsections.
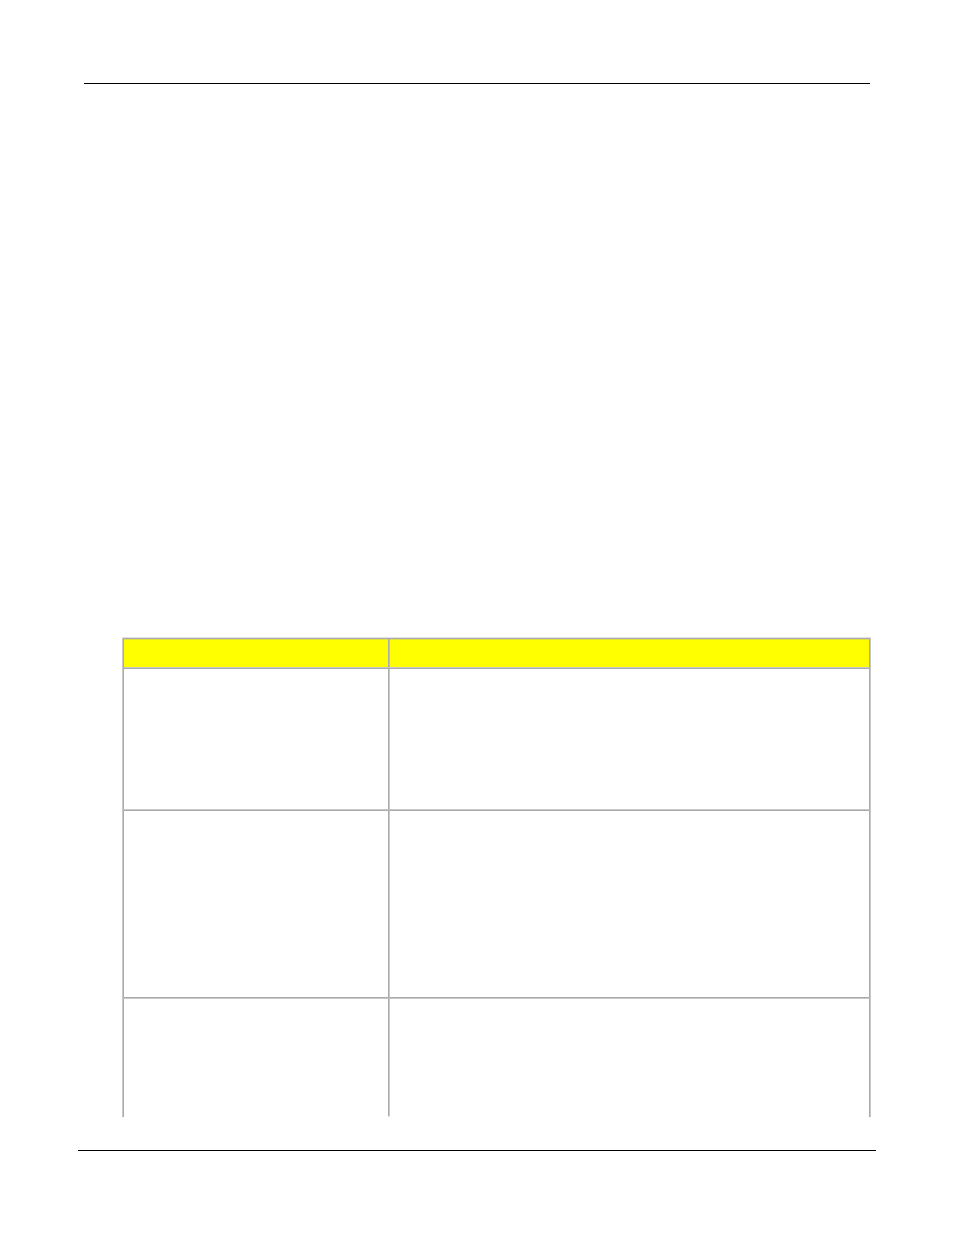
Tasks to Complete
Main Steps
Establish communication between
the PresencePLUS sensor and the 1. Install and physically connect a Banner PresencePLUS Vision
Sensor to a Kawasaki controller.
Kawasaki Robot Controller. See
2. Configure PresencePLUS and Kawasaki controller IP
addresses.
Establishing Sensor/Robot
Communication 6.2.3.3
3. Configure the PresencePLUS Remote Command Channel.
Establishing Sensor/Robot
Communication
on page 67
Create and save a PresencePLUS
Inspection. See
1. Create a new inspection and configure Vision tools to produce
the desired part location data that outputs it to the RCC
interface. The sample inspection described in this document:
PresencePLUS Inspection 6.2.3.4
Creating the PresencePLUS
Inspection
on page 69 for more
details.
• Locates a part
• Tests for presence of the part
• Outputs X, Y, and Rotation about the Z-axis offsets
2. Save and then start the inspection.
Program the Kawasaki controller
to connect and issue commands
1. Load the sample AS Language program onto robot controller.
The sample program implements the following actions:
to the PresencePLUS sensor . A
sample AS program
is provided to
get you started.
• Connects to the RCC.
• Triggers vision sensor and wait for inspection to complete.
65
Banner Engineering Corp. - Minneapolis, MN USA - www.bannerengineering.com
Tel: 763.544.3164
P/N 000000
System Setup Window Overview
7/2009