El menú initial setup (configuración inicial) 12, Channel swapping (permutación de canal) – Pioneer DVR-3100-S User Manual
Page 82
El menú Initial Setup (Configuración inicial)
12
82
Sp
•
Channel
(Canal)
– Cambie el número de canal
asignado a la preselección actual.
•
AFT
(Auto Fine Tune (Sintonización automática
ajustada)) – Cuando está en
On (Activo)
, la emisora
se sintoniza automáticamente; ajústelo en
Off
(Desactivado)
para sintonizarlo manualmente (tal
como se indica más adelante).
•
Level
(Nivel)
– Ajuste el nivel AFT (como se expone
en el párrafo anterior).
•
Sound System (Sistema de sonido)
– Ajuste el
sistema de sonido utilizado en el canal actual.
•
Name
(Nombre)
– Desplace el cursor a la derecha y
luego introduzca un nombre para la estación actual
(de hasta cinco caracteres) y luego pulse
ENTER
.
•
Decoder (Descodificador)
– Si el canal actual está
codificado y se requiere un descodificador
conectado al conector
AV2/INPUT 1/DECODER
,
ajuste esta opción en
On (Activo)
. (Consulte
también
AV2/L1 In (Entrada AV2/L1)
en la página 84.)
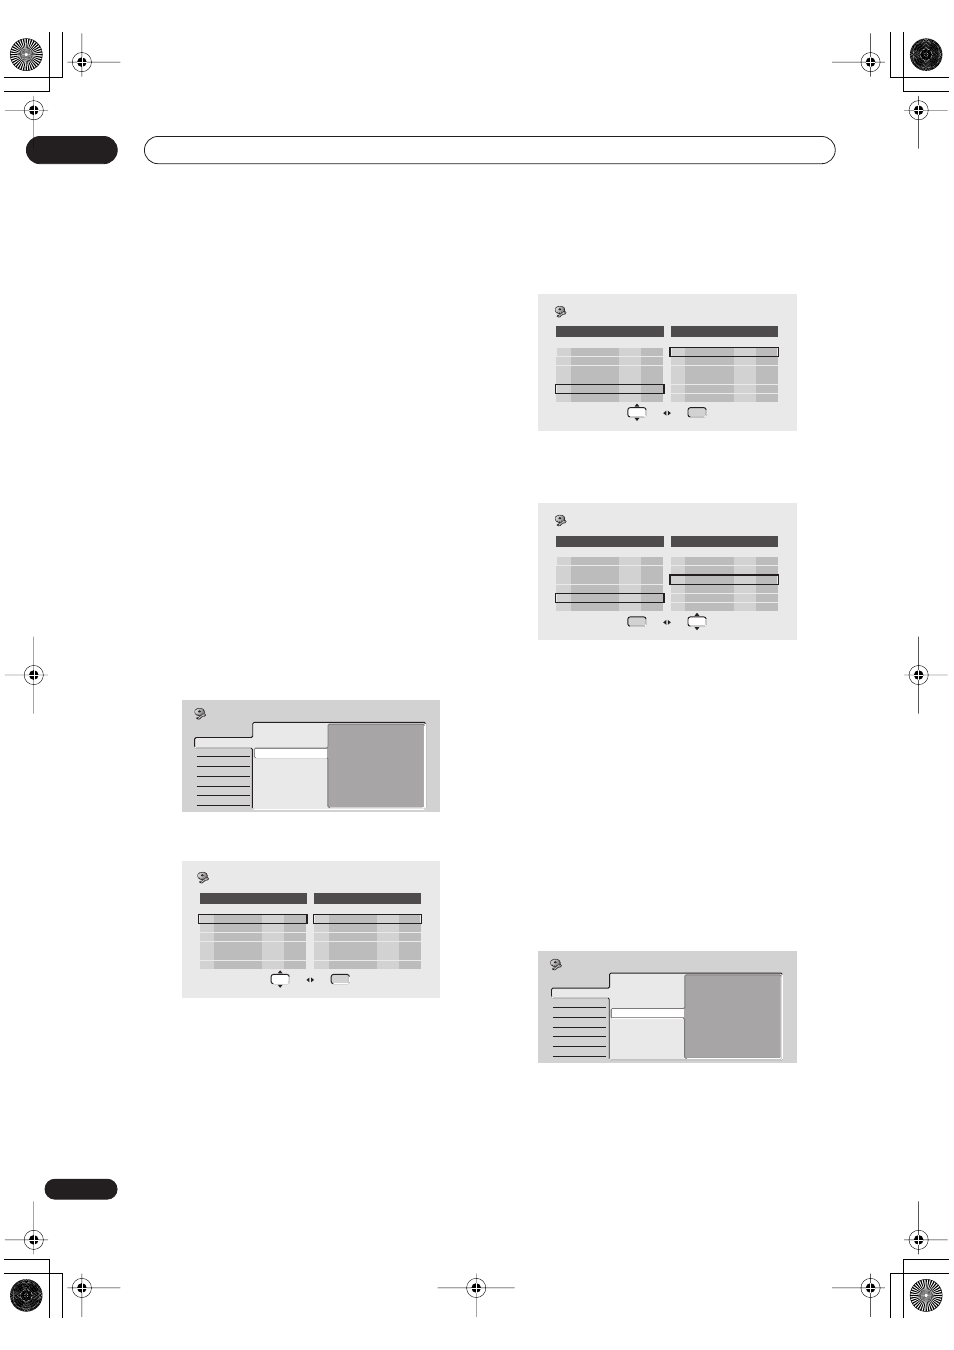
Channel Swapping (Permutación de canal)
La característica de permutación preseleccionada le
permite cambiar las asignaciones de canal de distintos
programas. De este modo puede agrupar preselecciones
de estación que suelen ir juntas.
1
Seleccione ‘Channel Swapping’ (Permutación de
canal).
2
Seleccione ‘Next Screen’ (Pantalla siguiente) para
acceder a la pantalla de preselecciones permutadas.
3
Utilice los botones
/
(cursor arriba/abajo)
para seleccionar la emisora preseleccionada que
desea permutar.
Utilice los botones
PREV/NEXT
(ANTERIOR/SIGUIENTE)
para ver en pantalla la página anterior/siguiente.
4
Pulse
(cursor derecha), luego seleccione una
estación preseleccionada que desee permutar con la
primera preselección.
5
Pulse ENTER para permutar las preselecciones.
6
Si desea permutar más preselecciones, pulse
(cursor izquierda) y luego repita los pasos del 3 al 5.
7
Pulse HOME MENU (MENÚ INICIAL) para
terminar y salir.
ShowView Ch Setting (Configuración de
canal ShowView)
• Configuración por defecto:
n/a (no procede)
Guide channels are used by the ShowView system so that
the channel number specified in the ShowView
programming numbers can be guaranteed to
correspond to the correct station.
1
Seleccione ‘ShowView CH Setting’ (Ajuste de
canales ShowView) y a continuación ‘Next Screen’
(Pantalla siguiente).
Basic
Tuner
Video In/Out
Audio In
Audio Out
Language
Recording
Playback
Auto Channel Setting
Manual CH Setting
Channel Swapping
ShowView CH Setting
Next Screen
Initial Setup
1
1
Pr System CH
Name
1 B/G CC40
2
B/G
2
3
B/G
3
4
B/G
4
5
B/G
5
6
B/G
6
Pr System CH
Name
1 B/G CC40
2
B/G
2
3
B/G
3
4
B/G
4
5
B/G
5
6
B/G
6
[1] 1/17
[2] 1/17
Swap Preset
Initial Setup
5
1
Pr System CH
Name
1 B/G CC40
2
B/G
2
3
B/G
3
4
B/G
4
5
B/G
5
6
B/G
6
Pr System CH
Name
1 B/G CC40
2
B/G
2
3
B/G
3
4
B/G
4
5
B/G
5
6
B/G
6
[1] 1/17
[2] 1/17
Swap Preset
Initial Setup
5
3
Pr System CH
Name
1 B/G CC40
2
B/G
2
3
B/G
3
4
B/G
4
5
B/G
5
6
B/G
6
Pr System CH
Name
1 B/G CC40
2
B/G
2
3
B/G
3
4
B/G
4
5
B/G
5
6
B/G
6
[1] 1/17
[2] 1/17
Swap Preset
Initial Setup
Basic
Tuner
Video In/Out
Audio In
Audio Out
Language
Recording
Playback
Auto Channel Setting
Manual CH Setting
Channel Swapping
ShowView CH Setting
Next Screen
Initial Setup
DVR-3100_Sp.book 82 ページ 2003年7月31日 木曜日 午後9時7分