5 digital input / hsc configuration – Horner APG XL7 OCS User Manual
Page 85
XL7 User Manual
15.4 Configuration
An overview of configuration:
1. Start the configuration by selecting the Controller | I/O Configure menu item.
2. If the XL7 OCS is connected to the PC press the Auto Config System button to automatically
detect the Base model, I/O and any communication options.
3. If the XL7 OCS is not connected press the Config button to the right of the top of the unit. This
allows the base CPU to be selected.
4. Select either XL7 OCS Cscan from the type drop down box.
5. Once the type of XL7 OCS is selected, the model # drop down box will provide the XL7 OCS
model numbers from which to choose from.
6. Once the XL7 OCS CPU is selected, press OK to exit the dialog and configure the I/O that is
present in the first slot.
7. The I/O configure dialog (Specifically the Module Setup tab) provides 4 buttons to configure all
of the I/O. Go through each area of I/O and configure it.
8. Once done configuring the I/O OK out of configuration dialogs.
Configuring the XL7 OCS I/O has four main portions that are covered in this chapter. For additional
information on I/O, refer the chapters covering General I/O or High Speed I/O in this manual.
The four areas of I/O configuration are:
-
Digital in / HSC
-
Digital out / PWM
-
Analog in
-
Analog out
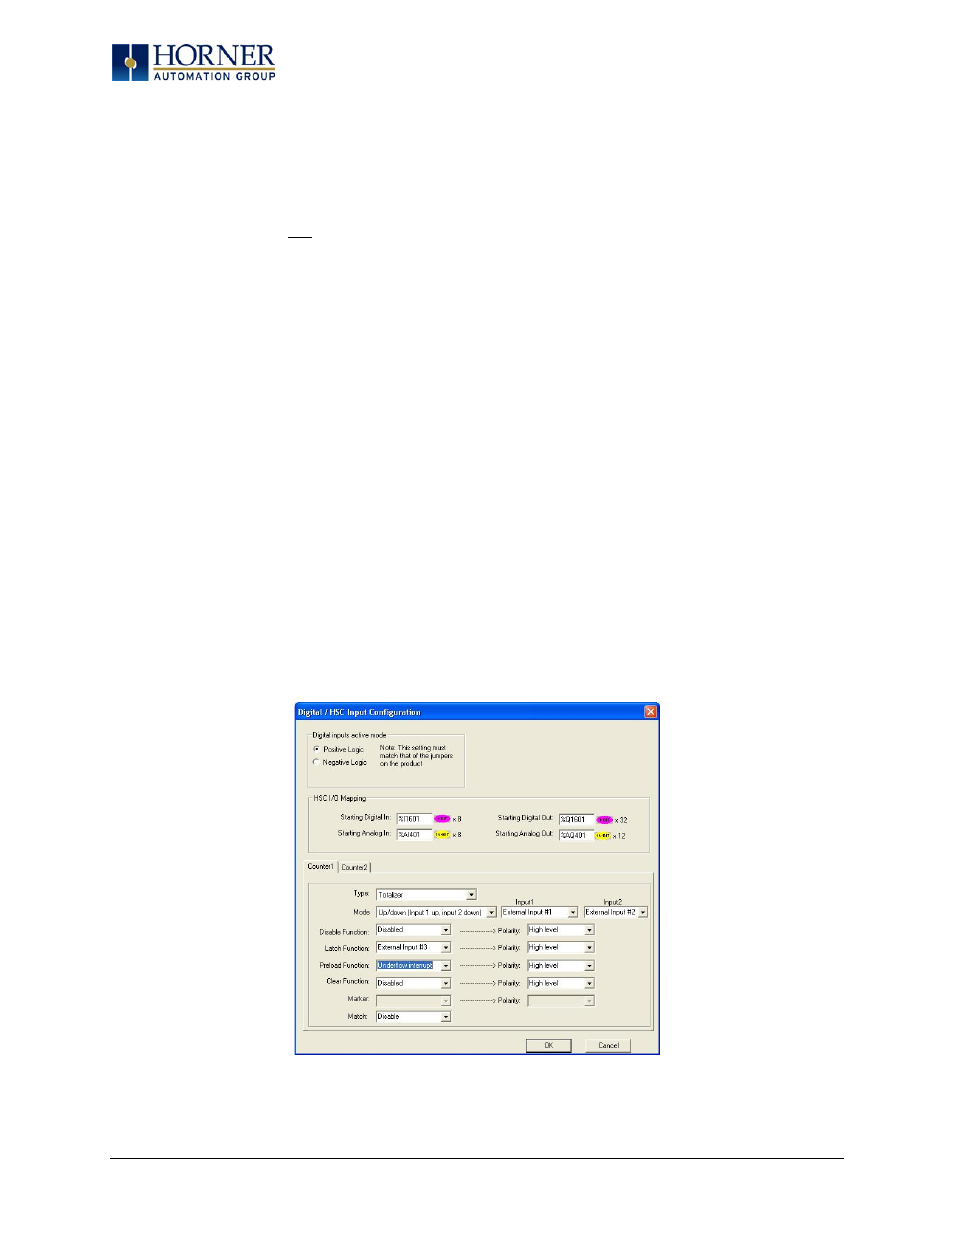
15.5 Digital Input / HSC Configuration
The following figure illustrates the Digital Input / HSC Configuration dialog.
Figure 15.3 – Digital Input / HSC Configuration Dialog
Page 85 of 110