Opening and closing the adjustment mode, Figure 74, Adjustment and purge buttons – Vaisala PTU300 User Manual
Page 164: Table 37, Adjustment and calibration commands
User's Guide _______________________________________________________________________
162 __________________________________________________________________ M210796EN-G
Table 37
Adjustment and Calibration Commands
Function
Command
Linear corrections on/off
LCI ON/OFF
Entering linear corrections
LCI
Multipoint corrections on/off
MPCI ON/OFF
Entering multipoint corrections
MPCI
Calibration date
CDATE
Opening and Closing the Adjustment Mode
1.
Open the transmitter cover. The buttons needed in adjustment are
on the left-hand side of the motherboard.
2.
If the chemical purge option is available, it should be carried out
always before RH calibration. To start chemical purge press
simultaneously two PURGE push buttons (on the motherboard) for
a few seconds. Red indicator LED flashes with short pulses until
purge is complete (up to 6 minutes).
3.
Press the ADJ button to open the adjustment mode.
4.
Press the ADJ button again to close the adjustment mode.
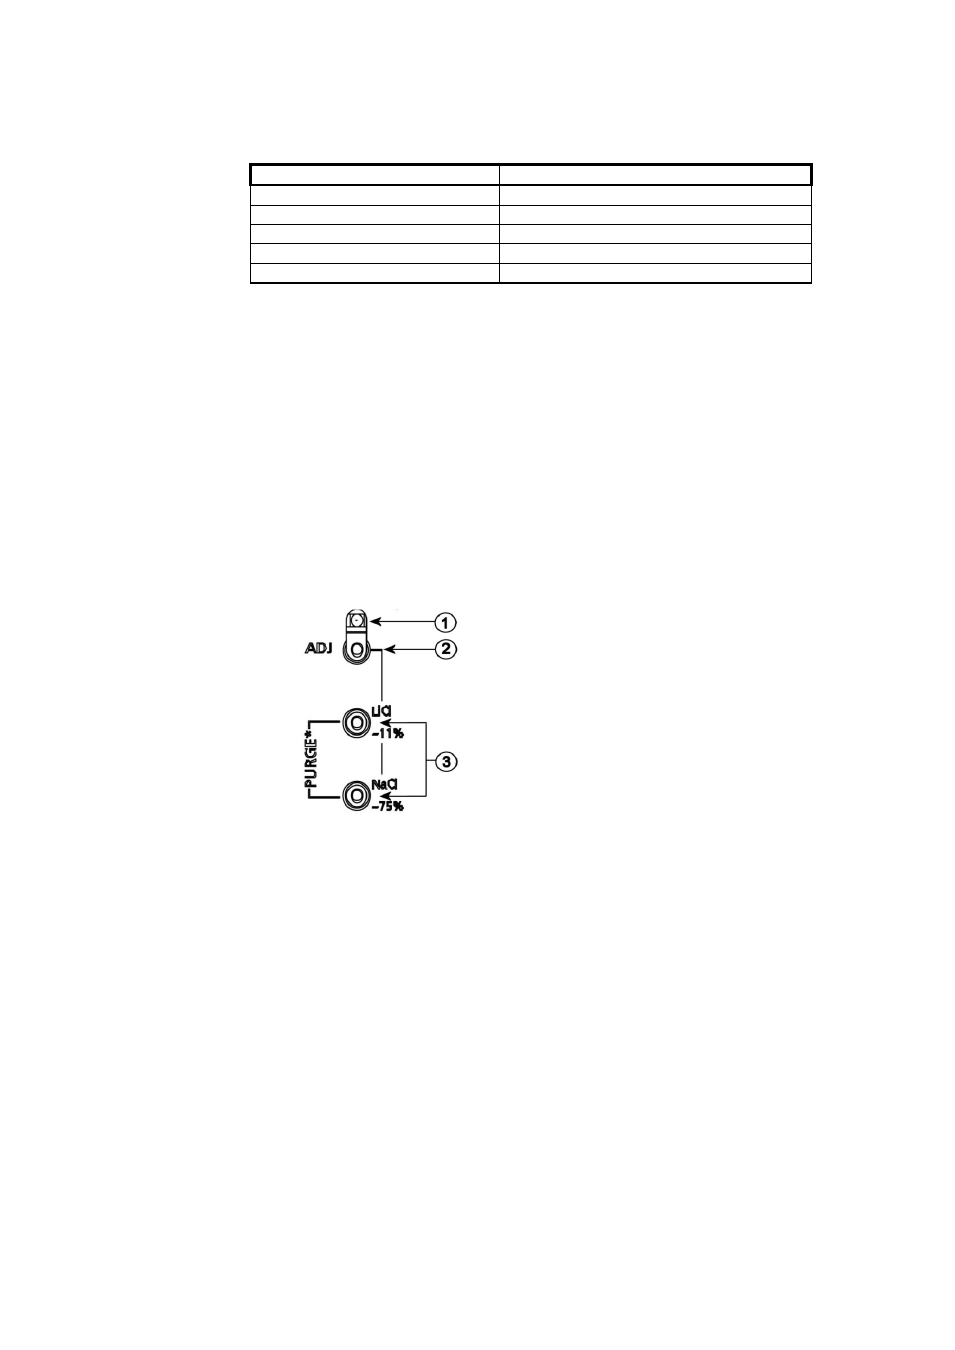
0508-013
Figure 74
Adjustment and Purge Buttons
The following numbers refer to Figure 74 above:
1
=
Indicator LED
2
=
Adjustment button
3
=
Press the purge buttons simultaneously to start chemical purge
(if available)
Adjustment menu is displayed only when ADJ button (on the
motherboard inside the transmitter) is pressed.