2 partition mounting bracket – PATLITE NHL User Manual
Page 80
6
80
[Installation Method]
1. After deciding on the attachment direction of the wall mount bracket, assemble this product to the bracket.
(Use the same installation screw enclosed for assembling the Support Base).
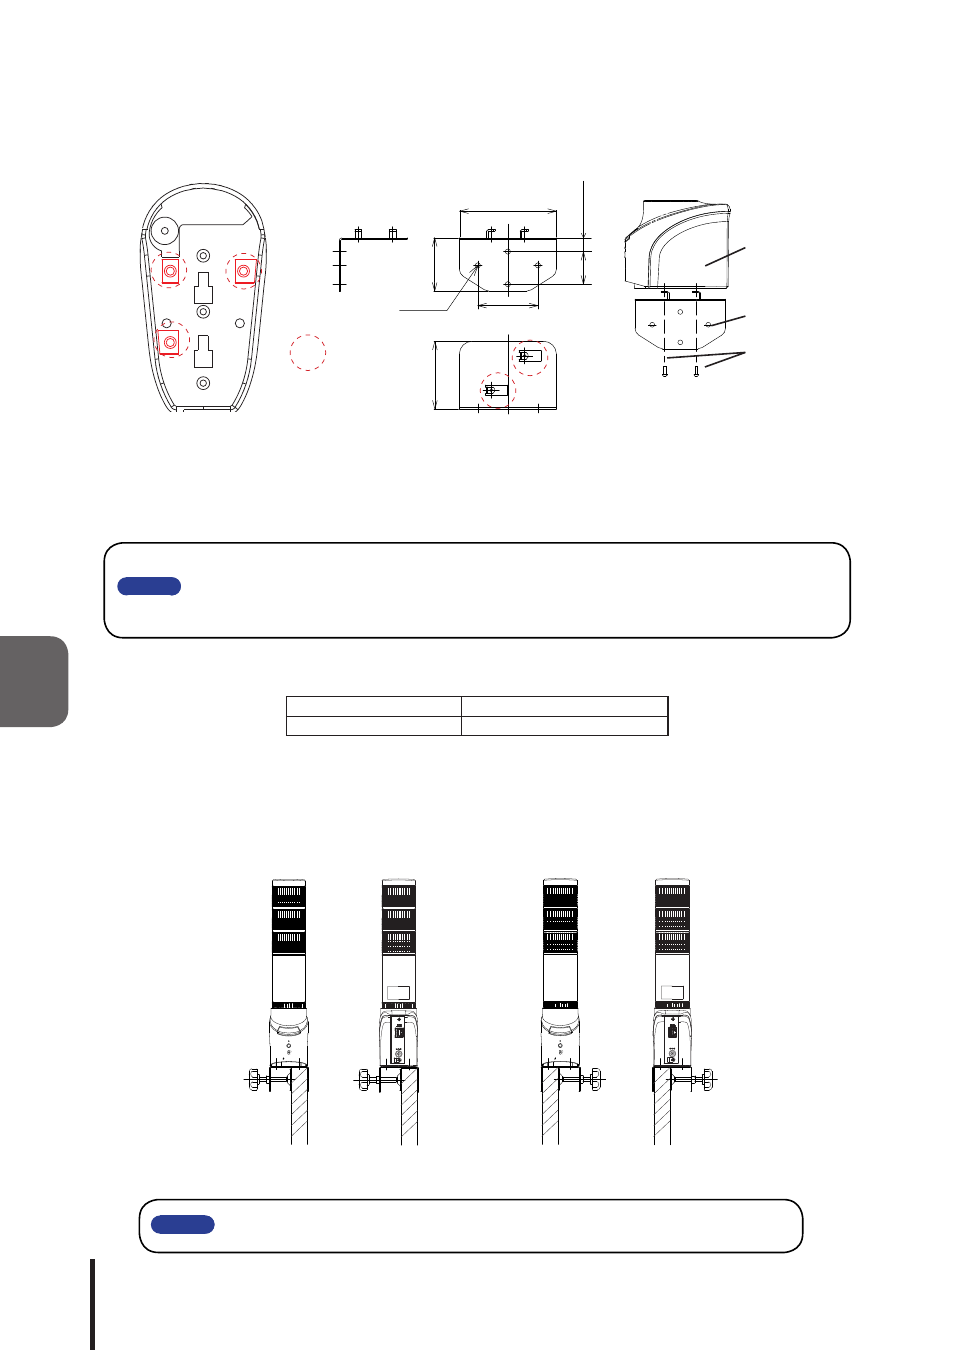
Fig. 6.3.2 Wall Mount Bracket Installation Diagram
2. Fix the wall mount bracket to the wall surface. Please select the proper screw when installing the wall
mount bracket to the customer's wall in accordance to the quality of the wall material to be mounted upon.
Option Name
Part Number
Wall Mounting Bracket
NH-WST
6.3.2 Partition Mounting Bracket
The partition mounting bracket is an optional item for attaching to partition walls in environments which cannot
be attached to walls or other positions. The partition mounting bracket is designed to be attached with the front
of this product facing to the right or left when fastening it to the partition.
Fig. 6.3.3 Partition mounting bracket installation example
(Left image is for the left-side and the right image is for the right-side installations)
VOL.
RESET
TEST
HIGH
LOW
OFF
L E
C
A R
VOL.
RESET
TEST
HIGH
LOW
OFF
L E
C
A R
RX/TX
LINK
24VDC
RX/TX
LINK
24VDC
The installation direction for this product is only for the front attachment direction.
Please
Please
Tighten the screws between this product and the bracket with a torque of about 0.39 N-m.
Failure to do so may cause damage to the unit.
Verify the installation is securely clamped to ensure there is no fear of detachment and falling
after installation. Apply the power after checking that it has been installed correctly.
Bracket
Mounting
Location
6
2
7
9
113
4-φ6
70
3
8
1
6
NHL Underside View
NH-WST Outside Appearance
Installation Procedure
NHL Unit
NH-WST
Mounting Screws