Printhead pressure adjustment, Media thickness adjustment – Printronix SL4M User Manual
Page 41
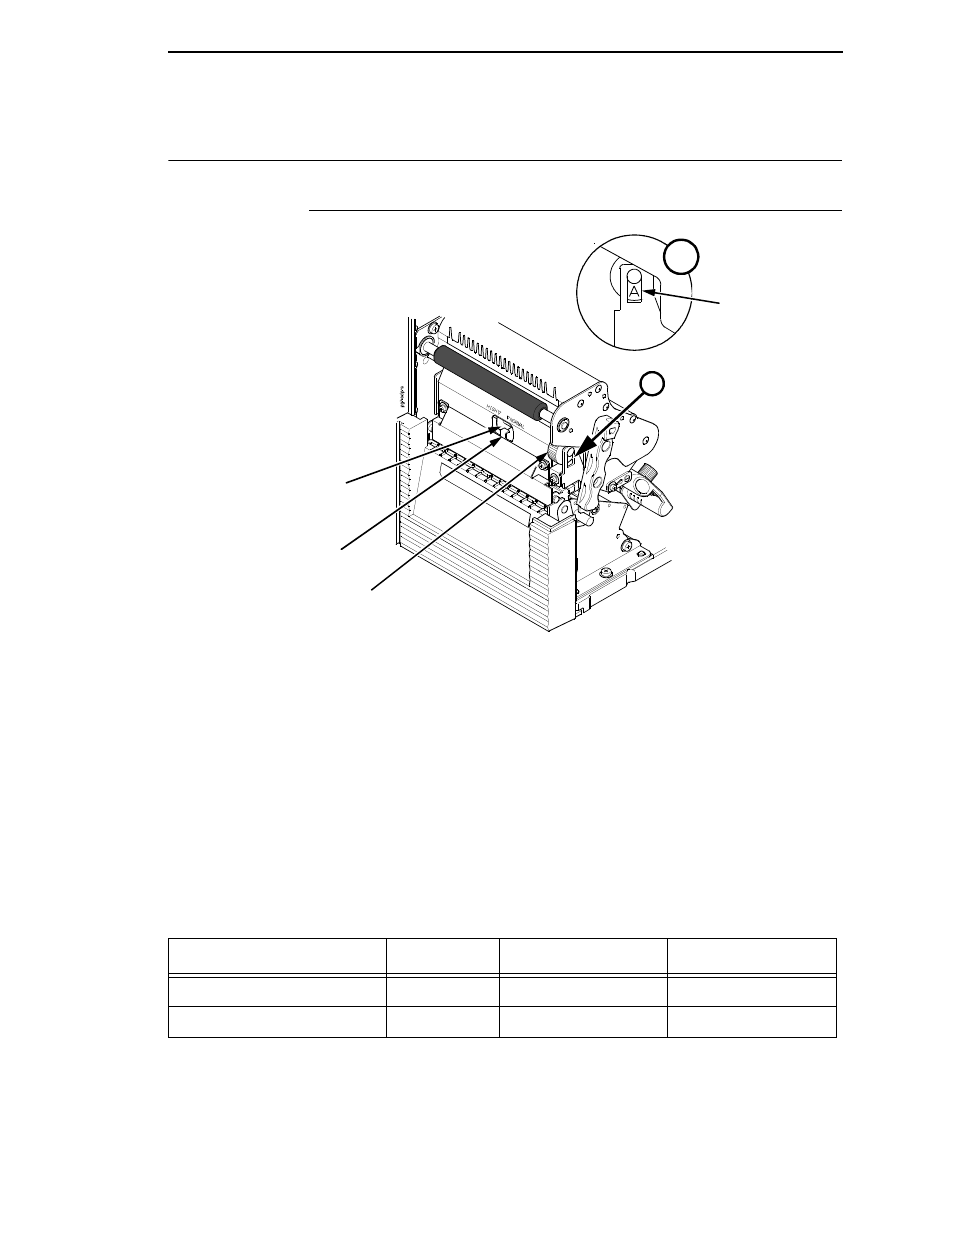
Media Thickness Adjustment
41
Printhead Pressure Adjustment
Media Thickness Adjustment
This procedure adjusts the printhead pressure to accommodate media of
different thicknesses. This will minimize printhead wear and optimize print
quality. The printhead pressure switch has two positions, high and normal.
Follow this procedure to adjust the media thickness:
1.
Rotate the printhead balance adjustment dial until “A” appears in the
indicator window (see Detail A above).
NOTE:
The dial must be set to “A”. If you have the dial set to a numerical
value, you cannot slide the printhead pressure switch.
2.
Slide the printhead pressure switch to NORMAL or HIGH depending on
the media thickness (see Table 2). Make sure to slide the blue printhead
pressure switch completely to either side of the metal tab.
3.
Adjust the media width by rotating the printhead balance adjustment dial
to the appropriate setting (see page 42). Do not leave the dial in the “A”
position.
Printhead Balance
Adjustment Dial
Printhead
Pressure
Switch (blue)
A
A
Metal Tab
Indicator
Window
Table 2. Media Thickness Adjustment
Media
Setting
Inches
Millimeters
Thin paper, normal label, etc.
NORMAL
0.003 to 0.008
0.076 to 0.200
Thick paper, tag stock, etc.
HIGH
0.008 to 0.010
0.200 to 0.254