Replacing the printhead – Printronix SL4M User Manual
Page 183
183
Replacing the Printhead
1.
Set the printer power switch to O (Off).
WARNING
Always unplug the printer power cord from the printer or power outlet
before doing any installation procedure. Failure to remove power could
result in injury to you and damage the equipment. When applicable, you
will be instructed to apply power.
2.
Unplug the printer power cord from the printer or the AC power source.
3.
Disconnect the data signal cable(s) from the printer interface(s).
4.
Remove the ribbon and media (e.g., paper, label, or tag stock material).
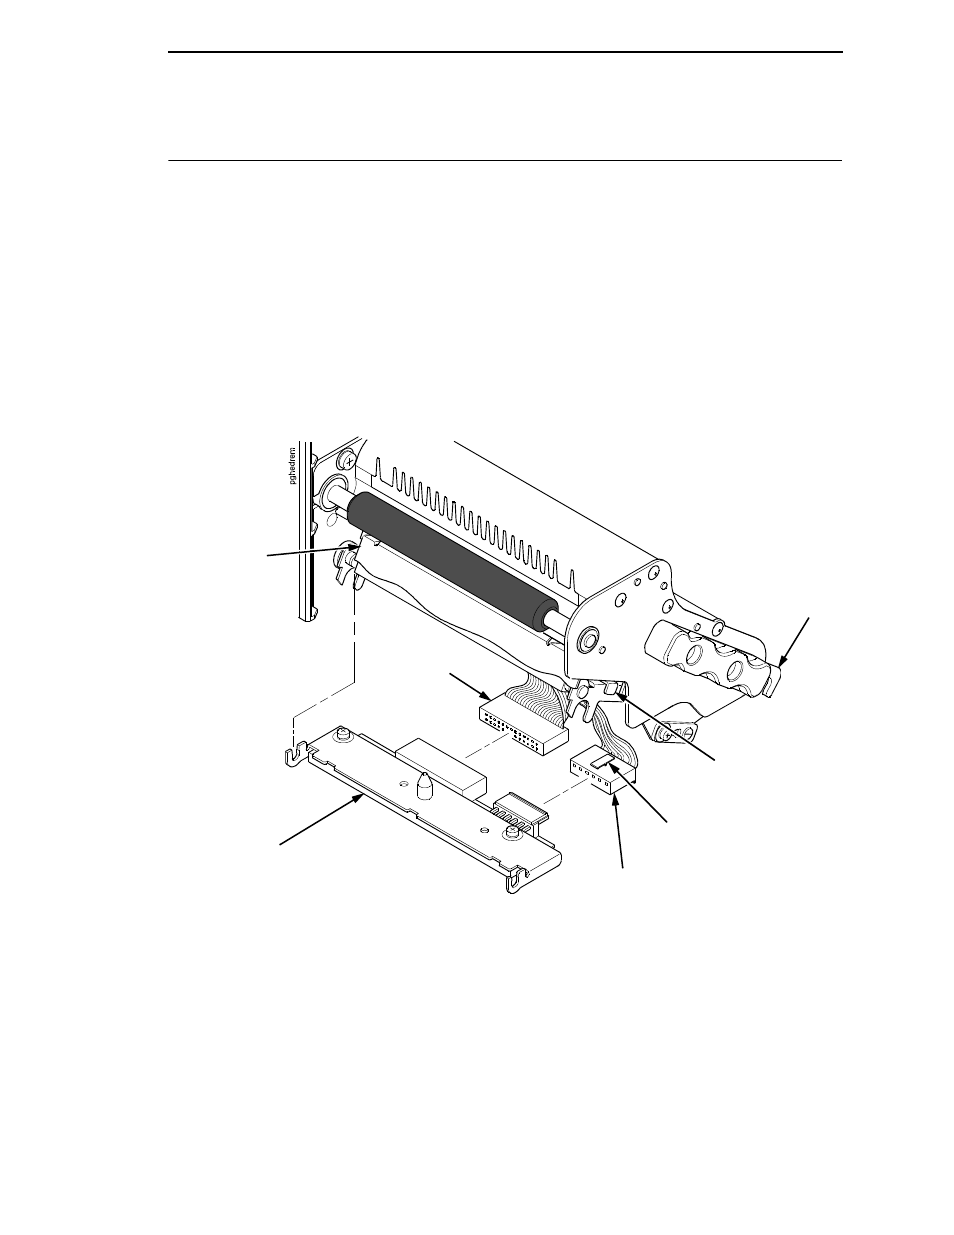
Figure 4. Replacing the Printhead Assembly
CAUTION
Oils from your hands can damage the light brown area (heating
elements) of the printhead. Do not touch the light brown area when you
handle the printhead assembly.
5.
Open the pivoting deck by rotating the deck lock lever fully
counterclockwise. The pivoting deck will swing upward, exposing the
bottom of the printhead assembly.
Pivoting Deck
Deck Lock
Lever
Printhead
Assembly
Printhead
Release Lever
Release Tab
Power Supply
Cable Assembly
Printhead
Controller Cable
Assembly