Using auto punch-in/out – Zoom MRS-802 User Manual
Page 36
Reference [Recorder]
ZOOM MRS-802
36
key to begin recorder playback.
5.
When you come to the punch-in point, press the
REC [
O
] key (or press the foot switch).
The REC [
O
] key lights up, and track recording begins from
that location.
6.
When you come to the intended punch-out point,
press the REC [
O
] key (or the foot switch) once
again.
The REC [
O
] key goes out, and the unit switches from
recording to playback.
7.
To stop playback, press the STOP [
P
] key.
8.
To check the newly recorded content, locate to a
point slightly before the punch-in point, and press
the PLAY [
R
] key.
Using auto punch-in/out
Auto punch-in/out is a function that lets you specify
beforehand the region to be re-recorded. Punch-in will occur
automatically when you reach the starting location (In
point), and punch-out will occur automatically when you
reach the ending location (Out point). This is convenient for
example when you cannot operate the MRS-802 because
you are playing the instrument yourself, or when very fast
playback/record switching is required.
In order to perform auto punch-in/out, you must first specify
the In point (switch point from playback to recording) and
Out point (switch point from recording to playback), and
then perform the recording operation. The procedure is as
follows.
1.
Raise the fader of the track where you want to
perform auto punch-in/out to a suitable position.
2.
While playing the instrument connected to the
input jack, use the [INPUT] control and [REC
LEVEL] control to adjust the recording level.
3.
Locate the point at which you want to punch-in,
and press the [AUTO PUNCH-IN/OUT] key.
The [AUTO PUNCH-IN/OUT] key flashes. This sets the “In
point” at which recording will begin.
4.
Locate the point at which you want to punch-out,
and press the [AUTO PUNCH-IN/OUT] button once
more.
This sets the “Out point” at which recording will end. The
[AUTO PUNCH-IN/OUT] button will change from flashing
to solidly lit. This indicates that the auto punch-in/out
function is now enabled.
H
INT
If you want to specify the in/out points precisely, it is
convenient to use the scrub function (
→
p. 44) to find the
locations and assign a mark (
→
p. 42) beforehand at the
desired locations.
5.
Use the Locate function to go to a spot slightly
before the In point.
6.
Repeatedly press the status key for the track on
which you want to perform punch-in/out, until the
key flashes red.
N
OTE
A status key that is lit red means that the current location is
between the In point and Out point. In this case, operate the
transport once again to locate to a point that is earlier than
the In point.
7.
If you want to rehearse the auto punch-in/out,
press the PLAY [
R
]key.
The recorder will begin playing. When you reach the In
point, the track on which you are punching-in/out will be
muted. When you reach the Out point, muting will be
defeated. (You will always be able to monitor the input
signal during this time.) Performing this action will not
delete or record anything on the track.
When you are finished rehearsing, move again to a location
earlier than the In point. If necessary, adjust the In/Out
points.
8.
To actually perform auto punch-in/out, hold down
the REC [
O
] key and press the PLAY [
R
] key.
The recorder operates in playback mode. When you reach
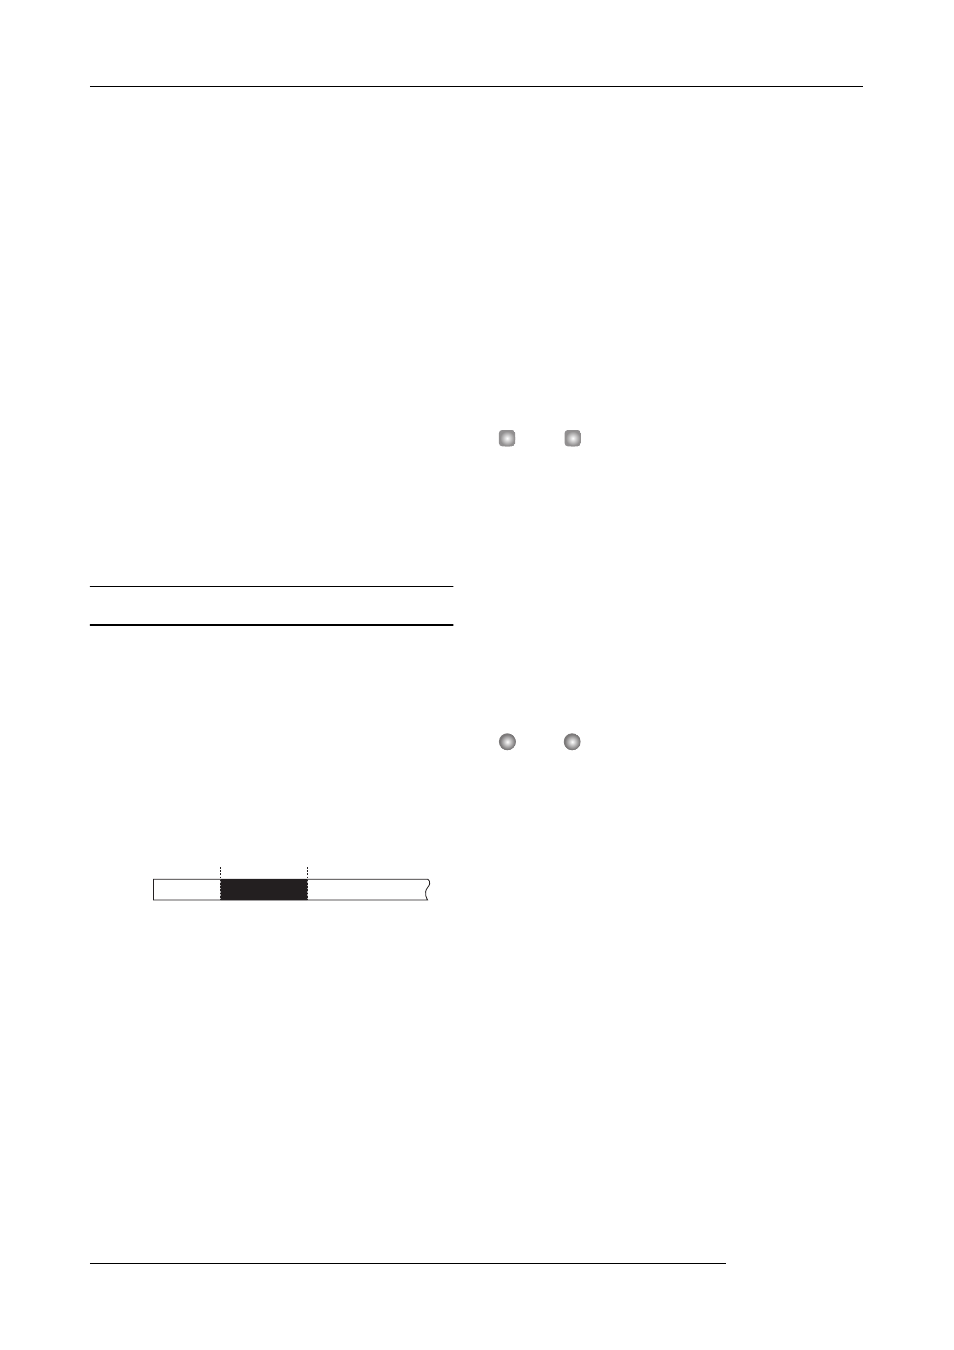
In point
Track Playback Playback
Recording
Out point