Hitachi J300U Series User Manual
Page 71
7-31
Contents and display
Extension
function
code
Input
terminal
a and b
contact
setting
1
➤
FUNC
➤
➤
FUNC
Press the key 10 times.
➤
➤
➤
1
2
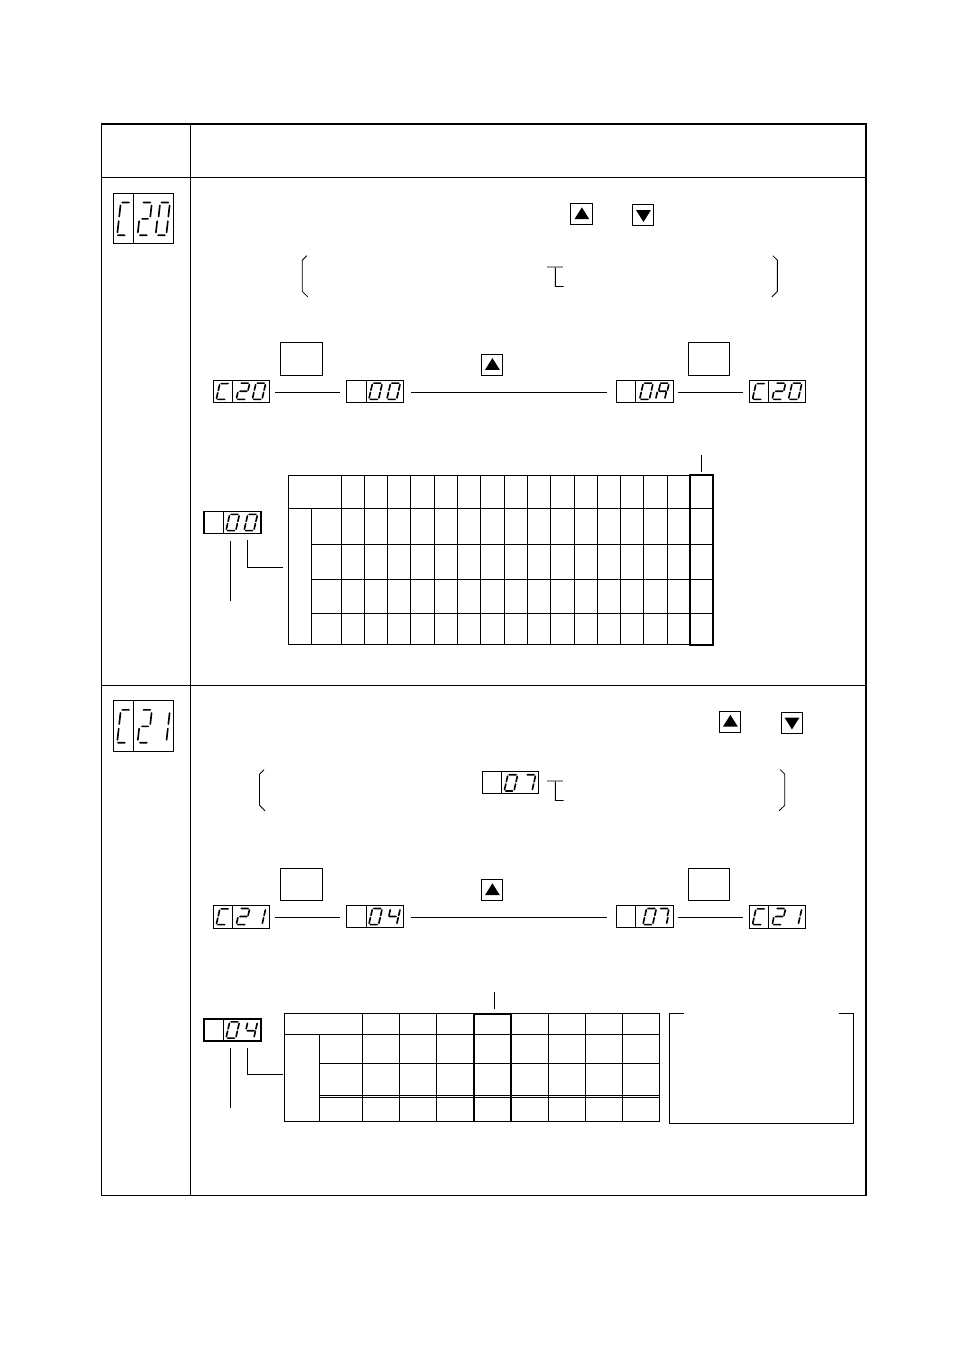
The input intelligent terminals 4 to 1 can be changed individually to the a contact or b contact
specification. Select the set value by pressing the keys and by combining the contacts
a and b with reference to the table indicated below.
Example: When the set value is A:
Contact a: Input terminals 3, 1
Contact b: Input terminals 4, 2
Setting method
Select the contact specification with
reference to the table indicated below.
Initial value
Set value
Initial setting
Set the high
order to 0.
Input terminal
F E
d C b A 9
8
7 6
5 4
3
2 1
0
b
b
b
b
b b
b
b
a a
a
a
a
a
a
a
b
b
b
b
a a
a
a
b b
b b
a
a
a
a
b
b
a
a
b b
a
a
b b
a
a
b
b a
a
b
a
b
a
b a
b
a
b a
b a
b
a b
a
4
3
2
1
7
6
5
4
3
2
1
0
b
a
b
a
b
a
b
a
b
b
a
a
b
b
a
a
b
b
b
b
a
a
a
a
11
12
Alarm
a: Contact a specification
(Shorted when power
is turned ON)
Contact b specification
(Opened when power
is turned ON)
b:
Input terminal a and b contacts function list
Output
terminal
a and b
contact
setting
1
➤
FUNC
➤
➤
FUNC
Press the key 3 times.
➤
➤
➤
1
2
The output ingent terminal 11 and 12 and alarm output terminal can be changed idividually to the
a contact or b contact specification. Select the set value by pressing the keys and by
combining the contacts a and b with reference to the table indicated below.
Example: When the set value is :
Alarm output: Contact b
Terminals 11 and 12: Contact b
Setting method
Initial value
Initial setting
Set the high
order to 0.
a: Contact a specification
(Shorted when power
is turned ON)
Contact b specification
(Opened when power
is turned ON)
b:
Set value
Output
terminal
Output terminal code list
(NOTE)
Output terminals 11 and 12
NOTE: For details of the Alarm terminal, see page 6-5.