Epson AcuLaser MX20DNF User Manual
Page 245
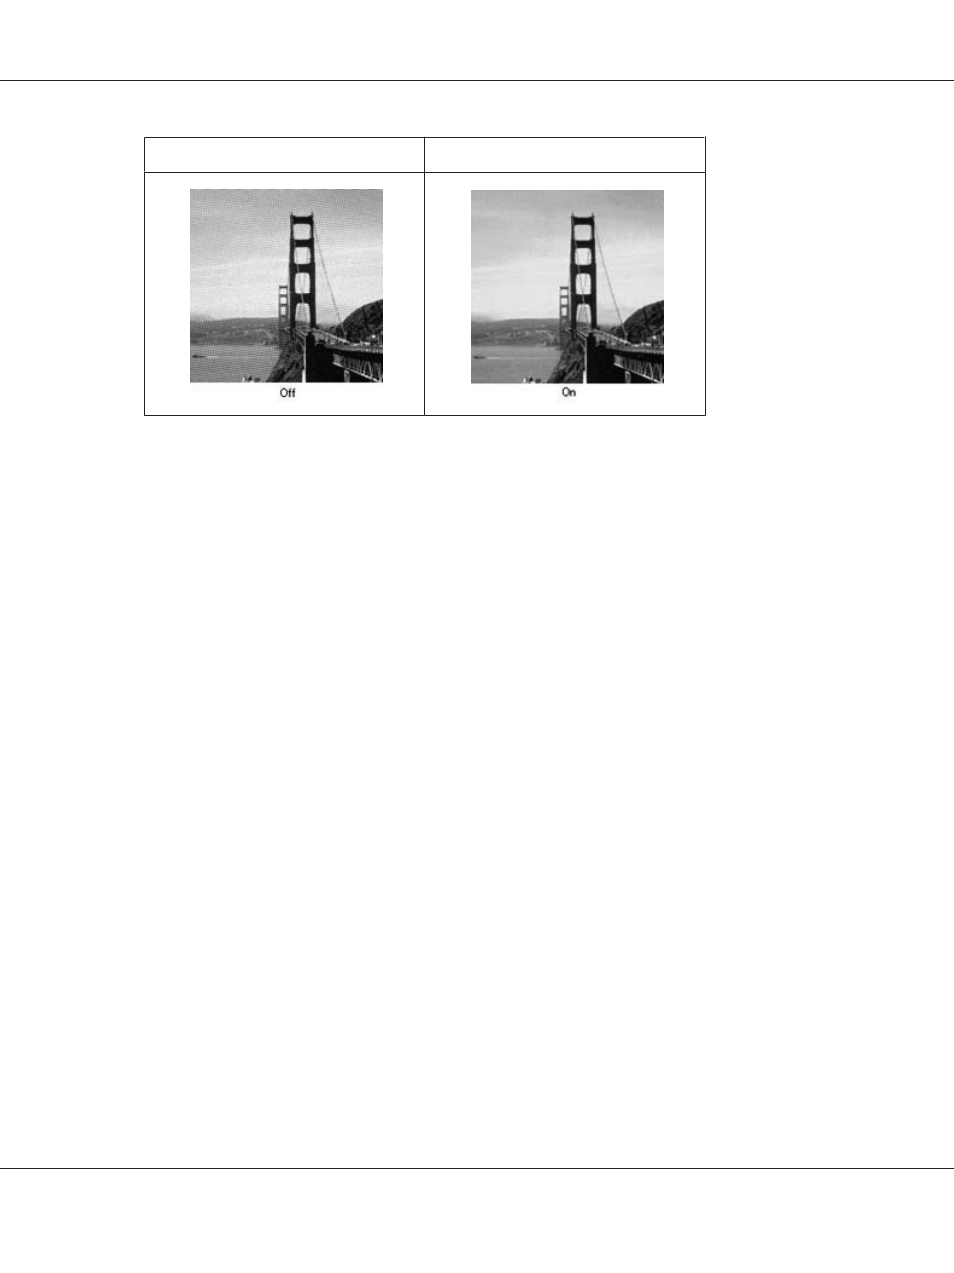
Original image
Descreening applied
❏ Select the Descreening check box. In Professional Mode, select an appropriate Screen Ruling
for the Descreening and deselect the Unsharp Mask setting. See “Adjusting the color and other
image settings” on page 87 for instructions.
❏ Select a lower resolution setting. See “Selecting the scan resolution” on page 81 for instructions.
Note:
You cannot remove ripple patterns when you are scanning using a resolution higher than 600 dpi.
Scanned colors differ from the original colors
❏ Make sure the Image Type setting is correct. See “Scanning in Office Mode” on page 70,
“Scanning in Home Mode” on page 73, or “Scanning in Professional Mode” on page 75 for
instructions.
❏ Click Configuration, select the Color tab, and change the Display Gamma setting to match your
output device, such as a monitor or printer, in the Color menu. See Epson Scan Help for details.
❏ Adjust the Auto Exposure Type setting in Professional Mode. Also try selecting a different Tone
Correction
setting. See “Adjusting the color and other image settings” on page 87 for instructions.
❏ Click Configuration, select the Color tab, and select Color Control and Continuous auto
exposure
in the Color menu. See Epson Scan Help for details.
❏ Click Configuration, select the Color tab, and click Recommended Value to return the Auto
Exposure Level setting to the default. See Epson Scan Help for details.
❏ Make sure to enable the Embed ICC Profile setting. In the File Save Settings window, select JPEG
or TIFF as the Type setting. Click Options, then select the Embed ICC Profile check box. To
access the File Save Settings window, see “Selecting File Save Settings” on page 79.
Epson AcuLaser MX21/MX20 Series User's Guide
Troubleshooting 245