Measurement Computing LogBook Series User Manual
Page 81
LogBook User’s Manual
919495
LBK and other non-DBK Options 5-5
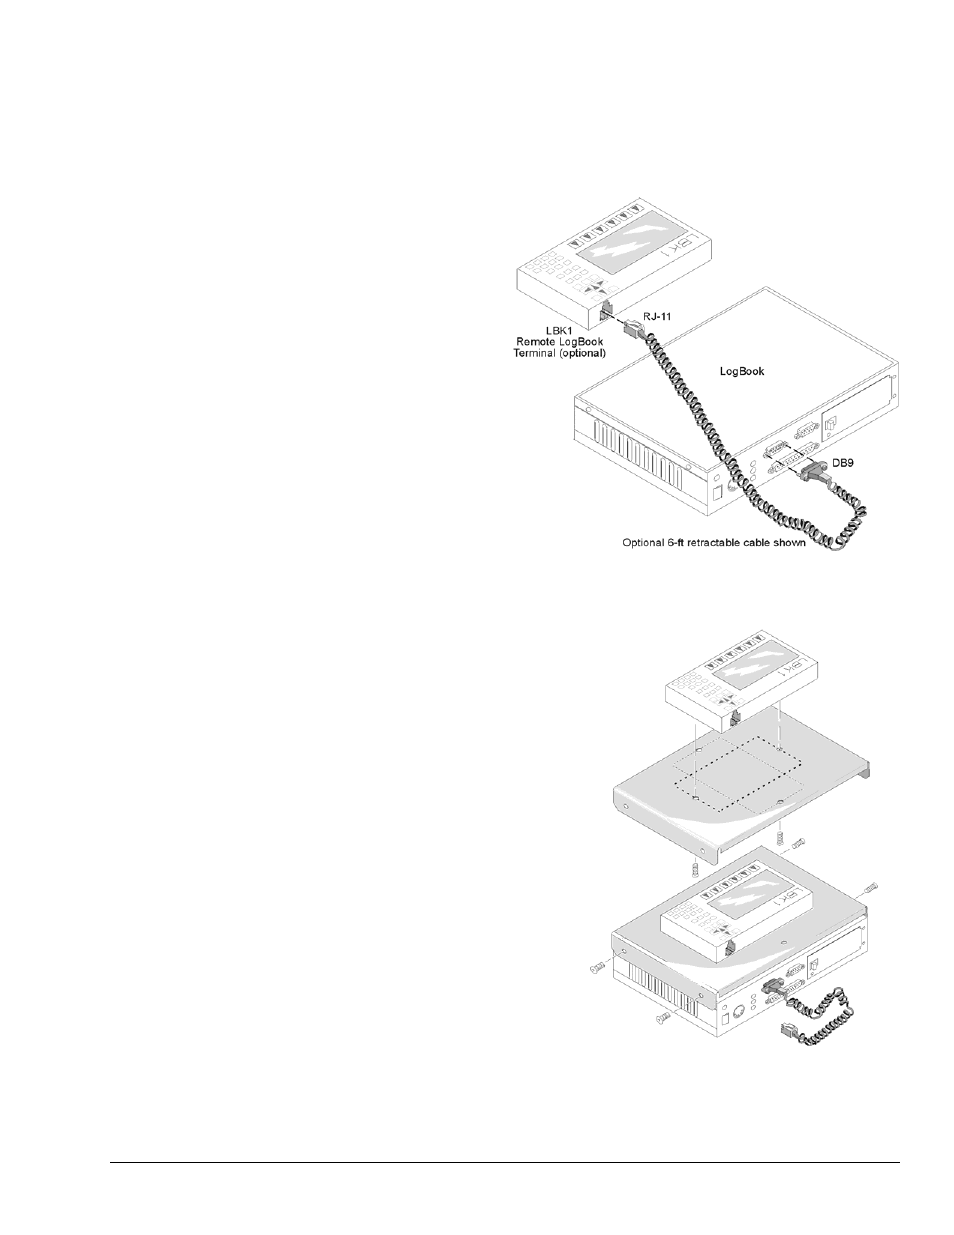
LBK1 Installation
System Connection
1. Connect the supplied cable’s DB9P
connector to the LogBook’s DB9S
connector and tighten the locking
screws.
On LogBook/300 the connector is
labeled “FROM CONTROLLER”.
On LogBook/360 the connector is
labeled “TERMINAL (TO LBK1).
2. Connect the cable’s RJ-11 connector
to the LBK1’s corresponding socket.
LBK1 with Early-Style LogBook/300
Mounting Rack
An optional mounting rack (p/n Mount1) can be used
to hold the LBK1 securely to the LogBook. For
convenience, you can mount the LBK1 length-wise or
width-wise on the rack (see figure).
1. Mount LBK1 on the rack in the desired
orientation, and attach 2 screws through the
rack to the LBK1.
2. Mount rack onto the LogBook, and attach 4
screws to hold the rack to the LogBook.
3. Attach cable, RJ-11 side to the LBK1 and
DB9 side to the LogBook.
Note:
The mounting rack can be attached to other
equipment, racks, shelves, or other support
structures.
LBK1 and Rack (p/n Mount1) Shown both
Assembled (bottom) and Disassembled (top)
Note: Early-Style LogBook Depicted