Setting up the card drawer – Measurement Computing LogBook Series User Manual
Page 36
LogBook/360 Quick Start Guide
QS360
-
3
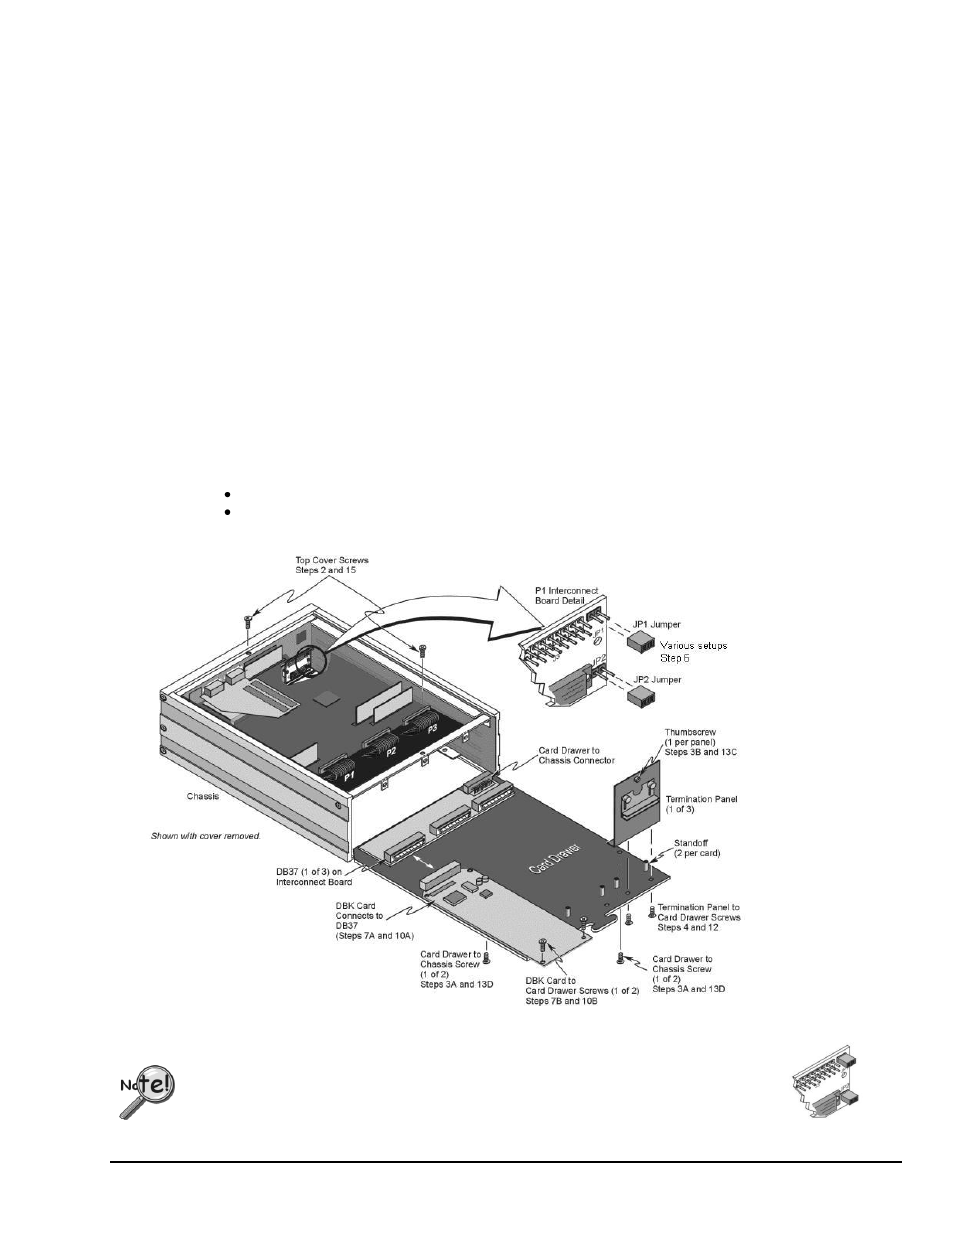
Setting Up the Card Drawer
LogBook/360 can house three DBK cards internally, and make use of various termination panels. For user convenience, a card
drawer can be slid free of the device. The following steps should be used when adding, removing, or changing cards. Refer to
the following figure as needed.
1 – Turn off system power and disconnect LogBook/360.
Turn power off to the LogBook/360 and all connected devices. Disconnect LogBook/360 from the system.
2 – Remove top cover.
If you need to make any change on the LogBook motherboard, you will need to remove the top cover. Otherwise, the cover
can remain in place. To remove the top cover, simply remove the two top cover screws and slide the cover free of the
device.
3 – Remove card drawer.
A. Remove the two screws that hold the card drawer to the chassis.
B. Loosen the three termination panel thumbscrews.
C. Carefully pull the card drawer free of the chassis.
4 – Remove termination panels.
For each termination panel, remove the two screws that mount it to the card drawer, then remove the termination panel.
5 – Determine power requirements.
Depending on the power needs of your system’s DBK cards, you may need to add a power card.
Refer to the DBK Basics section of the LogBook User’s Manual PDF in regard to calculating your
system’s power requirement.
If the required power is more than the available power your system will require auxiliary power. One of two power
supply cards can be used with LogBook/360:
DBK32A – This DBK supplies ±15 V for use with a LogBook, DaqBook, or DaqBoard.
DBK33 – This DBK supplies +5 V and ±15 Vfor use with Log Book, DaqBook, DaqBoard,
or Daq PC-Card.
Leave jumpers JP1 and JP2 in place unless a DBK33 is being used. If a DBK33 is being
used configure the P1 interconnect board according to the table presented in step 6.