Measurement Computing LogBook Series User Manual
Page 141
Software Reference
989592
LogView LV-15
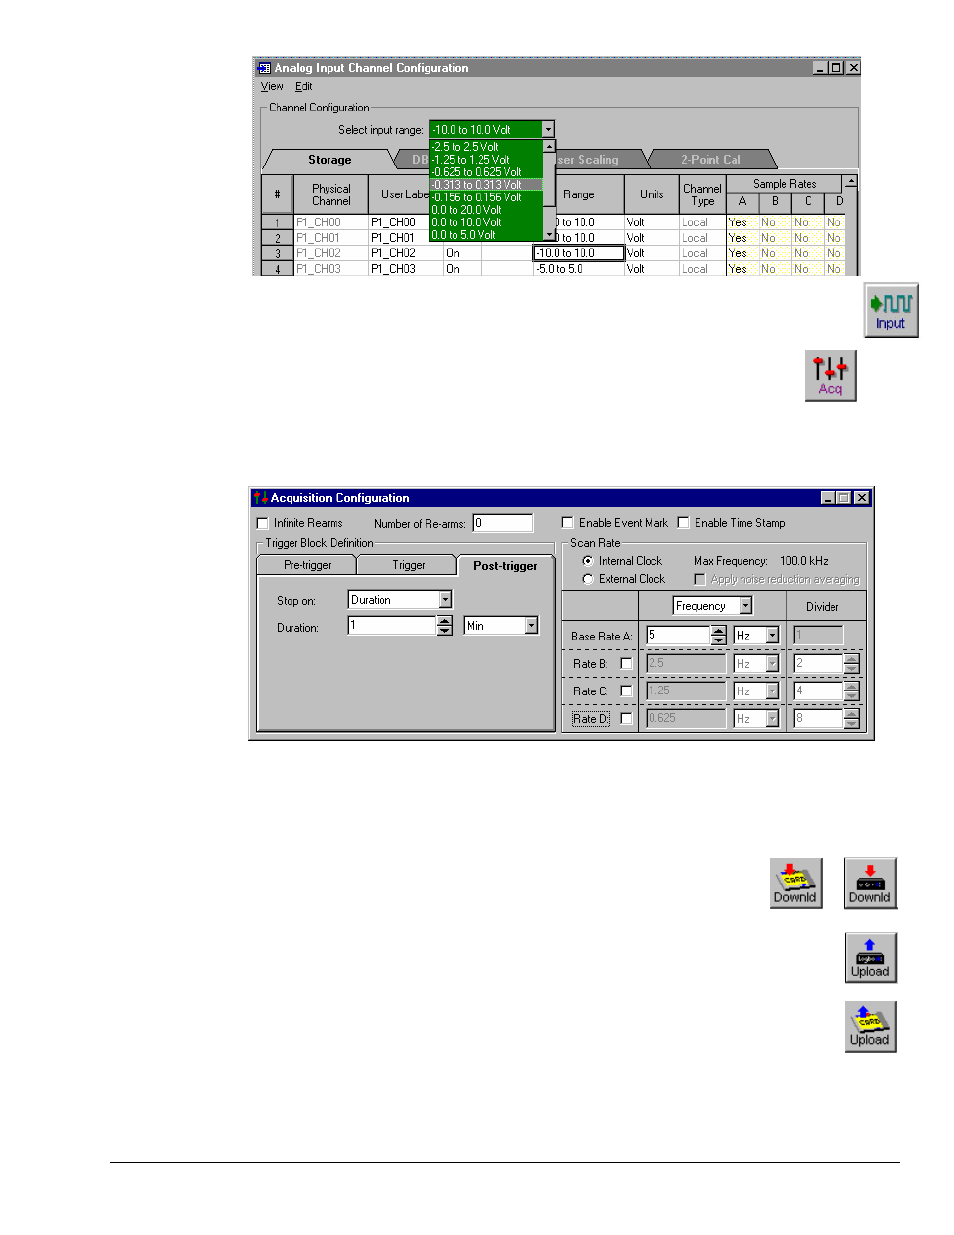
Selecting Input Range for Channel P1-CH02
4. Click the Digital button. Turn all the digital channels “Off”—or “On” as applicable.
5. Click the
the View pull-down menu, and the Acquisition Configuration window will appear.
6. From the Acquisition Configuration window, select all the parameters that define
your desired acquisition. Under the Trigger tab, select Immediate as the trigger if
you want to start the acquisition the moment the system is armed. Under the Post Trigger tab, select
a duration
of 1 minute. In the Scan Rate frame, set Base Rate A to 5 Hz (or as applicable) by typing in a value
and selecting the proper unit.
Acquisition Configuration Window
7. After verifying that all settings are as you desire, select Save under the File menu and associate
a name to your acquisition setup file (if not already done so).
8. From the main toolbar, click the
LogBook’s PC-Card.
9. To arm an attached LogBook, click the Arm (f) button.
10. To arm a remote LogBook, eject the PC-Card, transport it to LogBook, insert
it into LogBook's socket, and then apply power.
11. To upload data from an attached LogBook during or after an acquisition, click the
12. To upload data from a remote LogBook after the acquisition is complete, or as part of card
swapping, eject the PC-Card from LogBook and transport to the PC’s socket; then click
the
13. To inspect the data, click the
installed.
or
or