Odel…… lv-6 – Measurement Computing LogBook Series User Manual
Page 132
LV-6 LogView
989592
Software
Reference
Toolbar commands can be accessed in two ways: (1) via toolbar, or (2) via pull-down menu selection. Note that the
pull-down menus include additional commands that do not have associated toolbar buttons.
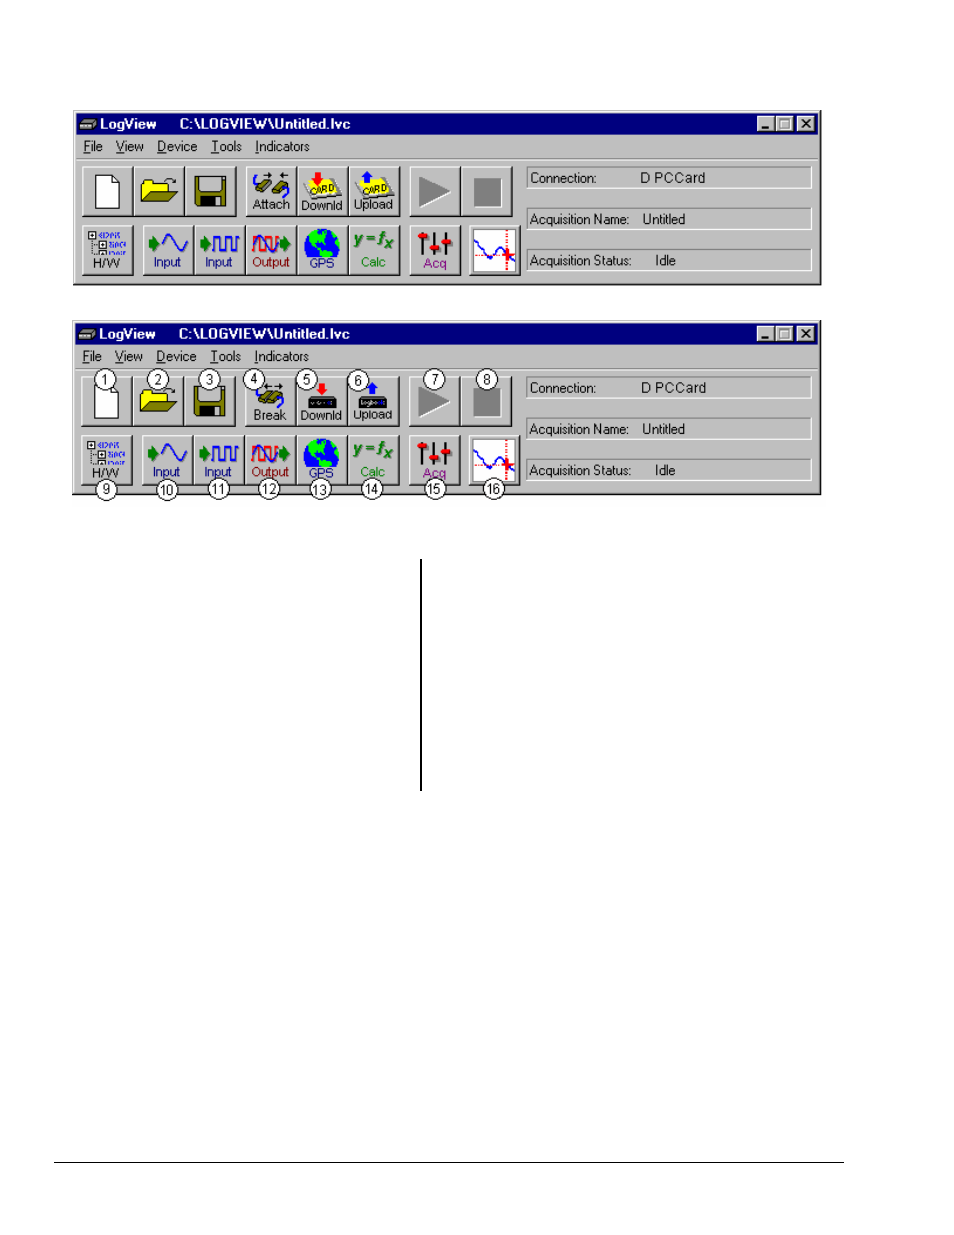
LogView Control Window – LogBook Unattached
LogView Control Window – LogBook Attached
Legend
1 – New Setup File
2 – Open Setup File
3 – Save Setup File
4 – Break PC from LogBook (Shows when PC is attached), or
– Attach PC to LogBook (Shows when PC is unattached)
5 – DownLoad to LogBook (Shows when PC is attached), or
– DownLoad to PC-Card (Shows when PC is unattached)
6 – UpLoad Acquisition Setup & Data to LogBook
(Shows when PC is attached), or
– UpLoad Acquisition Setup & Data to PC-Card
(Shows when PC is unattached)
7 – Arm (Start) Acquisition
8 – Stop Acquisition
9 – Hardware Configuration
10 – Analog Input Setup
11 – Digital Input Setup
12 – Output I/O Setup
13 – GPS (Global Positioning System) / Serial IN Setup Option
14 – Calculated IN Channel Setup
15 – Acquisition Configuration
16 – View Data [via a post acquisition view application]
Spreadsheet Model
LogView’s interface uses a spreadsheet model of cells in rows and columns (see next figure):
• Each row is a different channel. Individually-controlled channels can be hardware-based or
calculated; channels can be identified with user-specified labels.
• Each column is a parameter related to the channel. Some parameters can be user-set (user label,
sample rate, etc.); others are read only (physical channel, readings from transducers, etc.).
Note: Generally, cells that are “grayed-out” rather than black are not subject to user input (e.g. physical
channel, channel type); however, grayed-out Sample Rates under the Storage tab can be changed
in the Acquisition Configuration Window.