Measurement Computing LogBook Series User Manual
Page 139
Software Reference
989592
LogView LV-13
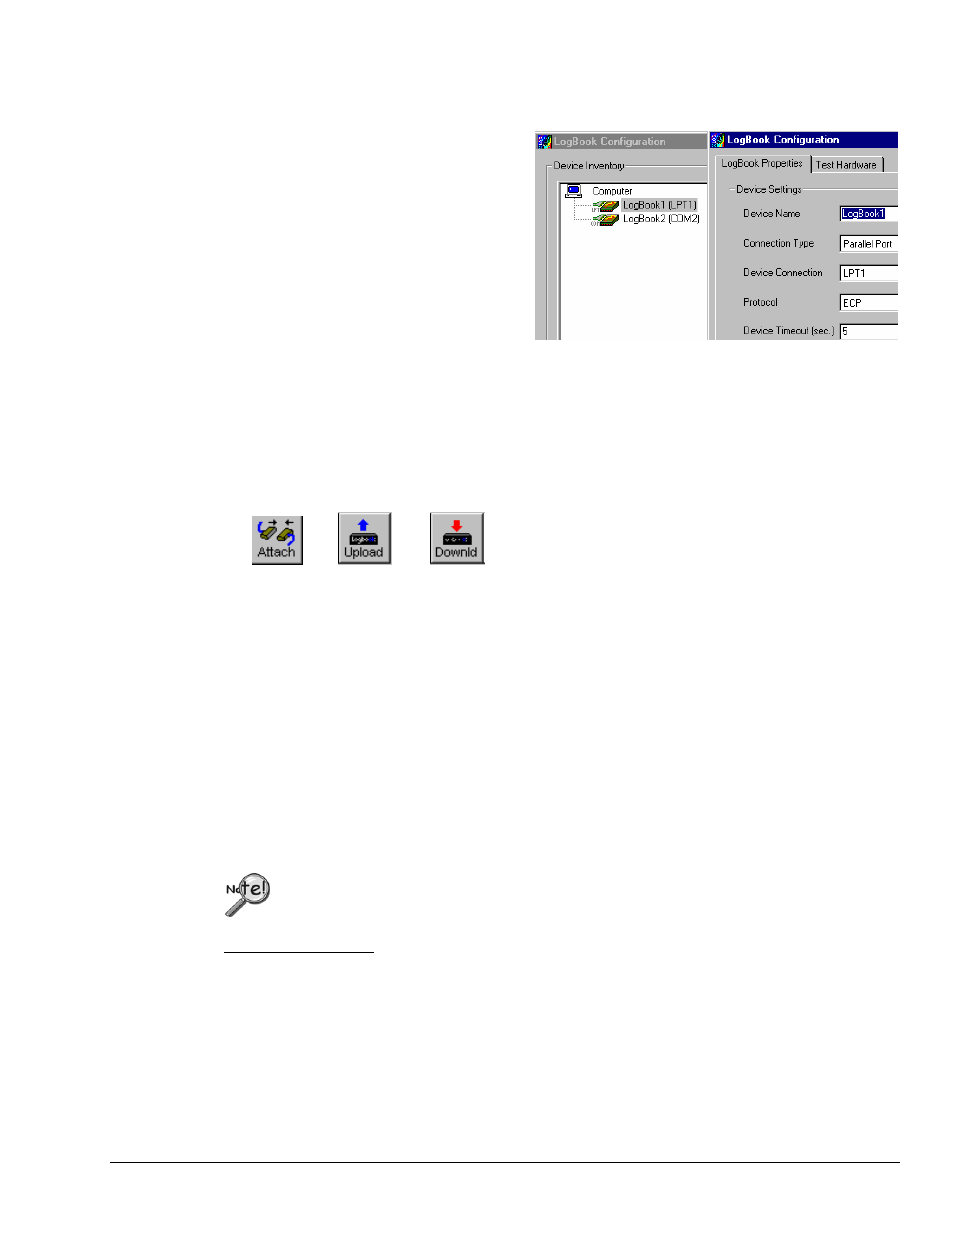
1. On your PC with LogView already loaded, open control panel applet, and check Hardware
Configuration. If no LogBook is present in the tree, click Add Device and a LogBook ID; otherwise,
select a LogBook in the tree and click Properties.
2. Under LogBook Properties tab, enter or
verify device name, the connection type,
the protocol, a timeout duration; and
then click Apply.
3. (if serial connection) Under Port
Settings tab, select baud rate and related
parameters; and then click Apply.
4. Verify proper LogBook connection and
power-on; then, under the Test
Hardware tab after, click the
button. Testing will verify system
parameters and then bench-mark system
communication performance.
5. Launch LogView from your PC (unless you set up a shortcut, you can find LogView in the Programs
group in the Start menu). The control window and the Analog Input Channel Configuration window
should appear.
6. Under the Device menu in the control window, click Select LogBook. From the drop down list,
select LogBook you just configured in the hardware tree; then click the Attach icon to establish
a communications link. The
now be enabled (LogView recognizes when LogBook is attached and enables the applicable tools as
seen by their lettering turning from gray to black).
7. In LogView’s Analog Input Channel Configuration (page LV- 30) and Acquisition Configuration
(page LV- 42) windows, set up the channels and trigger parameters you wish to use (see Simple Data
Logging, page LV- 14).
8. Download the acquisition setup file just configured to LogBook
9. Click the Arm Acquisition button (f). LogBook is now armed and ready to collect data when the
trigger parameter is satisfied.
10. During the acquisition, you can monitor system status via LogBook Monitor window accessed from
the Device pull-down menu. To verify proper operation, such monitoring is recommended for the
first run of a new acquisition setup file.
11. After collecting data, click the
Depending on the communication channel and size of data files, uploads take a variable amount of
time. Uploads can also be done incrementally during an acquisition.
The next time you launch LogView, it will automatically look for the selected LogBook and attempt to
attach itself. At this point, LogView and LogBook will be in constant communication. If you want to turn
off LogBook’s power or detach the communication cable, you should first select Break from the Device
menu or Exit from the File menu.
PC-Cards purchased with LogBook have been initialized at the factory. PC-Cards
purchased elsewhere must be initialized through LogView. The initialization procedure is
discussed in the following paragraph.
Initializing a PC-Card
PC-Cards, that were purchased with LogBook, have been initialized. PC-Cards purchased elsewhere
must be initialized. Initialization is accomplished as follows:
1. Place the PC-Card in the PC’s corresponding socket.
2. Select the driver according to your card’s documentation.
3. In LogView, under the Device menu, click Select PC-Card, then click OK.
LogView will check the card and initialize it as needed.