Ripping set-up procedure, A warning, Ripping – Sears 113.197611 User Manual
Page 66
Attention! The text in this document has been recognized automatically. To view the original document, you can use the "Original mode".
Ripping
Ripping Set-up Procedure
Follow these steps
before
ripping.
These
steps must be repeated each time a dif
ferent thickness workpiece is ripped.
A
kerf must be made for each different
width cut.
1.
Prepare table:
-insert solid (no kerfs) fence
(Note:
Use
auxiliary fence when blade is set
1/2
to 2"
from fence)
-lock table locks.
2. Prepare blade:
-lock radial arm at
0
” miter
-lock motor at desired bevel angle
-lock blade in in-rip position*
-lower blade to just clear table
-lock blade carriage desired distance
from fence.
Make sure widest part of
workpiece will he between blade and fence.
*iise out-rip position only when blade is
set
12
” or more from fence
3. Make kerf:
i) turn saw on
ii) lower blade about
Vie"
into table
iii) turn saw off and remove yellow key.
4. Place workpiece parallel to and up
against blade.
Note:
Workpiece will he be
tween blade and table front.
5. Low'er guard nose until it just clears
top surface of workpiece, then tighten
guard clamp screw.
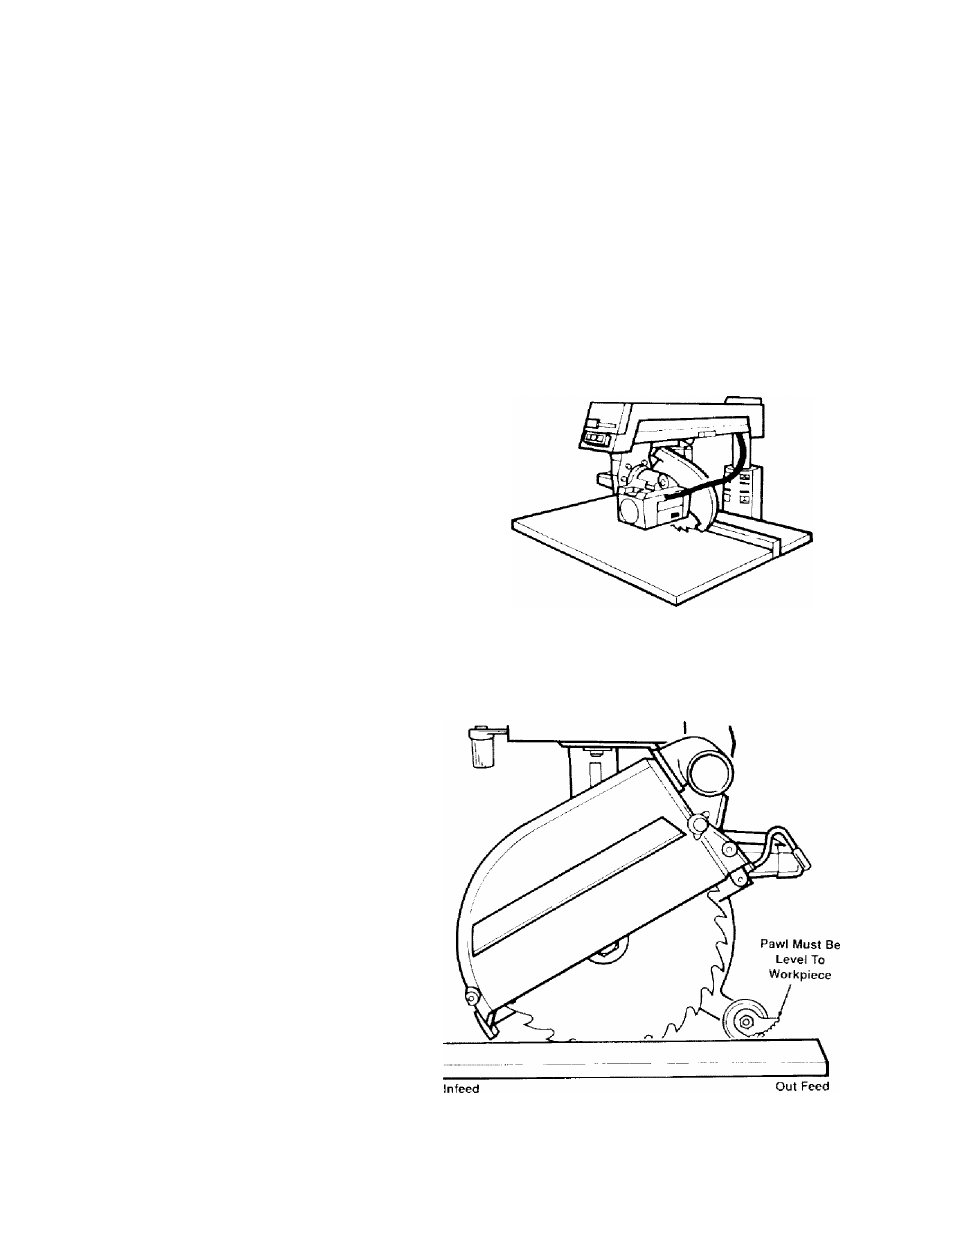
6
. Lxtwer pawls and spreader so spreader
hangs along side of workpiece, in line
with blade, and one set of pawls rests
level on workpiece surface, then tighten
pawls/spreader wing nut.
7. Test setting: push workpiece toward
outfeed side to see that workpiece moves
freely; push workpiece toward infeed side
to see that pawls grab.
If these conditions
are not met, re-set pawls until they are.
A
WARNING
If workpiece is pushed along fence
with kerfs, workpiece could get
caught on kerf, pinch blade and
c a u s e k i c k b a c k . D o n o t u s e
crosscutting fence for ripping.
66