Kccpirihli – Sears 113.197611 User Manual
Page 19
Attention! The text in this document has been recognized automatically. To view the original document, you can use the "Original mode".
/kccpirihli/
11UI y
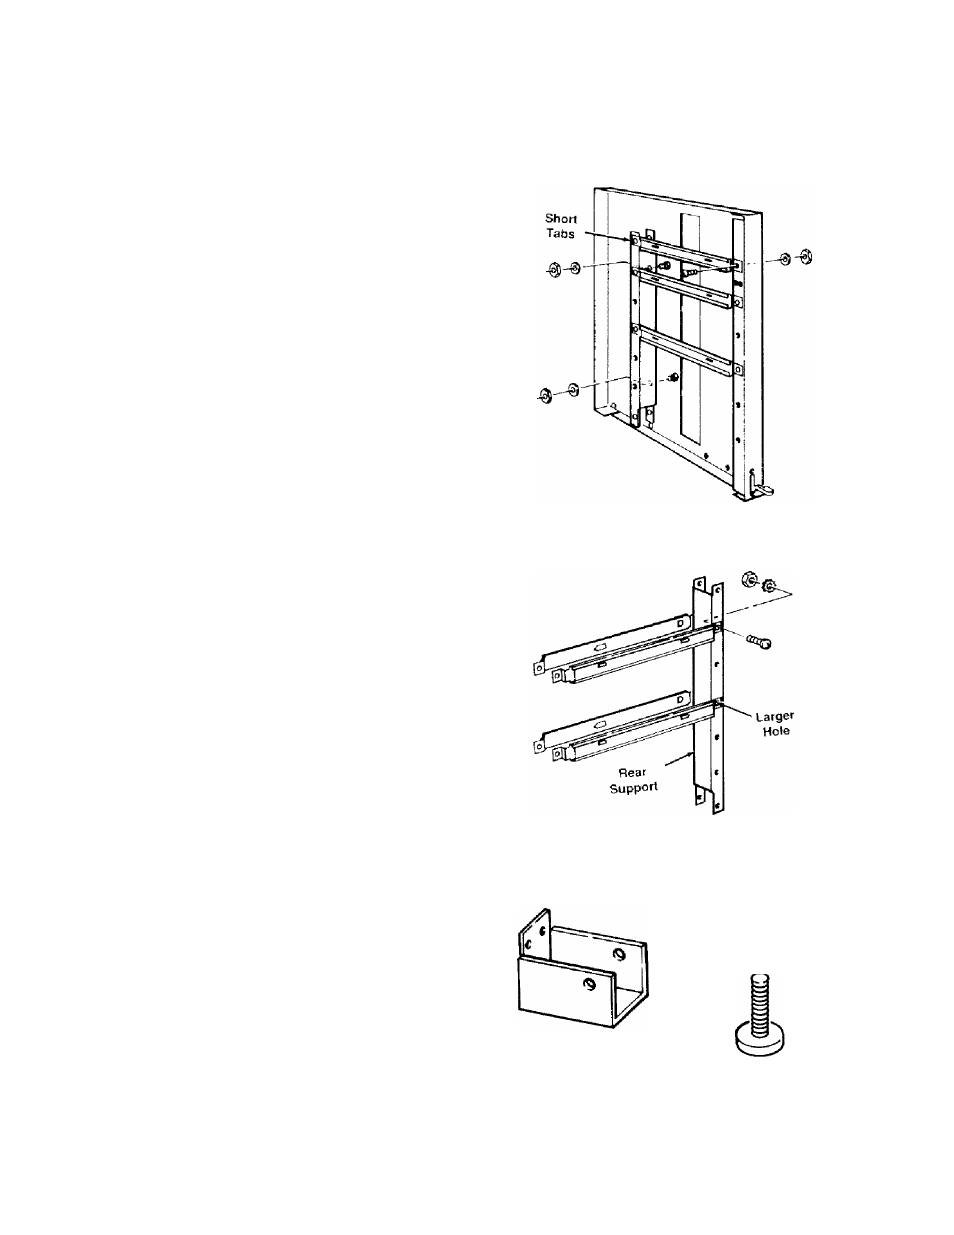
5. Position rear support, with slide brack
ets attached, inside right side panel, so
short tabs point up, and solid surface
faces front.
6. Attach rear support to side panel: use
two screws
(insert screws through side
pane\)\
on end of each screw put washer,
then nut, and wrench tighten.
7. Attach slide brackets to front inside
edge of side panel: use three screws
(in
sert screws through slide brackets)',
on end
of each screw put washer, then nut, and
wrench tighten.
8. Repeat steps 4-7, installing slide brack
ets to right side of another rear support
and attaching rear support, with slide
brackets attached, to left side panel.
9, Attach four slide brackets to remaining
rear support, one on each side of center
hole and one on each side of second hole
from top: use four screws
(insert screws
through larger hole in slide bracket)',
on
end of each screw put washer, then nut,
and wrench tighten.
Set this rear support
aside for later use. Remaining two slide
brackets will be installed later.
10. Go to "Attach Side Panels to Bottom
Shelf."
Assemble Side Panels(Only Door
Model without Casters)
1. Set out:
-right side panel
-left side panel
-bA'O spacers
-four leveling feet
-four
Vi"
diam x
Vz
long truss head
screws
-four G" diam lock washers
-four lb" diam hex nuts
-eight It?" diam hex nuts.
19