Assembly, Attach slide arm supports, Install front table – Sears 113.197611 User Manual
Page 30: As.sembly
Attention! The text in this document has been recognized automatically. To view the original document, you can use the "Original mode".
Assembly
j
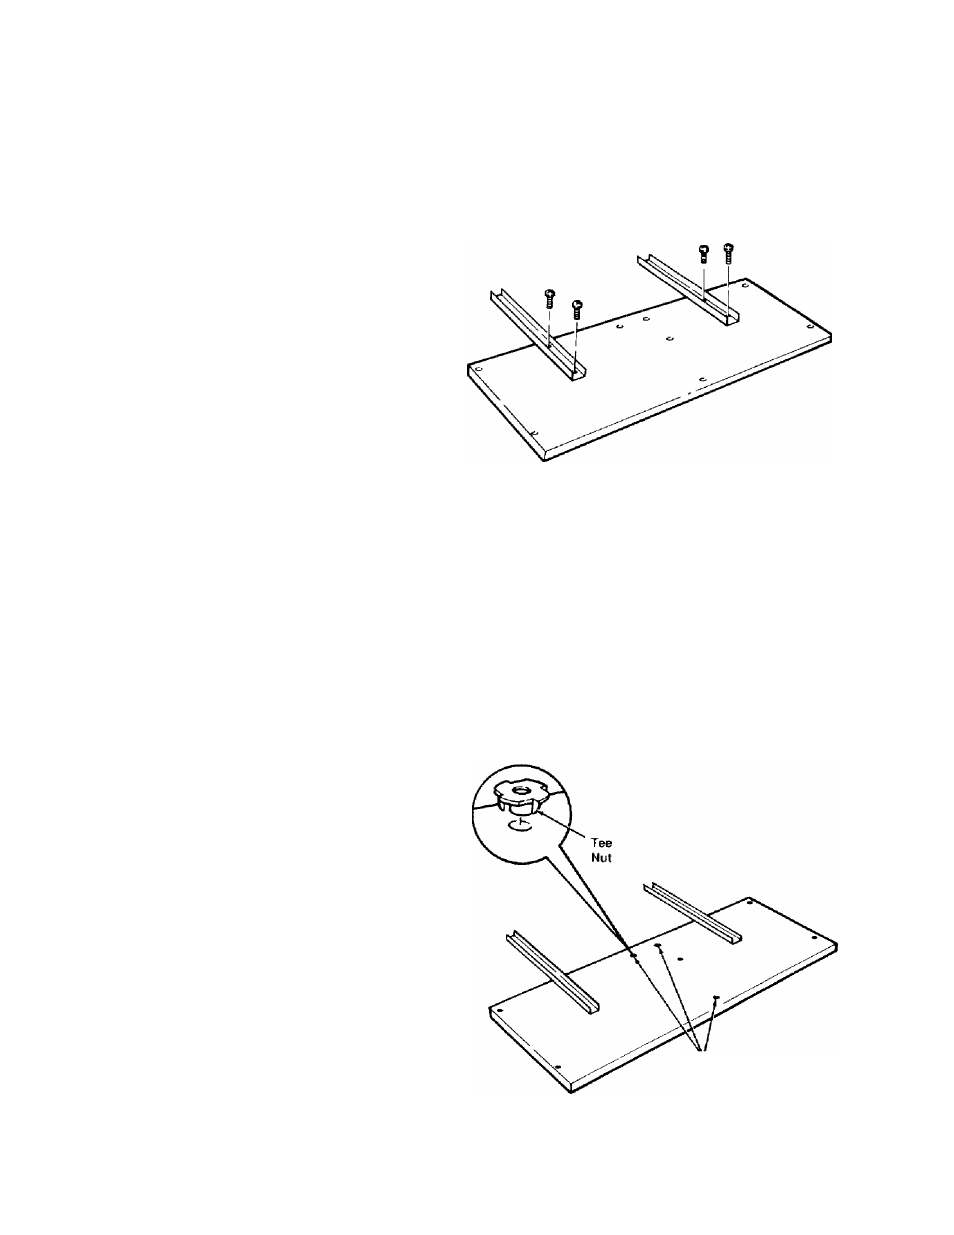
Attach Slide Arm Supports
1. Set out:
'two slide arm supports
-four
V
a
"
diam x W long pan head type
AB screws
-front table.
2. Identify top and bottom of table: top
has countersunk holes. Place table bot
tom side up.
3. Attach slide arm supports, solid sides
down, to table; use two screws per sup
port; tighten, but not fully, because sup
port will have to be adjusted later.
Install Front Table
1. Set out:
-three tee nuts
-five rubber bushings
-five
V
a
U-clips
-five
V
a
"
diam x
IV
a
"
long mounting screws
-two
V
a
"
diam x
Vi"
long truss head screws
-three
V
a
"
diam x r/s" long cup point set
screws
-five
i
V6
a
"
in. diam x out. diam flat
washers
-two 17/64" in. diam x out. diam flat
washers
-two
V
a
"
diam lock washers
-two
V
a
"
diam hex nuts.
2.With front table still bottom side up,
hammer tee nut into each leveling hole.
Leveling Holes
30