Install drawers (only drawer model), To remove drawers (only drawer model), Alignment and adjustment – Sears 113.197611 User Manual
Page 33: Assembly
Attention! The text in this document has been recognized automatically. To view the original document, you can use the "Original mode".
Assembly
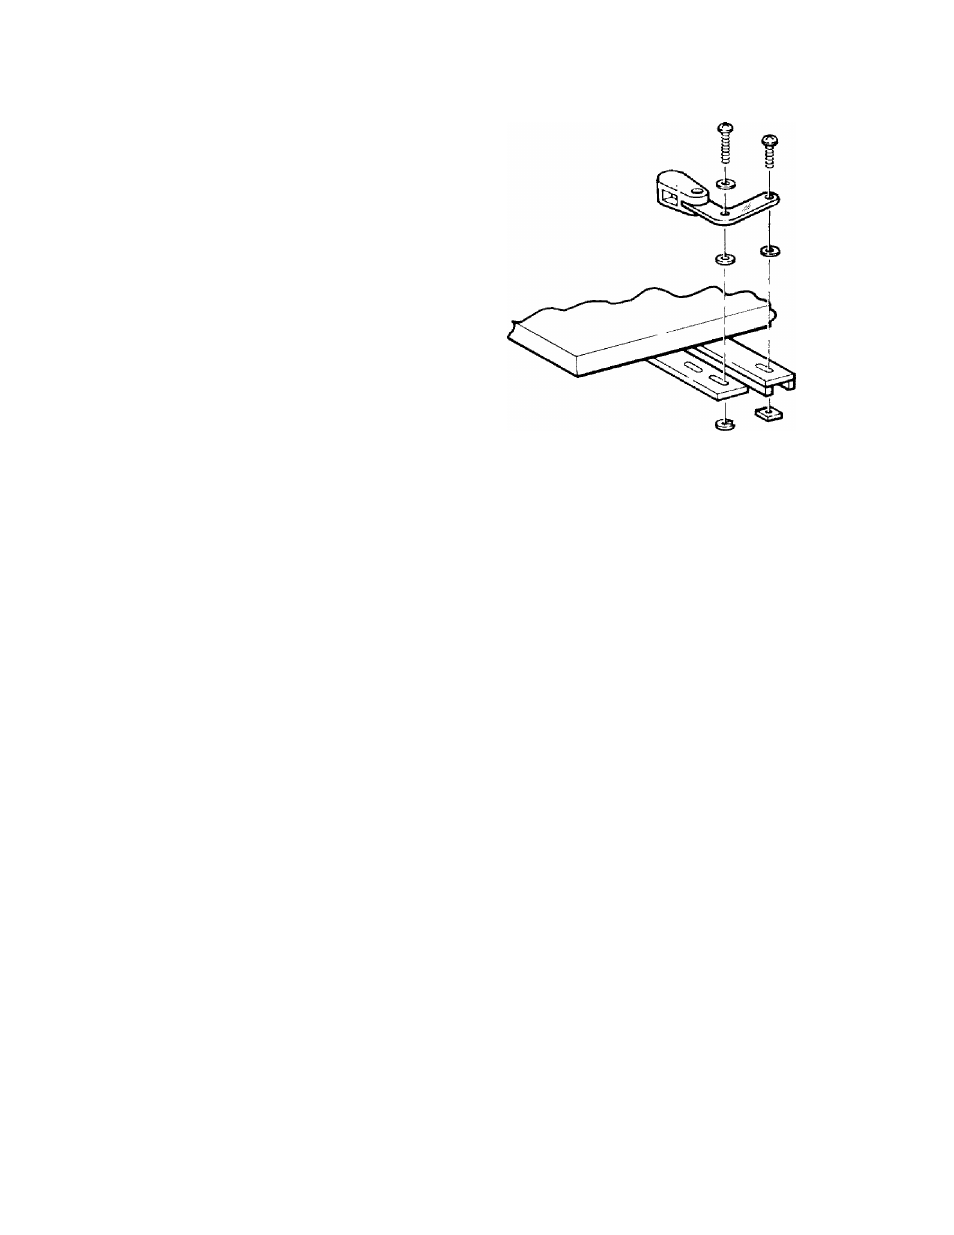
4. Attach slide arms to slide arm sup
ports: use one li^" long screw per slide
arm; put flat washer on screw; insert
screw through slide arm; on other end of
screw put another flat washer; put screw
through slide arm support; on end of
screw put lock washer, then hex nut and
wrench tighten*.
5. Attach slide arms to lock handle chan
nels: use one st" long screw per slide arm;
insert screw through slide arm; on end of
screw put flat washer; put screw through
lock handle channel; on end of screw put
square lock nut and tighten.
install Drawers (Only Drawer Model)
1. Slide each drawer into place and push
all the way in.
2. Pull each drawer out as far it will go.
They should not come all the way out. If
any do, use screwdriver to bend out stop
tabs on slide brackets and re-test drawer.
To Remove Drawers (Only Drawer
Model)
1. Use screwdriver to push in one stop
tab on right slide bracket and at same
time pull drawer out slightly.
2. Repeat with left slide bracket and pull
drawer all way out.
Alignment and Adjustment
Go to Alignment and Adjustment Section
and follow all instructions. You cannot
use the saw until it is aligned and ad
justed. It may be helpful to read the Con
trols Section before proceeding with
alignment and adjustment.
Remaining parts will be installed in Digi
tal Display Section.
33