Assembly – Sears 113.197611 User Manual
Page 18
Attention! The text in this document has been recognized automatically. To view the original document, you can use the "Original mode".
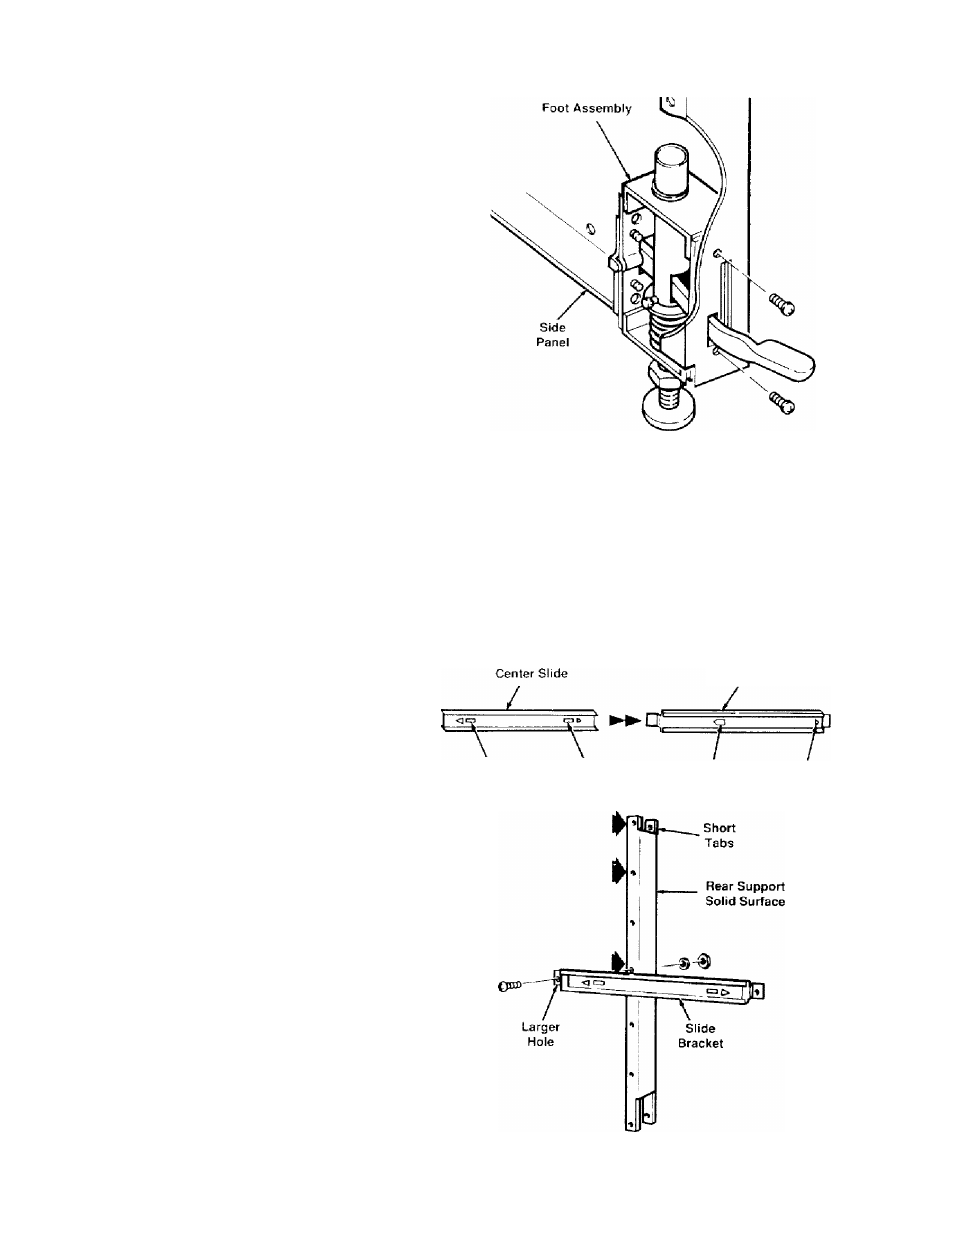
Assembly
3. IdenLify right side panel by locating let
ter "R" stamped near center of rear edge.
4. Put right foot assembly inside front
edge of right side panel, so foot lever
comes through ”J" slot. Use two screws to
attach foot assembly to panel
{insert
screws through side panel).
5.
In similar way, attach left foot assembly
to left side panel.
Assemble and Install Slide Brackets
(Only Drawer Model; Door Model: Go
to "Attach Door Hinges")
1. Set out:
-twelve outer brackets
-tw elve center slides
-three rear supports
-grease packet
-twenty U" diam x
vf
long truss head
screws
-twenty U" lock washers
-twenty
vk"
diam hex nuts.
2. Grease top and bottom of center slides.
3. Make twelve slide brackets: insert a
center slide all the way into each of 12
outer brackets, then slightly pull back on
center slide to make sure stop tabs are
engaged.
Outer Bracket
Stop Tab
Stop Tab
Stop Tab Rear Stop
4. Attach three slide brackets to left side
of one rear support, in holes indicated:
use one screw per slide bracket
{insert
screws through larger hole in slide bracket);
on end of each screw put washer, then
nut, and wrench tighten.
18