Install guard, Alignment and adjustment – Sears 113.197611 User Manual
Page 46
Attention! The text in this document has been recognized automatically. To view the original document, you can use the "Original mode".
Alignment and Adjustment
Blade alignment and adjustment are com
plete Note:
It is important that you peri
odically check alignment and adjustment to
insure accurate cuts and improve the safety
of cutting procedures. Be aware that align
ment in one plane necessarily affects align
ment in other planes. Thus, the blade may
be perfectly aligned for one type of cut but
not another.
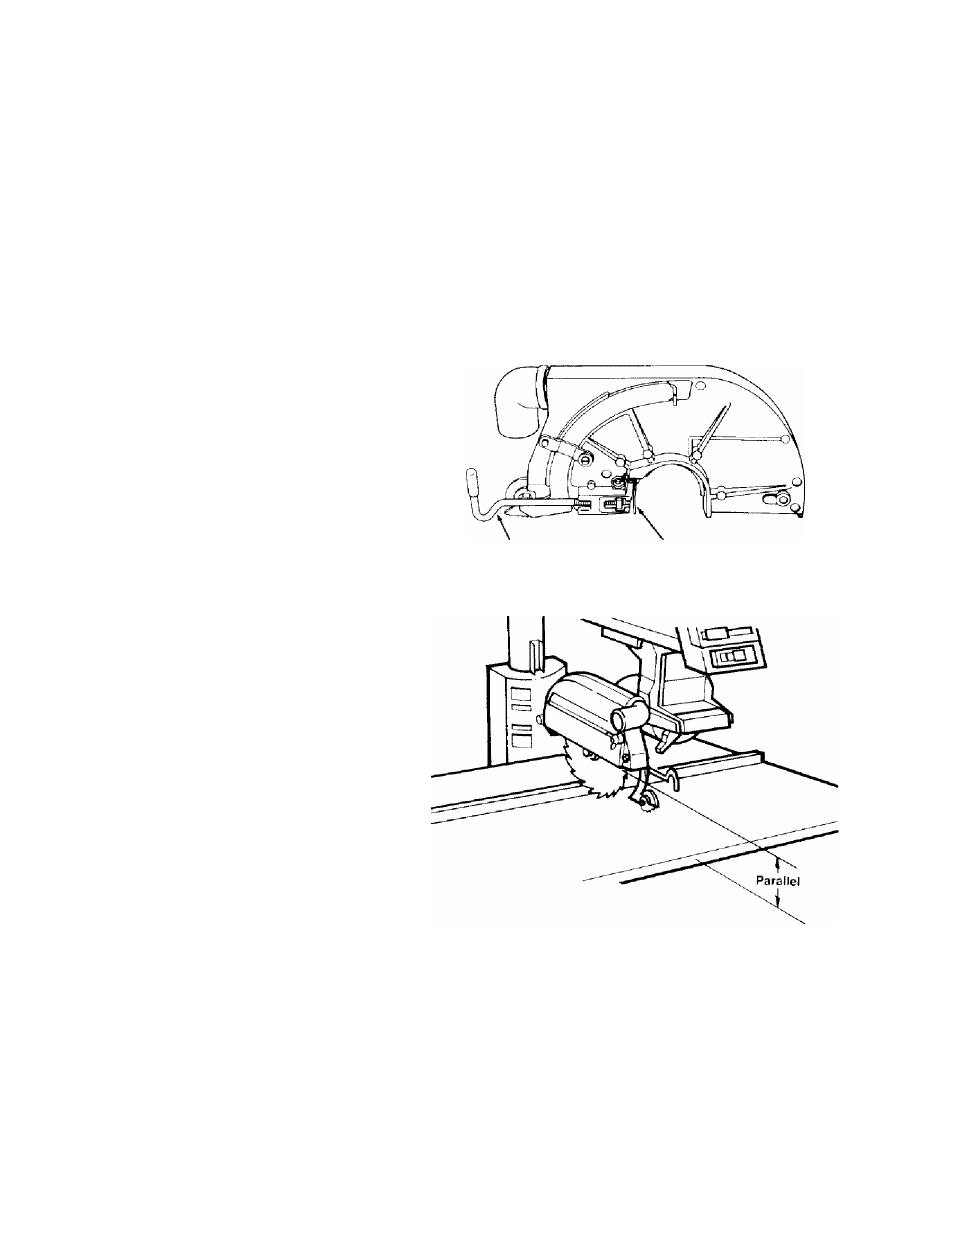
Install Guard
The guard is a very important safety fea
ture. It covers a large part of the blade
and helps protect against severe cuts. Al
ways use the guard and adjust it according
to instructions for the type of cut.
1. Raise blade at least
5"
from table.
2. Lock motor at 0“ bevel (blade vertical).
3. Loosen guard clamp screw until it no
longer touches metal plate.
4. Place guard over blade so guard clamp
screw is towards table front. Guard will
fall into place when ridge on inside of
guard slides into slot on motor.
5. Adjust guard to make sure bottom
edge is parallel to table. Tighten guard
clamp screw.
Align Spreader to Blade
The goal of this adjustment is to make the
spreader directly in line with the blade.
Spreader alignment is an important safety
factor. The spreader rides in the kerf of
the cut workpiece during ripping to help
keep the two sides of the workpiece from
pinching on the blade. Blade pinching is a
cause of kickback.
Guard Clamp Screw
Metal Plate
46