Bio-Rad Bio-Plex Software® Upgrades and Conversions User Manual
Page 43
Calibration
31
Select existing control numbers from the pulldown list, and the target values
for the control numbers appear in the appropriate fields.
When you receive a new Bio-Plex Calibration Kit, you must add the new CAL1
and CAL2 control numbers and target values to the Calibrate dialog. These
numbers are printed on the bottles containing the beads.
NOTE: It is critical that you enter the correct target values for your CAL1 and
CAL2 calibrators. Entering incorrect values results in an incorrectly calibrated
array reader, which adversely impacts assay results.
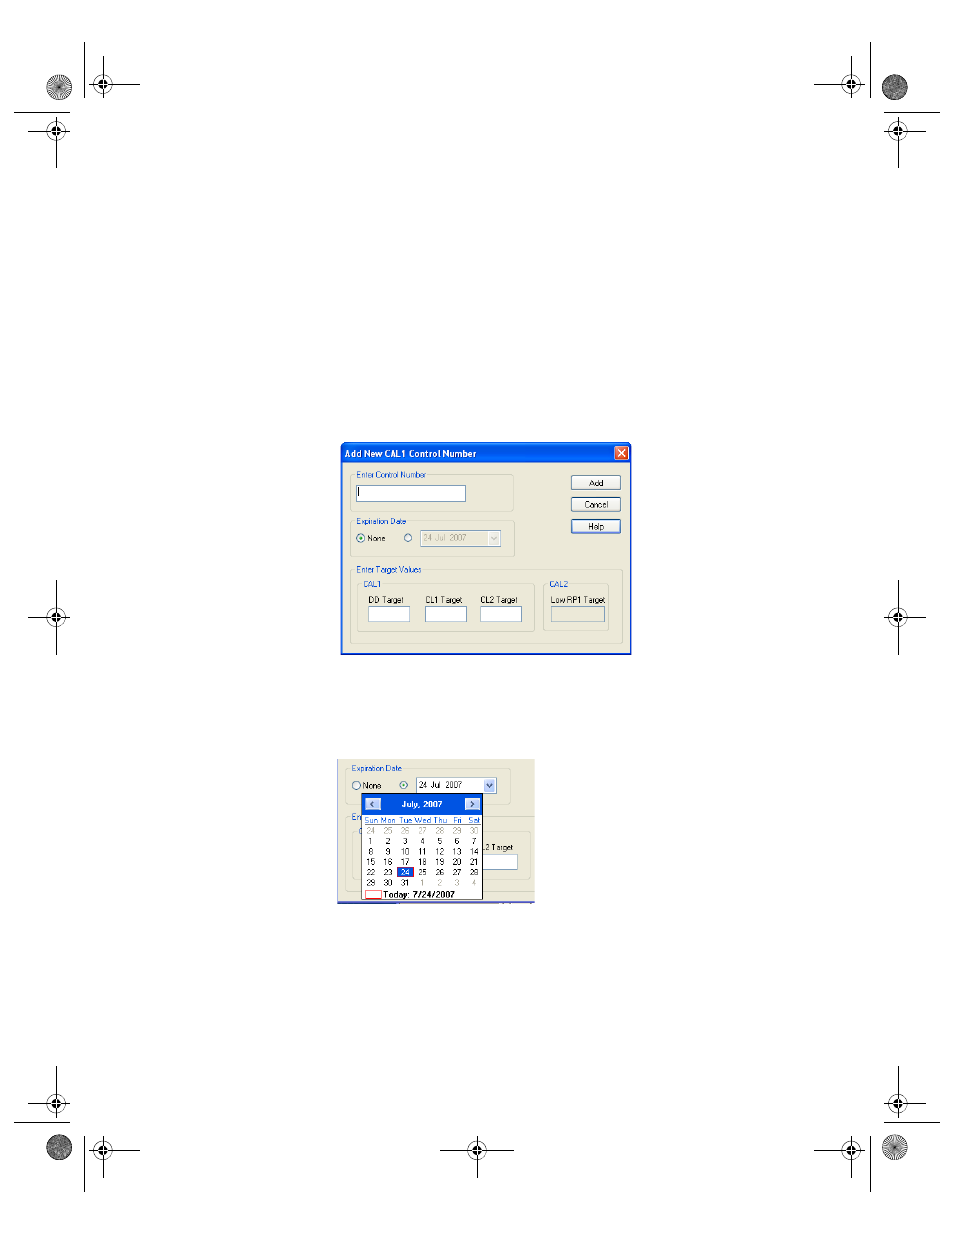
To add a new CAL1 control number, click the Add button under CAL1 Control
Number in the Calibrate dialog. The Add New CAL1 Control Number dialog
box opens.
Figure 16. Adding a new CAL1 control number
In the dialog, enter the control number from the CAL1 bottle in the Enter
Control Number field. If the expiration date is printed on the bottle, select the
option button next to the date field under Expiration Date and click the
pulldown button next to the field to open the calendar selection box.
Figure 17. Calendar selection box
Scroll through the calendar using the scroll buttons at the top. Click to select a
particular date. Use the up/down arrow keys to highlight and change
individual date components.
BioPlex_6.book Page 31 Friday, September 23, 2011 11:55 AM