Bio-Rad Gel Doc™ XR+ System User Manual
Molecular imager, Gel doc, Xr and chemidoc
Setting Up Your Molecular Imager Gel Doc XR or
ChemiDoc XRS System
Install Filter
From the inside of the darkroom, gently
thread the filter into the filter slider mount
located on the inside of the camera opening
at the top.
Attach Camera Bracket
1. The brackets are shipped inside the
Gel Doc XR or ChemiDoc XRS darkroom.
Carefully remove them.
2. Attach the appropriate bracket to the
camera by hand-tightening the screw into
the front of the camera. Do not overtighten
because it may be necessary to make
minor adjustments later.
3. Place the round foam gasket on the top of
the cabinet with the foam side facing up.
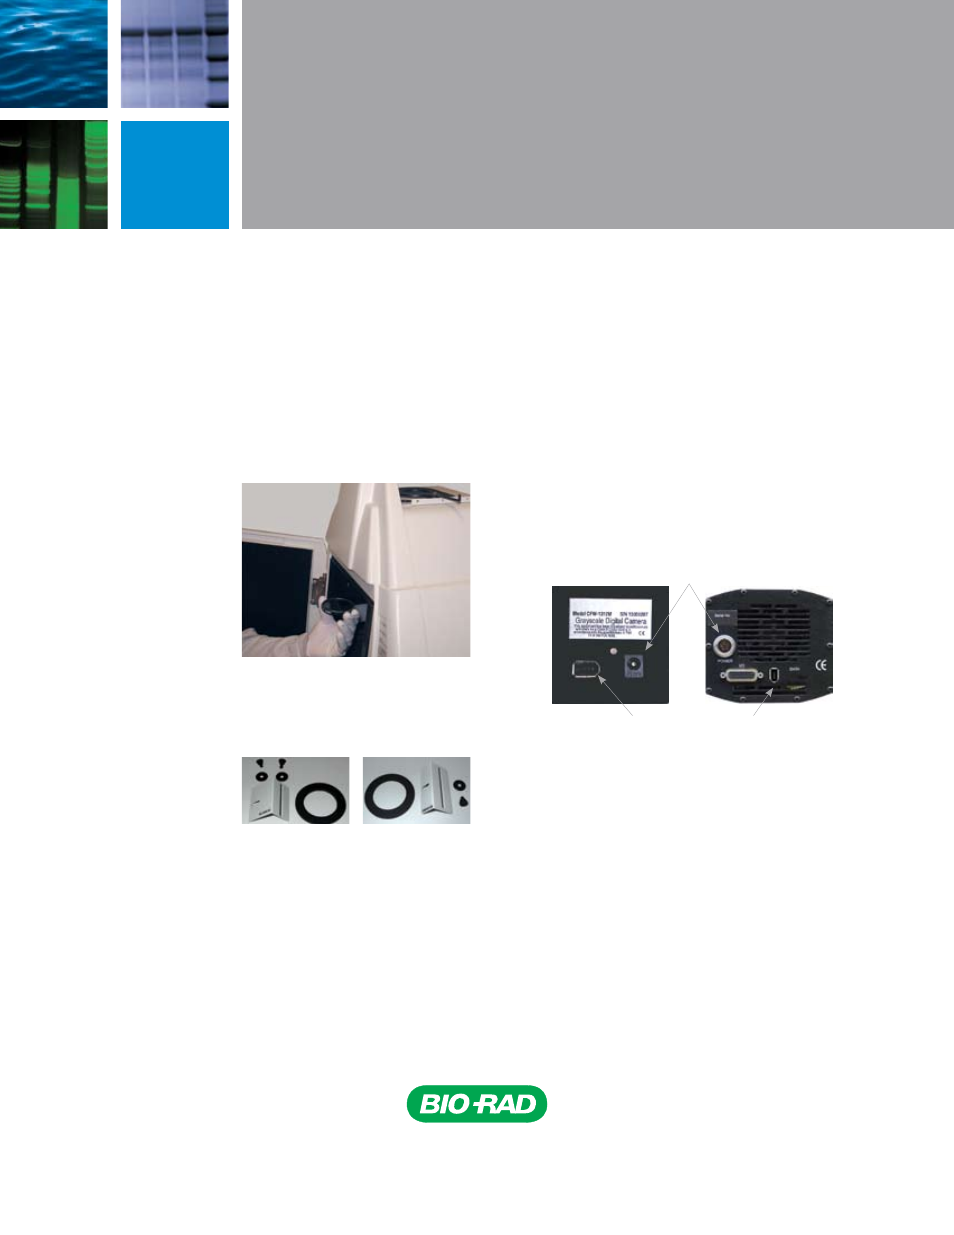
Attach FireWire and Power
Supply Cables
Attach the FireWire and power supply cables
to the top of the camera. Do not plug the
FireWire cable into the computer or the power
supply cable into the wall yet.
Note: The ChemiDoc XRS power supply cable has a red
dot that will face the front of the camera when it is lined
up properly.
Install the Camera
1. Place the camera lens through the gasket,
and stand the camera upright on the
cabinet as shown. Hint: The camera will
need to acquire image optimization files the
first time that Quantity One
®
1-D analysis
software is run. It is best to leave the lens
cap on the camera while those files are
acquired.
2. Hand-tighten the screw to attach the
camera bracket to the hood.
Molecular Imager
®
Gel Doc
™
XR and
ChemiDoc
™
XRS Systems Installation Guide
Gel Doc bracket (A)
and gasket (B)
A
B
ChemiDoc gasket (A)
and bracket (B)
B
A
Power cable
from power supply
FireWire port connector