Det-Tronics EQP Fire and Gas Detection/Releasing System User Manual
Page 109
14.1
95-8533
5-7
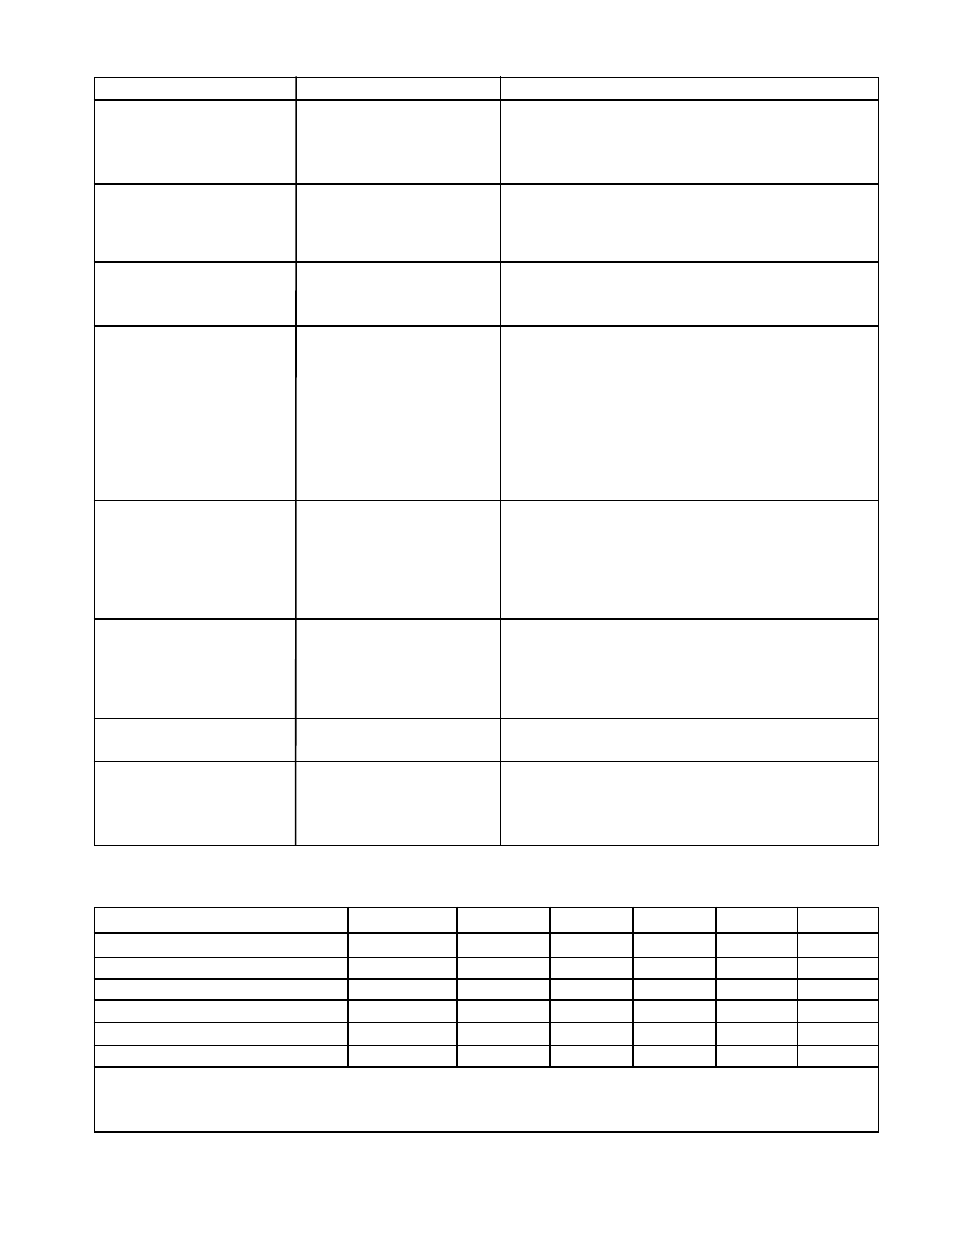
Table 5-1—System Controller Troubleshooting Guide
Symptom
Possible Cause
Corrective Action
Controller Power LED/
No Power to Input.
- Measure input voltage (18 to 30 VDC).
Text Display OFF.
- Check that P1 is fully inserted.
If voltage is present and P1 is fully inserted, replace
controller.
LON Fault – LED lit.
LON wiring is shorted or open. - Check that P7 is fully inserted.
- Using the EQ Safety System Software, determine the
location of open or short via LON Diagnostics screen.
- Use a multimeter to determine wiring fault.
Trouble Relay is Active.
Any monitored device in the
- Using the front panel display/controls, view all points
system including ground fault
in alarm/fault and identify faulted device.
in fault condition.
Repair or replace faulted device as necessary.
Digital inputs are not
- Bad input switch.
- Check that P2 and P3 are fully inserted.
responding.
- Faulty input channel.
- Using a voltmeter, measure input terminals with contact
- Faulty wiring.
closed to the input (measures 0 vdc when input contact
- Configuration error.
is closed, measures approximately 23 vdc with circuit
open and 24 vdc input at the controller).
- If input does not respond to a contact closure, replace
module (verify response with EQ Safety System
Software/textual
display).
-
Verify
configuration.
Relay outputs are not
- Bad relay channel.
- Check that P4 and P5 are fully inserted.
responding to an output
- Faulty output wiring.
- When output should be energized, measure contact
command.
- User logic.
resistance using an ohm meter.
- Verify that wiring from output is not open.
- Using EQ Safety System Software, verify that logic is
trying to operate the channel.
Serial links are not responding. - Faulty wiring.
- Check that P8 and P9 are fully inserted.
- Incorrect serial link
- Verify that communication LEDs are flashing.
configuration.
- Verify that serial link configuration matches the host
- Text display shows
device.
“Invalid Configuration”
- Verify that wiring is not open or shorted.
Front panel pushbuttons are
- Power OFF.
- Verify that power is present and P1 is fully inserted.
not working.
- Controller is faulted.
- Cycle power to controller.
Text display indicates a
Power loss for more than
- Using the Safety System Software, execute “Set RTC”,
RTC Fault.
12 hours.
which downloads the current time into the Controller’s
real time clock. Alternatively, use the “Set Time and
Date” menu in the Controller.
Table 5-2—Troubleshooting Guide - DCIO Module
I/O Type
Normal (Off)
Normal (On) Open (Off) Open (On) Short (Off) Short (On)
Unsupervised Input
–15.4
0
–15.4
–15.4
0
0
Supervised Input (EOL Resistor)
–14.4
0
–15.4
–15.4
0
0
Supervised Input (EOL/Inline Resistors)
–15.4
–15
–15.4
–15.4
0
0
Unsupervised Output
–15.4
23.9
–15.4
23.9
0
0
Supervised Output (Agent Release)
0 to 2.1 Note 2
23.9
–15.4
23.9
0
0
Supervised Output (Notification)
–14.4
23.9
–15.4
23.9
0
0
Notes:
1. All measurements are in Volts and are measured in reference to the common terminal and 24.0 Vdc is the module’s input.
2. Value is dependent on the resistance of the solenoid attached.