Apple Compressor 3 User Manual
Page 334
The Destination Selection dialog appears.
3
Navigate to your chosen destination folder or open mounted volume, then click Open.
A new destination called Untitled Local-1 appears in the Custom folder of the Destinations
tab along with the path to the folder you just assigned.
4
Double-click the new destination in the Destinations tab.
The Inspector window opens, showing relevant information for the new destination.
5
Do either of the following in the Inspector:
• Modify the name of the new destination in the Name field.
• Modify the pathname of the new destination by clicking Choose to open the destination
selection dialog and navigating to a new folder.
6
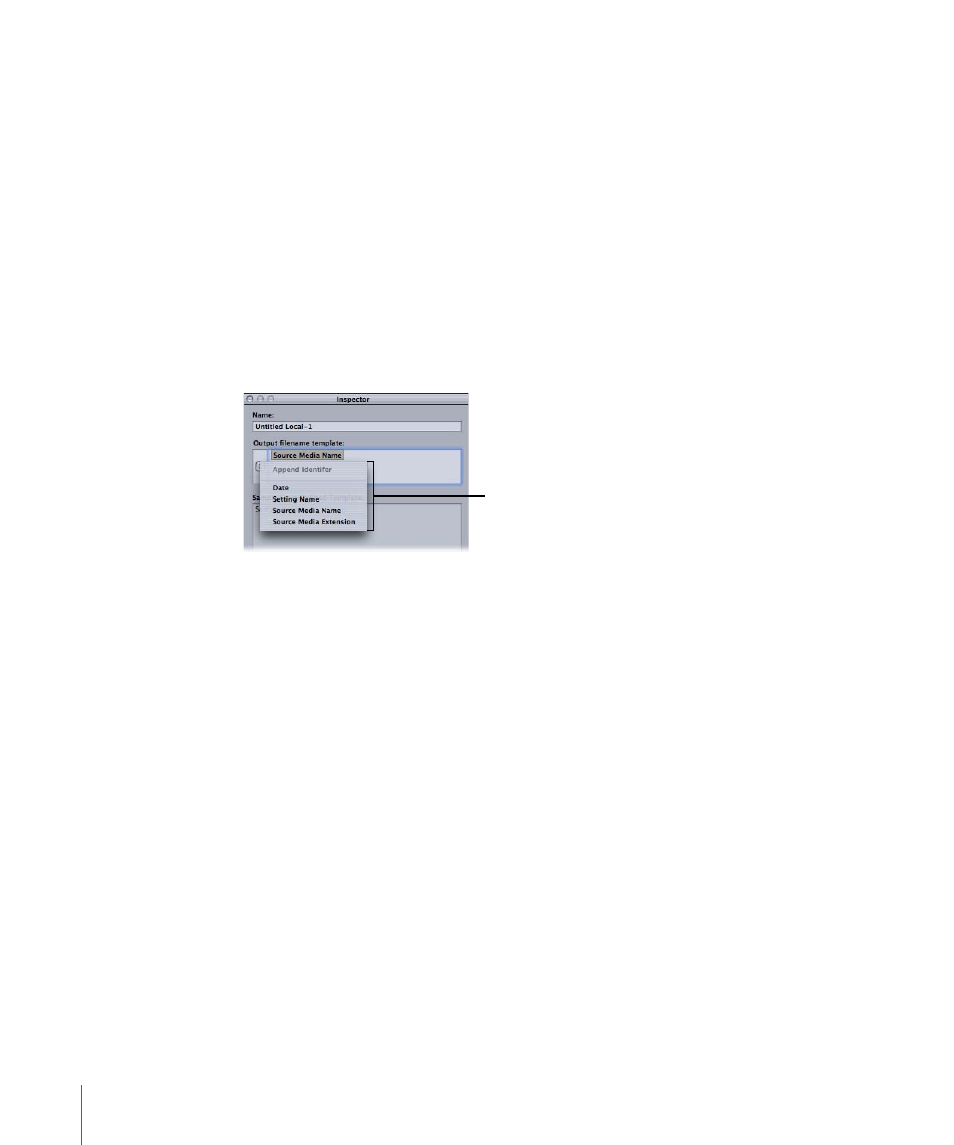
Add file identifiers to your output filename using the pop-up menu in the Template field.
Filename Template
pop-up menu
You can also manually edit this field by doing any of the following:
• Drag the file identifiers to rearrange their order.
• Click on either side of the file identifiers to type additional text.
• Use the Delete key on your keyboard to remove any of the file identifiers.
The Sample From Defined Template field in the Inspector window shows a sample of the
output filename with its chosen file identifiers. The default file identifier combination is
Source Media Name-Setting Name.
Note: Avoid customizing your filename templates with anything beginning with a period
(.). The resulting file will only be visible via the command line and not visible using the
Mac OS X Finder.
See
for more details about these settings.
To create a remote destination
1
Open the Destinations tab.
2
Click the Add (+) button and choose Remote from the pop-up menu.
The Remote destination dialog appears. For detailed information about the remote
destination dialog, see
About the Remote Destination Dialog
.
3
Enter information in the relevant fields, as necessary.
334
Chapter 27
Creating and Changing Destinations