Pulsafeeder Pulsar DLC User Manual
Page 98
93
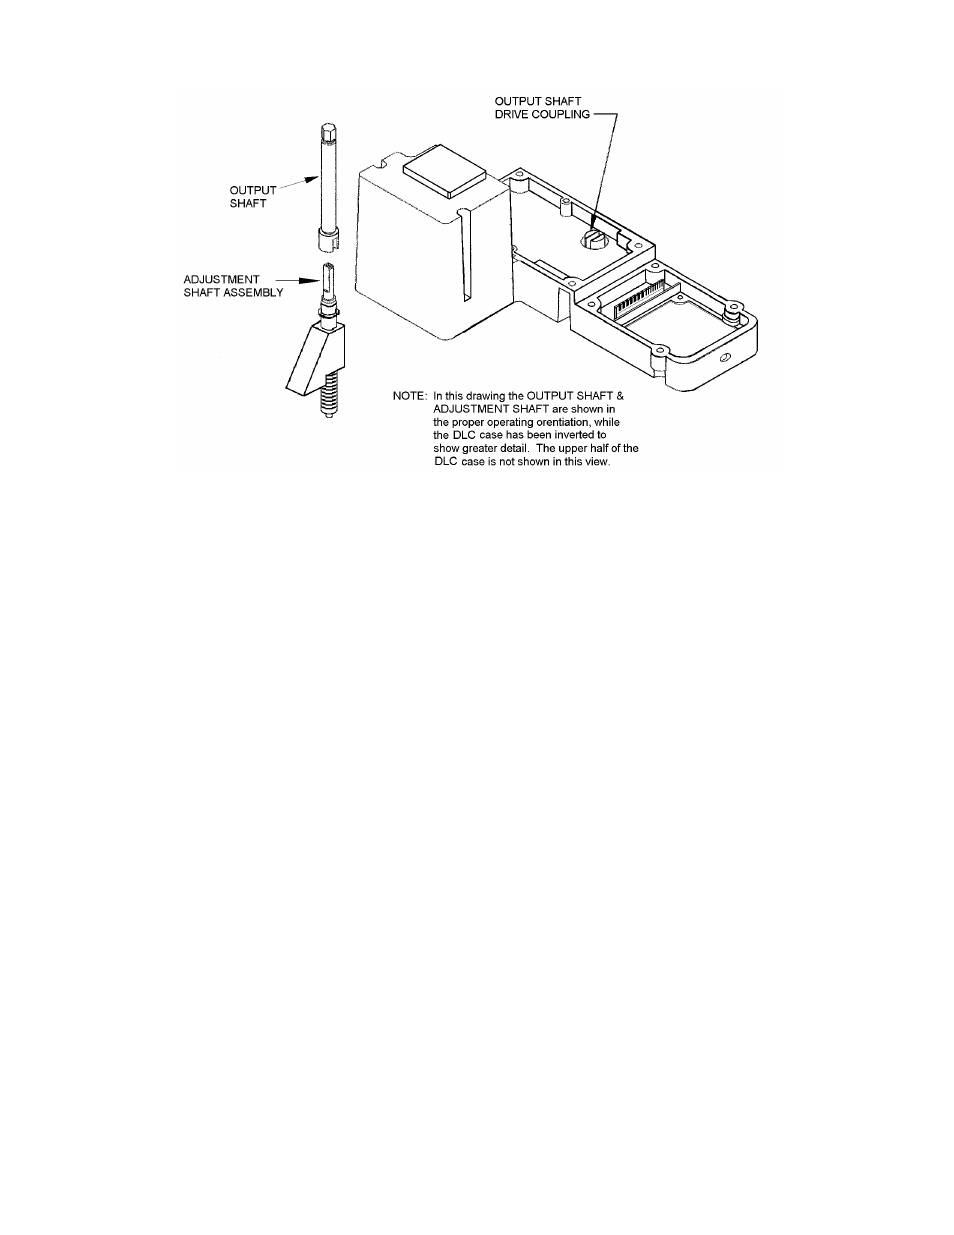
Figure 22 – DLC/Eccentric mating components
7. Locate the face on the bottom of the DLC that mates with the face of the lip of the eccentric box. The
DLC is oriented such that the control pad and display sit to the left of the pump's reagent head (as
viewed standing in front of the reagent head looking at the motor). The conduit connections and access
panel (with Serial Tag) reside at the rear of the pump near the gear box.
8. Orient the DLC properly at a comfortable height above the pump and align the slot in the DLC
coupling with the 'flats' on the adjustment shaft by turning the black hand knob on the DLC. Do not
turn the adjustment shaft!
9. Lower the DLC onto the eccentric box. It may be necessary to tip the DLC slightly towards the motor
to clear the motor adapter. With the DLC approximately 25mm (1 inch) above the eccentric box, make
a fine adjustment to align the slot in the DLC coupling with the adjustment shaft 'flats'. Once aligned,
lower the DLC to mate with the eccentric box. Do not force the cover! When the coupling is properly
aligned, the DLC will seat properly under its own weight.
10. Install the 4 DLC mounting screws and washers provided.
11. Remove the 4 wiring access panel screws.
12. Follow the instructions in Section 5 – Installation: Electrical Wiring of this manual for electrical
connections.
13. Perform the steps detailed in Section 6 – Start Up Instructions.
14. Review Section 7 – General Operation for detailed information on configuring your DLCM and its
advanced features.