Authentication settings for servers, Kerberos settings, Ldap settings – Samsung CLX-9250ND-XAA User Manual
Page 58: S (see "kerberos, See "ldap settings
Network setup_ 58
Authentication settings for servers
To send a scanned image through email or via a network server safely, you
must register the account information of authorized users to your local
machine or to the network server using SyncThru™ Web Service.
•
If user authentication has been activated, only authorized local users or
authorized users registered with the server (Kerberos, SMB, LDAP) can
send scanned data to the network (email, FTP, SMB).
•
For network scanning using the authentication feature, you must register
the network or local authentication configuration from the machine’s
display screen or the SyncThru™ Web Service (see"External
Authentication Server" on page 88).
Kerberos Settings
You can set kerberos server and realm settings for authentication.
Configure the settings and press OK to save the settings.
Press Machine Setup > Network Settings > Kerberos Settings from the
display screen.
You can also use this feature from the SyncThru™ Web Service.
Open the Web browser from your networked computer and type the IP
address of your machine. When SyncThru™ Web Service opens, click
Security > Network Security > External Authentication Server >
Kerberos Server (see "Kerberos Sever" on page 88).
Adding a Kerberos sever
1. Press Add to add a new Kerberos server.
•
Default Realm: Enter the default realm.
•
Default Server: Enter the server address.
•
Default Port No.: Enter the default port number. 88 is set as a
default value.
•
Backup Server: Enter the server address.
•
Backup Port No.: Enter the backup port number. 88 is set as a
default value.
•
Default Server: Check to use this server as the default
Kerberos server.
2. Press OK to save the change or Back (Cancel) to return to the
previous screen.
Editing a Kerberos server
1. From the list, select the Kerberos server you want to edit and press
Edit.
2. A pop-up window appears.
Edit the necessary information
3. Press OK to save the change or Back (Cancel) to return to the
previous screen.
Deleting a Kerberos server
1. From list select the Kerberos server you want to edit and press
Delete.
2. Press OK to save the change or Back (Cancel) to return to the
previous screen.
LDAP Settings
You can set LDAP (Lightweight Directory Access Protocol). LDAP is used
by large accounts to access large quantities of data, including corporate
address books. It can also be used for authentication. Configure the settings
and press OK to save the settings.
Press Machine Setup > Network Settings > LDAP Settings from the
display screen.
You can also use this feature from the SyncThru™ Web Service.
Open the Web browser from your networked computer and type the IP
address of your machine. When SyncThru™ Web Service opens, click
Security > Network Security > External Authentication Server >
LDAP Server (see "LDAP Server" on page 89).
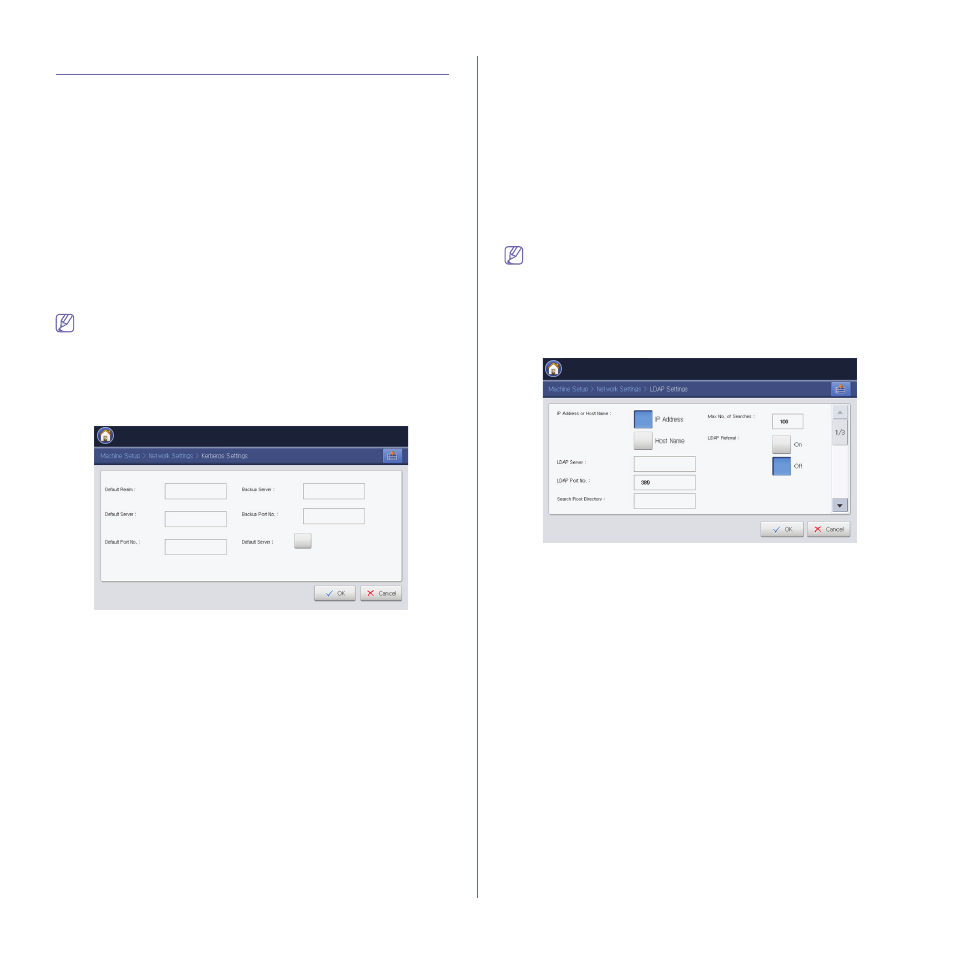
Adding a LDAP sever
1. Press Add to add a new LDAP server.
•
IP Address or Host Name: Select whether to use an IP
address or a host name.
•
LDAP Server: Enter the server address.
•
LDAP Port No.: Enter the server port number from 1 to 65535.
389 is set as a default value.
•
Search Root Directory: Enter the search root directory which is
the top search level of the LDAP directory tree. You can enter up
to 64 characters.
•
Max No. of Searches: You can set the maximum number of
results that need to be returned during LDAP address book
search.
•
LDAP Referral: Select whether to turn on or off the LDAP
Referral. If this option is ON, LDAP client will search referral
server if the LDAP server has no data to reply to query and if the
LDAP server has a referral server.
•
Search Timeout: You can set the maximum search timeout for
LDAP address book search.
•
Authentication method: Select the authentication method for
accessing the LDAP Server during the address book search.
-
Anonymous: Used to bind with null password and login ID
(Password and login ID are grayed out in SWS).
-
Simple: Used to bind with the login ID and password in
SWS.
•
Append Root to Base DN: Select whether to enable or disable