Prepare the cab cable access point, Attach harnesses to geosteer control unit – Ag Leader GeoSteer Installation Manual User Manual
Page 47
Prepare the Cab Cable Access Point
Hardware
Installation
Guide
37
Prepare the Cab Cable Access Point
In all installations cables will have to be routed into and out of the cab to the various sensors and components. Most vehicles
have a cab cable access point on the rear window, floor panel, or side bulkhead that allows this to happen easily with a
minimum amount of cab modifications. Always find the cab cable access point on the vehicle when starting to route harnesses
and prepare it so that the cables can be routed when needed.
Refer to the Connecting System Cables chapter in the vehicle-specific AutoSteer Installation
Manual provided with the installation kit to locate the cab cable access point for the vehicle the
system is being installed on.
Note: It is important to ensure the cables are protected where they are routed and that after the installation is complete, the
cable access point is resealed to ensure that outside air or moisture cannot get into the cab during normal machine operations.
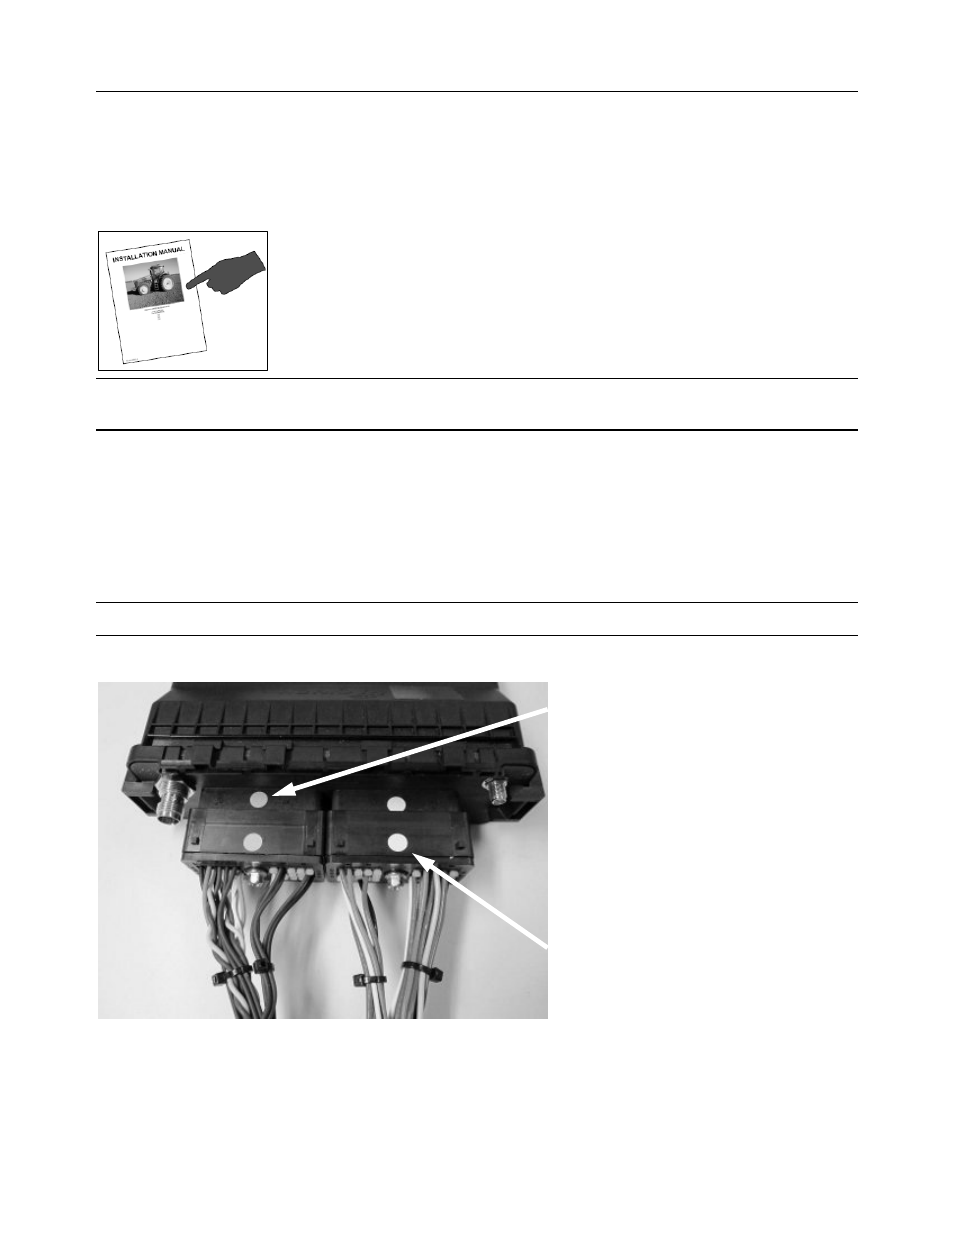
Attach Harnesses to GeoSteer Control Unit
The GeoSteer Control Unit has two 30 port connectors. These connectors are keyed so that the correct harnesses or plug can be
attached in the proper port and orientation. The connectors on the GeoSteer Control Unit and the cables also have a colored dot
to aid attaching the cables properly. The GeoSteer Main Cable Harness is represented by a Yellow dot and the Vehicle Specific
Harnesses are represented by a White dot. Always verify that the colored dots match before attaching the Harnesses.
Note: Never force the connectors, the connectors should easily slide into place. Forcing the connector may damage the system.
Figure 8-11 GeoSteer Control Unit Cable Identifying Dots
GeoSteer Main Cable Harness - Yellow
Vehicle Specific Cable Harnesses - White