Basestati on headset connecti on and controls, Set the mic gain for the local headset – Clear-Com Tempest2400 User Manual
Page 42
36
Tempest®24 00 2 -Channel Wireless Intercom System
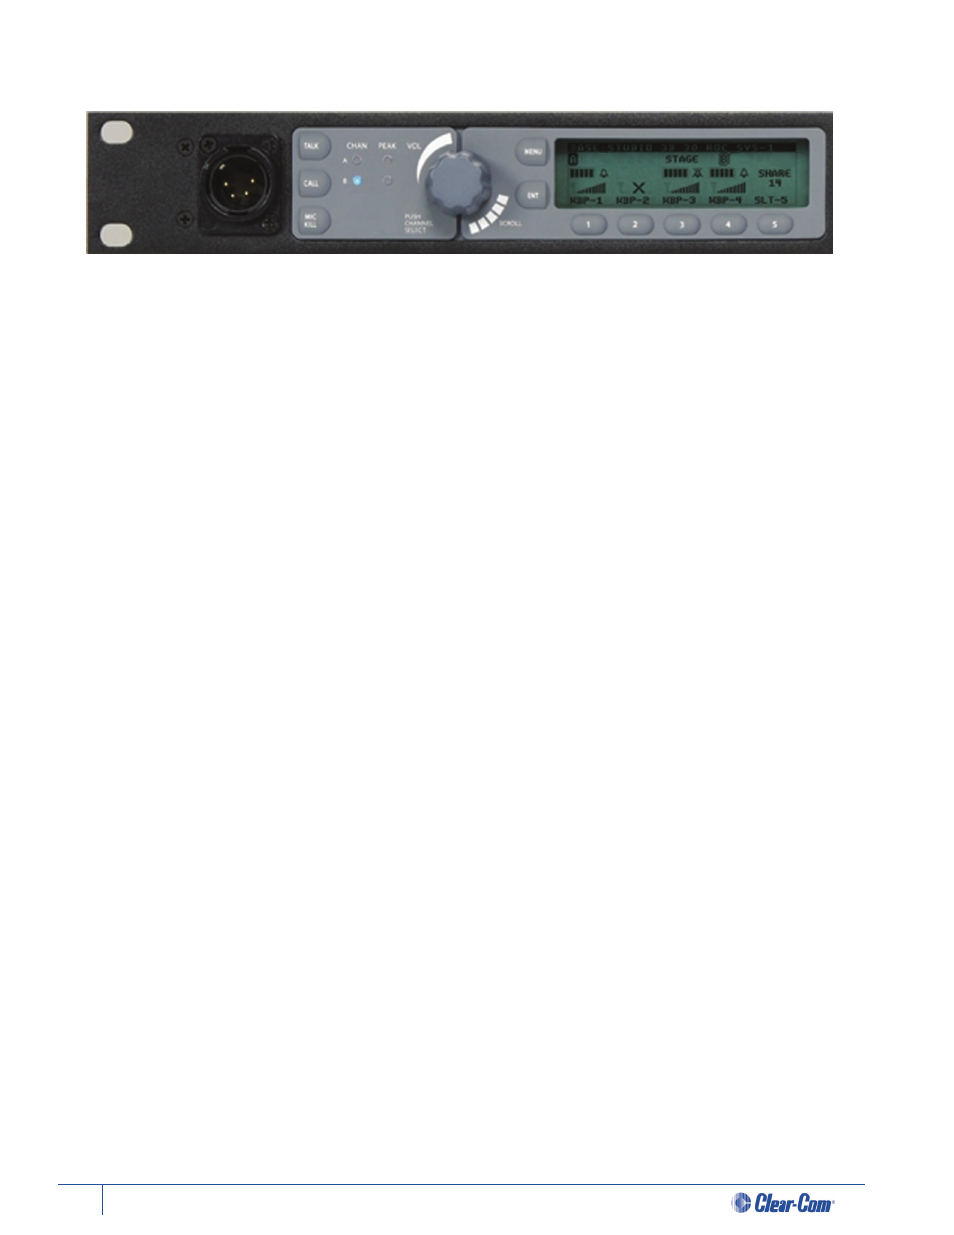
BaseStati on Headset Connecti on and Controls
The BaseStati on headset connecti on is a functi onal user communicati on point, and may also be used for setup and
troubleshooti ng. The Front Panel Headset can communicate on any one of the two intercom channels. Controls for this
headset are located just to the right of the connector, and in the menu on the BaseStati on Setti ngs screen.
The front panel headset connector is a 4-PIN XLR male. A compati ble headset must be provided by the user.
The TALK butt on enables or disables the microphone for the local headset. A blue LED will backlight the word “TALK” on
the TALK butt on when the mic is enabled. Always keep the microphone disabled (TALK OFF) when not in use.
Tempest uses an intelligent latching method for TALK butt ons. Pressing the TALK butt on momentarily (less than two
seconds) will latch the mic butt on. The blue “TALK” LED will remain lit and the microphone will remain enabled. Pressing
and holding the TALK butt on will cause the butt on to act in a momentary or push-to-talk fashion, so the blue “TALK” LED
will remain lit and the microphone will remain enabled only as long as the butt on is pressed.
In Operati onal Mode, turning the Volume control adjusts the volume of the audio of the local headset. Turning the
Volume control clockwise increases the audio level while turning the control counter clockwise decreases the level. The
Volume control knob is also a push butt on. Pressing the Volume control cycles the Channel selecti on and LEDs in order
from A to B .
The two Peak LEDs indicate when the mic audio from the local headset is reaching a peak level and is about to enter into
limiti ng. These LEDs should normally be OFF.
Set the Mic Gain for the Local Headset
Set the Mic Gain properly to assure the best audio quality. To set the Mic Gain for the Local Headset:
1. Press MENU to enter Menu Mode.
2. From the Main Menu select “BaseStati on Setti ngs,” then “Set Mic Gain.”
3. While at the “Set Mic Gain” screen, talk into the local headset microphone in a louder than normal level and adjust the
Volume control unti l the Peak LED for the selected channel just starts to light at the loudest parts of the audio. Press ENT to
accept the changes.
When the Mic Gain is set too high, it is possible to induce feedback or echo. When set too low, words can be clipped
by the low level noise gate, or may sound too quiet to other listeners. Headsets by diff erent manufacturers or diff erent
models of headsets will require widely varying Mic Gain setti ngs. When setti ng microphone gain, it is best to err toward
a setti ng that is too low, rather than too high. This will help reduce unwanted echo in the system when that microphone
is enabled.