0 installation – Alpha Technologies XM3-HP Series - Technical Manual User Manual
Page 41
41
017-882-B0-001 Rev. C2 (10/2013)
2.0
Installation
2.2
XM3-HP Start-Up Procedure, continued
2.2.2 Battery Installation Options and Wiring Diagram, continued
CAUTION!
Threaded insert terminals require the use of 3/4" (19mm) bolts. The use of 1" (25.4mm) bolts will seriously
damage the battery. The only exception is the terminal with the large spacer for the in-line fuse link. Apply
NO-OX grease on all exposed connections.
Torque all nuts and bolts to 110in-lbs (12.43N-m).
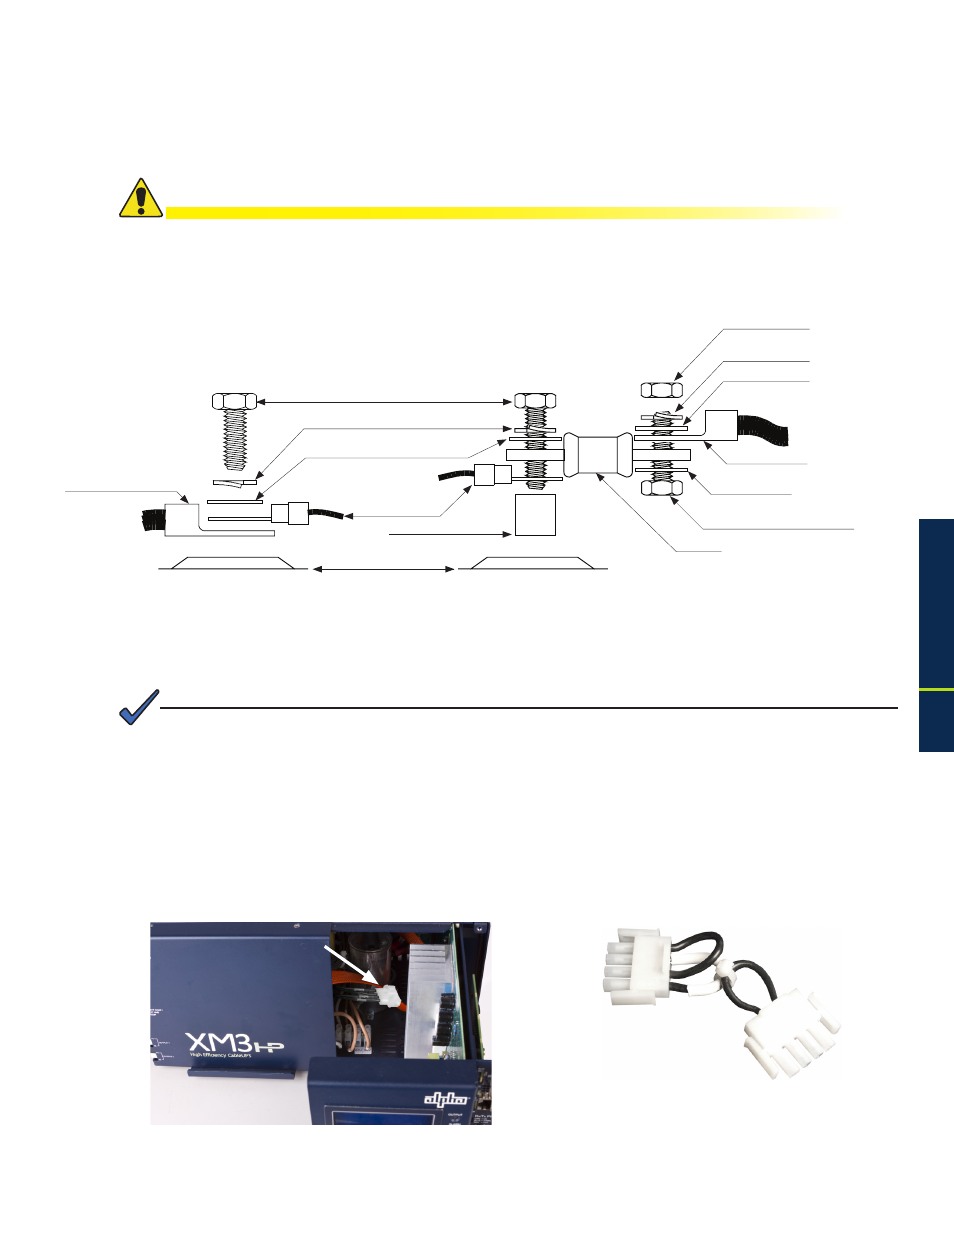
2.2.2.1 Threaded Insert Terminals
Fig. 2-7, Battery Terminal Bolt Stack-up
Fig. 2-8, Fuse Bolt Stack-up
2.0
Installation, continued
3/4" (19mm) x 1/4-20 Bolt
3/4" (19mm) x 1/4-20 Bolt
Battery Sense
Cable or PTS
Battery Terminal
1/4-20 Nut
Split Washer
Split Washer
Flat Washer
Flat Washer
Battery Cable
Battery Cable
Flat Washer
Spacer
Fuse
2.2.3 120/240V Configuration Procedure
This procedure is for the XM3-918D-HP only.
NOTE:
Procedure:
1. Remove the Inverter Module to access the Transformer Harness (see Fig. 2-9).
2. Connect the appropriate connector to the Transformer Harness. For the 120V
configuration, connect the end with two wires. For the 240V configuration, connect the end
with only one wire (see Fig. 2-10).
Fig. 2-9, Transformer Harness
Fig. 2-10, 120/240V Connector
120V
240V
p/n 744-281-20
p/n 744-281-21