0 installation – Alpha Technologies XM3-HP Series - Technical Manual User Manual
Page 40
40
017-882-B0-001 Rev. C2 (10/2013)
2.0
Installation
Smart AlphaGuard (Embedded) — use Battery Harness, p/n:
875-848-20 for one string
875-848-21 for two strings
875-848-22 for three strings
875-848-23 for four strings.
AlphaGuard (external) — use Battery Harness, p/n 875-090-32.
Upgrade existing external AlphaGuard to Smart AlphaGuard — use Retrofit Cable, p/n:
875-910-20 for one string
875-910-21 for two strings
875-910-22 for three strings
875-910-23 for four strings.
Adapt Smart AlphaGuard harness to legacy DSM3/DSM3x connector — use Adaptor Cable, p/n 876-003-20.
DSM3 (1 battery string) — use Battery Sense Harness, p/n 874-842-21 (Not required if Smart AlphaGuard is installed with
its sense harness).
DSM3 (2 battery strings) — use Battery Sense Harness, p/n 874-842-28 (Not required if Smart AlphaGuard is installed with
its sense harness).
DSM3x (3 battery strings) — use Battery Sense Harnesses, p/n 874-842-21 and 874-842-28 (Not required if Smart
AlphaGuard is installed with its sense harness).
DSM3x (4 battery strings) — use Battery Sense Harness, p/n 874-842-20 and 874-842-28 (Not required if Smart
AlphaGuard is installed with its sense harness).
Load batteries into cabinet with the positive terminals (+) facing forward. Battery strings are
lettered A through D; batteries are numbered 1 through 3, from right to left.
To Power Supply
Black
Red
PTS
2
1
5
7
3
6
6
6
2.2
XM3-HP Start-Up Procedure, continued
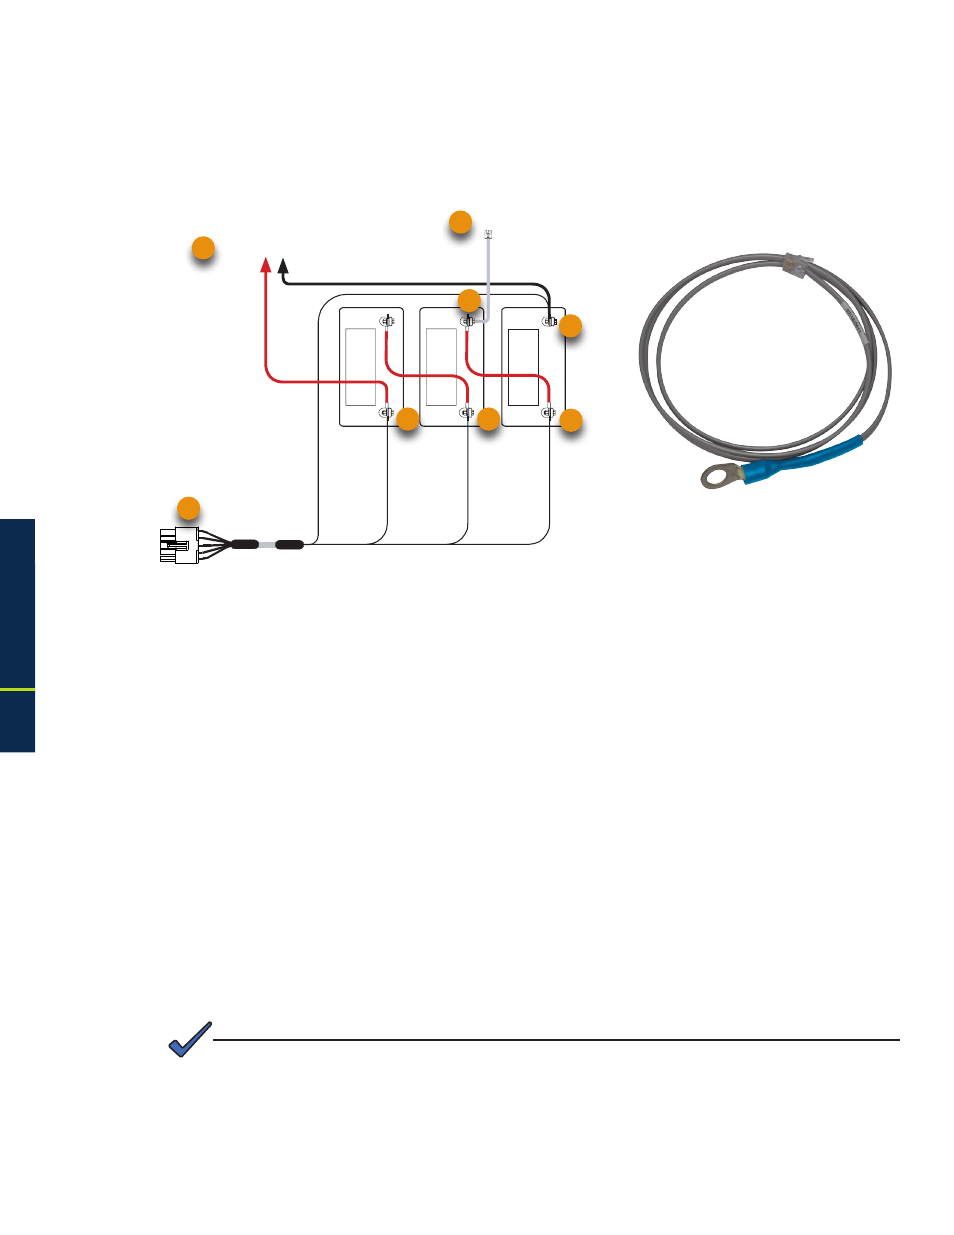
2.2.2 Battery Installation Options and Wiring Diagram
Fig. 2-5, Battery Wiring Diagram
(w/ embedded SAG option depicted)
Vbatt 3A
36V
Red, Pin 9
A/B/C/D NEG Black, Pin 5
Vbatt 2A
24V
Orange, Pin 4
Vbatt 1A
12V
Brown, Pin 10
2.0
Installation, continued
A3
A2
A1
Fig. 2-6, Precision Temperature
Sensor (PTS), p/n 746-331-20
(String -) 0V
POS(+)
NEG(-)
NEG(-)
NEG(-)
POS(+)
POS(+)
A NOTE provide additional information to help complete a specific task or procedure.
NOTE: