Configuration with the vnm 250 gui, Configuring a vne 250, Configuration with the vnm – Extron Electronics VN-Matrix 250 User Guide User Manual
Page 72: Configuration with, The vnm 250 gui
Configuration with
the VNM 250 GUI
This section provides information about configuring the VN Matrix system with the VNM 250
GUI control program.
NOTE: The VNM 250 GUI control program should only be used with small systems (10
devices or fewer). For larger systems, the VNM Enterprise Controller must be used.
z
z
z
z
z
z
RS-232 Pass-through Configuration
Configuring a VNE 250
1.
Ensure that a source device (analog or HDMI) is connected to the encoder (see
If required, connect a loop‑through display.
2.
If required, ensure that the analog program audio input is connected (see
3.
If required, ensure that the return audio output is connected.
4.
5.
(see page 35), click on the VNE 250 you wish to configure. The
Device tab opens.
6.
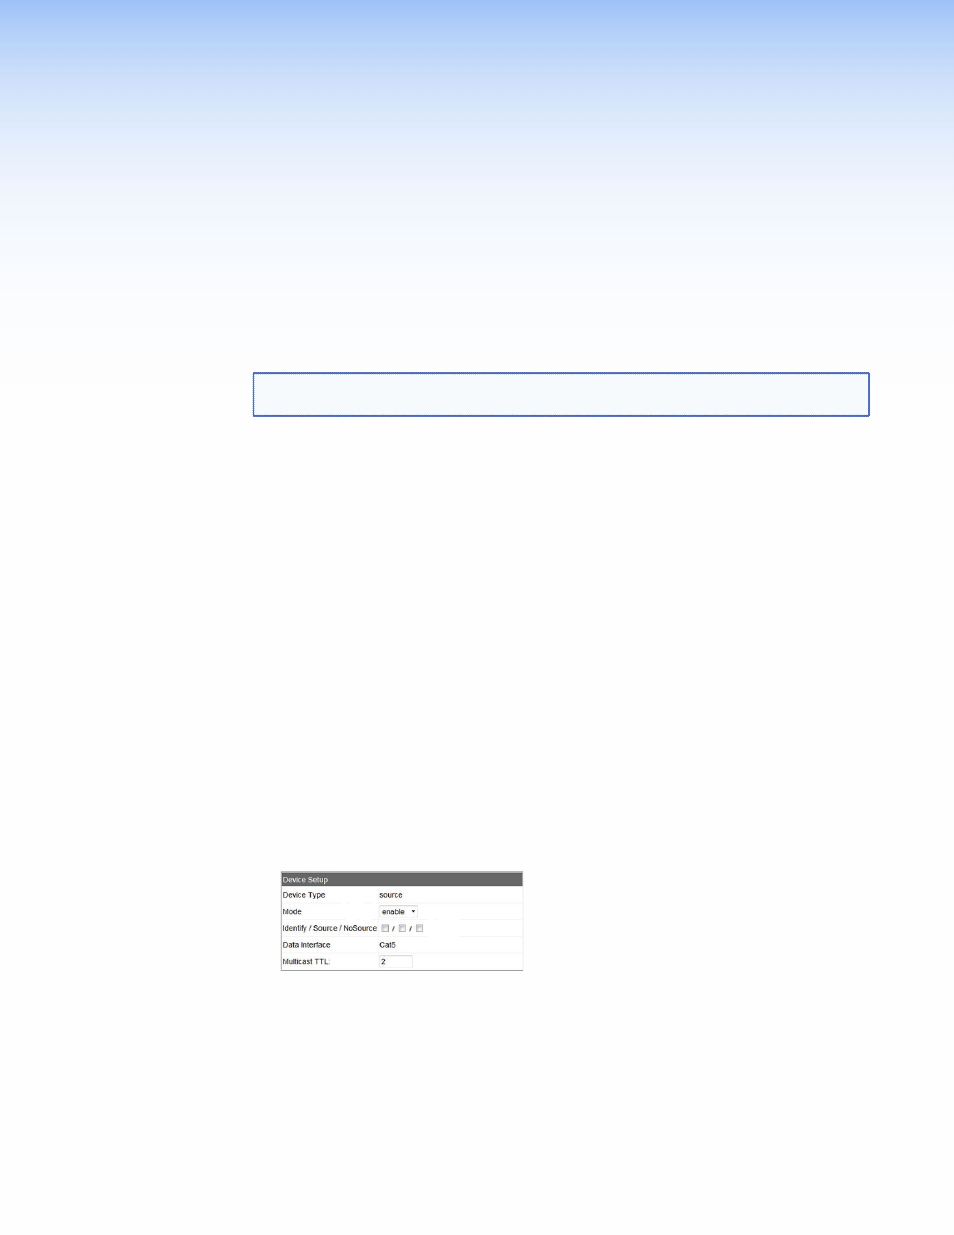
Ensure the
Mode
is set to
enable
in the
Device
Setup
panel (see figure 46,
1
):
1
1
2
2
Figure 46.
Device Setup Panel
7.
Configure the on‑screen text overlay, which appears on the pass‑through monitor, as
required (see figure 46,
2
).
8.
Click the
Save All
tab.
VNM 250 • Configuration with the VNM 250 GUI
66