Figure461. removing the system board, Fru:system board:installation – HP B1000 User Manual
Page 148
148
Chapter 4
Field Replaceable Units
FRU Removal and Replacement
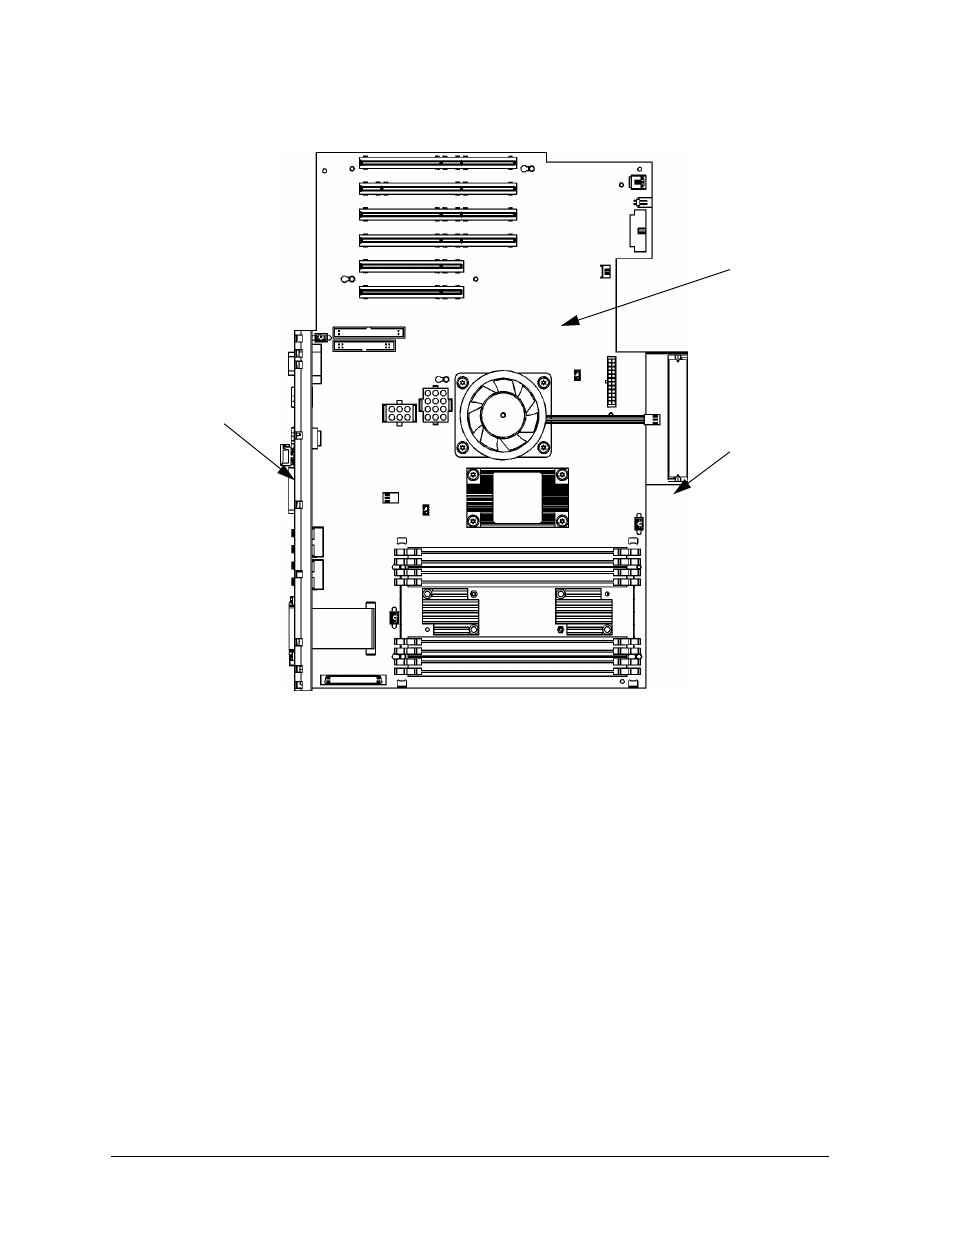
Figure 4-61. Removing the System Board
8. Fold back the workstation cables to avoid interference or damage.
9. Grasp the system board tray handle and slide the system board to the front of the
workstation. The system board tray keyholes are unlatched from the chassis wall hooks.
Lift the system board up then rotate to clear the top chassis hem and remove.
Installing the System Board Tray Assembly
To install the system board perform the following steps:
1. Angle the system board assembly diagonally as you begin installation. Position the
system board flat inside the chassis. Slide the system board tray slightly to the front
and then to the rear of the workstation to engage the chassis wall hooks. See Figure
4-62.
System Board
Right
Left
Edge
Edge