Figure457. installing memory cards, Close the ejector tab, Fru:memory:removing – HP B1000 User Manual
Page 143: Lay the system on its side as shown in, Figure 4-57.. installing memory cards, Ards installation. see figure 4-57, Figure 4-57
Chapter 4
143
Field Replaceable Units
FRU Removal and Replacement
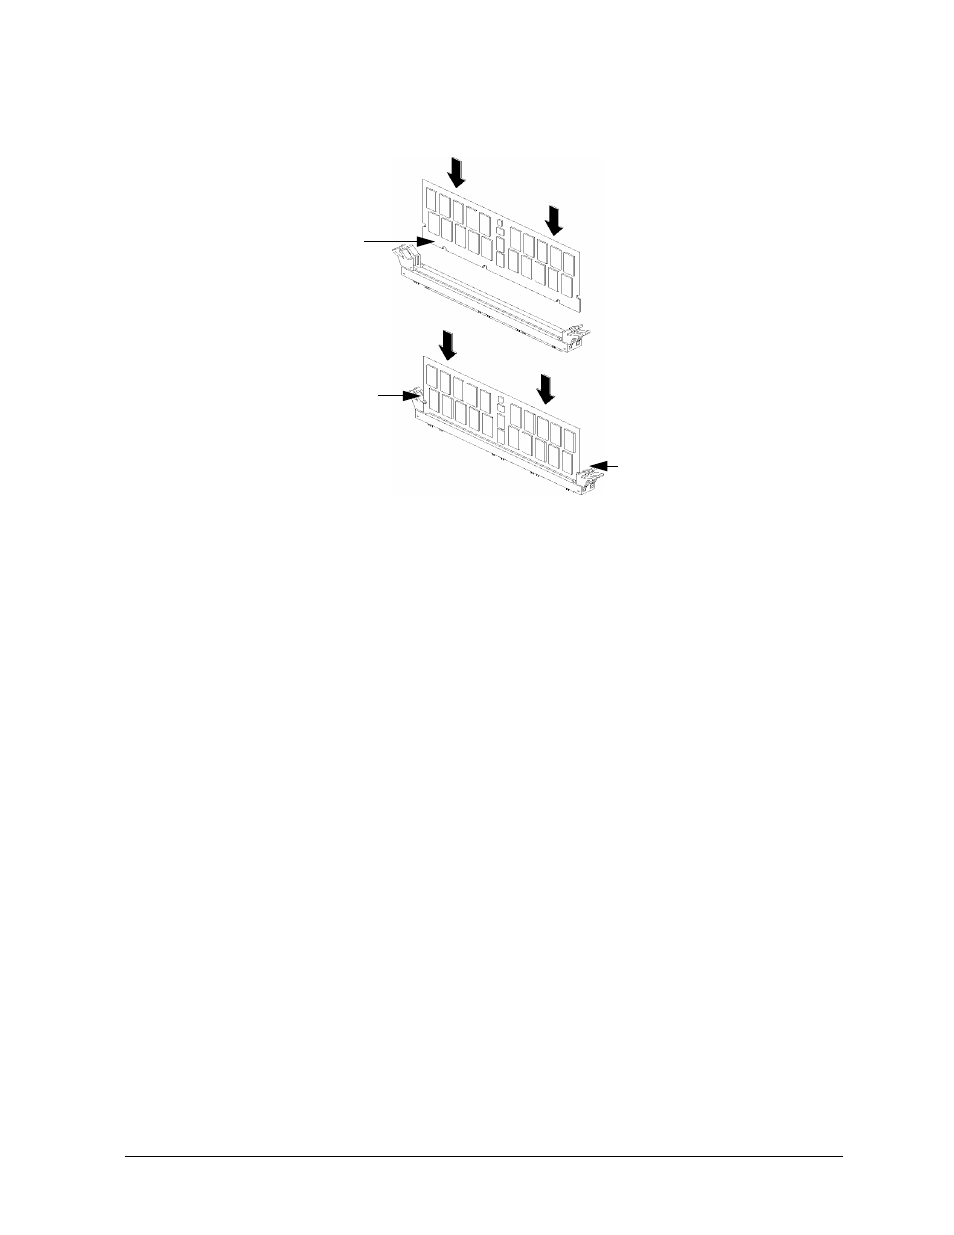
Figure 4-57. Installing Memory Cards
7. Place the DIMM card in the connector, lining it up with the guides. Make sure to put
the notched end toward the white ejector tab (to the left). See Figure 4-57.
8. Close the ejector tab.
9. Press firmly and evenly on the DIMM card to ensure that it seats properly. The ejector
tabs engage when the DIMM is properly seated.
10.Replace the power supply and workstation left side panel. You may now plug the power
cord back in to the electrical outlet.
11.Verify that this installation was successful by following the steps in Chapter 6, “The
Boot Console Handler.” If you have only replaced a faulty DIMM, you must execute the
pdt clear
command in the service menu of the Boot Console Handler. Answer yes (
Y
)
to the prompt “
Continue? (Y/N) >
.”
Once you have completed the steps listed above, the DIMM cards are properly loaded.
Removing Memory
Perform the following steps to remove memory (DIMM cards) from the system unit.
1. Open the side panel of the system unit as explained in the section “Opening the Left
Side Panel of the System Unit” in this chapter.
2. Lay the system on its side as shown in Figure 4-58.
Press down on ejector tabs to open
them and place the DIMM card in
the connector so that your fingers
are on the edge of the DIMM card.
Push the DIMM card down firmly
and evenly into the connector to
be sure it is properly seated.
White Ejector Tab
Black
Ejector Tab
Notches
Step 1
Step 2