11 measure coordinate (cycle 427, din/iso: g427), Cycle run, Please note while programming – HEIDENHAIN TNC 320 (34055x-06) Cycle programming User Manual
Page 358: Cycle parameters, Measure coordinate (cycle 427, din/iso: g427)

Touch Probe Cycles: Automatic Workpiece Inspection
16.11 MEASURE COORDINATE (Cycle 427, DIN/ISO: G427)
16
358
TNC 320 | User's Manual Cycle Programming | 5/2013
16.11
MEASURE COORDINATE (Cycle 427,
DIN/ISO: G427)
Cycle run
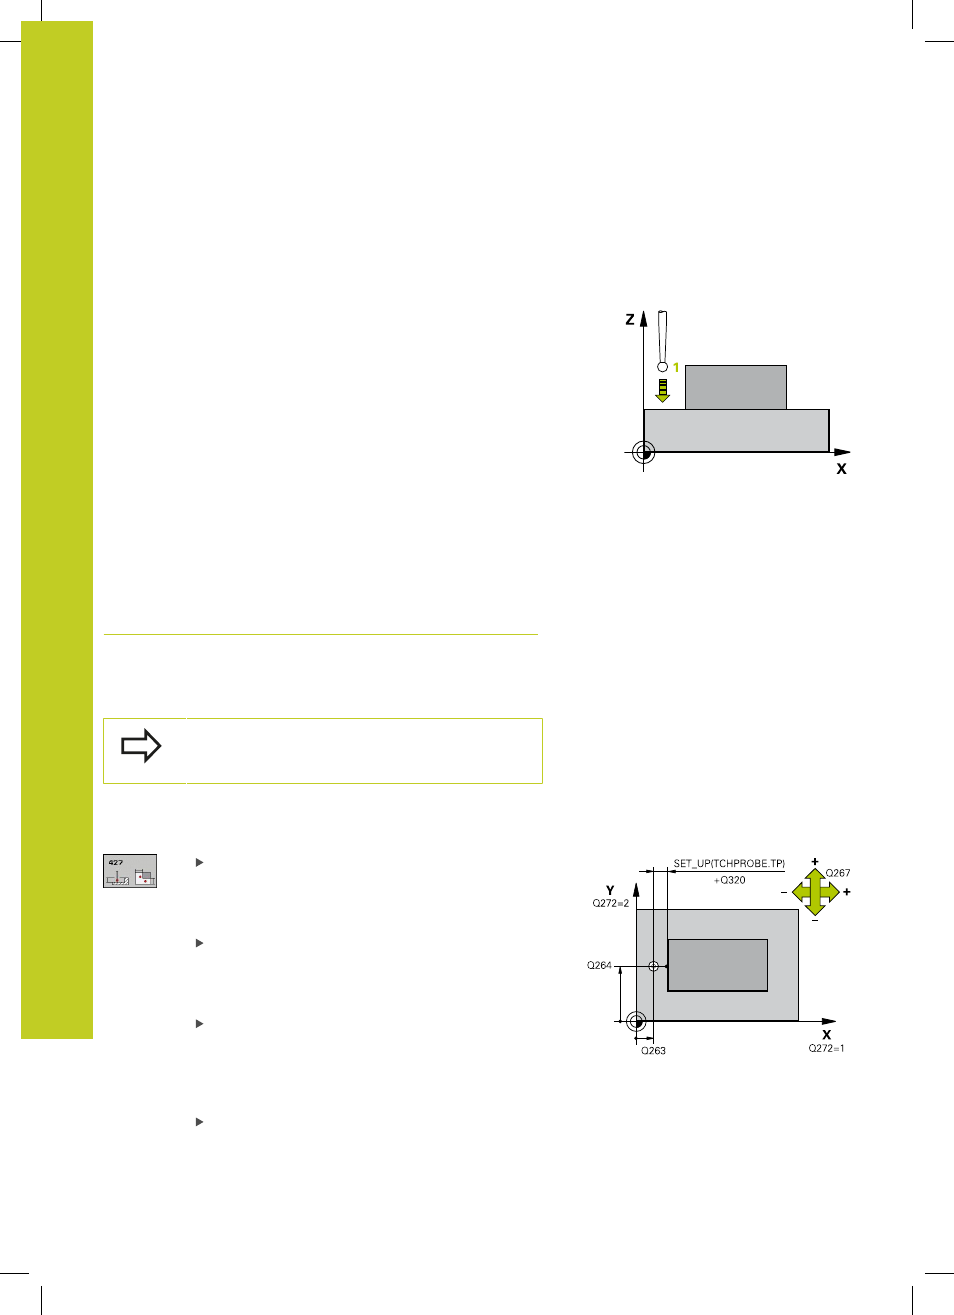
Touch Probe Cycle 427 finds a coordinate in a selectable axis
and saves the value in a system parameter. If you define the
corresponding tolerance values in the cycle, the TNC makes a
nominal-to-actual value comparison and saves the deviation value in
system parameters.
1 The TNC positions the touch probe at rapid traverse (value from
FMAX column) following the positioning logic (See "Executing
touch probe cycles", page 259) to the starting point
1
. The TNC
offsets the touch probe by the safety clearance in the direction
opposite to the defined traverse direction.
2 Then the TNC positions the touch probe to the entered touch
point
1
in the working plane and measures the actual value in
the selected axis.
3 Finally the TNC returns the touch probe to the clearance
height and saves the measured coordinate in the following Q
parameter.
Parameter number
Meaning
Q160
Measured coordinate
Please note while programming:
Before a cycle definition you must have programmed
a tool call to define the touch probe axis.
Cycle parameters
1st meas. point 1st axis Q263 (absolute):
Coordinate of the first touch point in the reference
axis of the working plane. Input range -99999.9999
to 99999.9999
1st meas. point 2nd axis Q264 (absolute):
Coordinate of the first touch point in the minor axis
of the working plane. Input range -99999.9999 to
99999.9999
Measuring height in the touch probe axis Q261
(absolute): Coordinate of the ball tip center (=
touch point) in the touch probe axis in which
the measurement is to be made. Input range
-99999.9999 to 99999.9999
Set-up clearance Q320 (incremental): Additional
distance between measuring point and ball tip.
Q320 is added to
SET_UP (touch probe table). Input
range 0 to 99999.9999
