HEIDENHAIN TNC 320 (34055x-06) Cycle programming User Manual
Page 280

Touch Probe Cycles: Automatic Measurement of Workpiece
Misalignment
14.8 Example: Determining a basic rotation from two holes
14
280
TNC 320 | User's Manual Cycle Programming | 5/2013
14.8
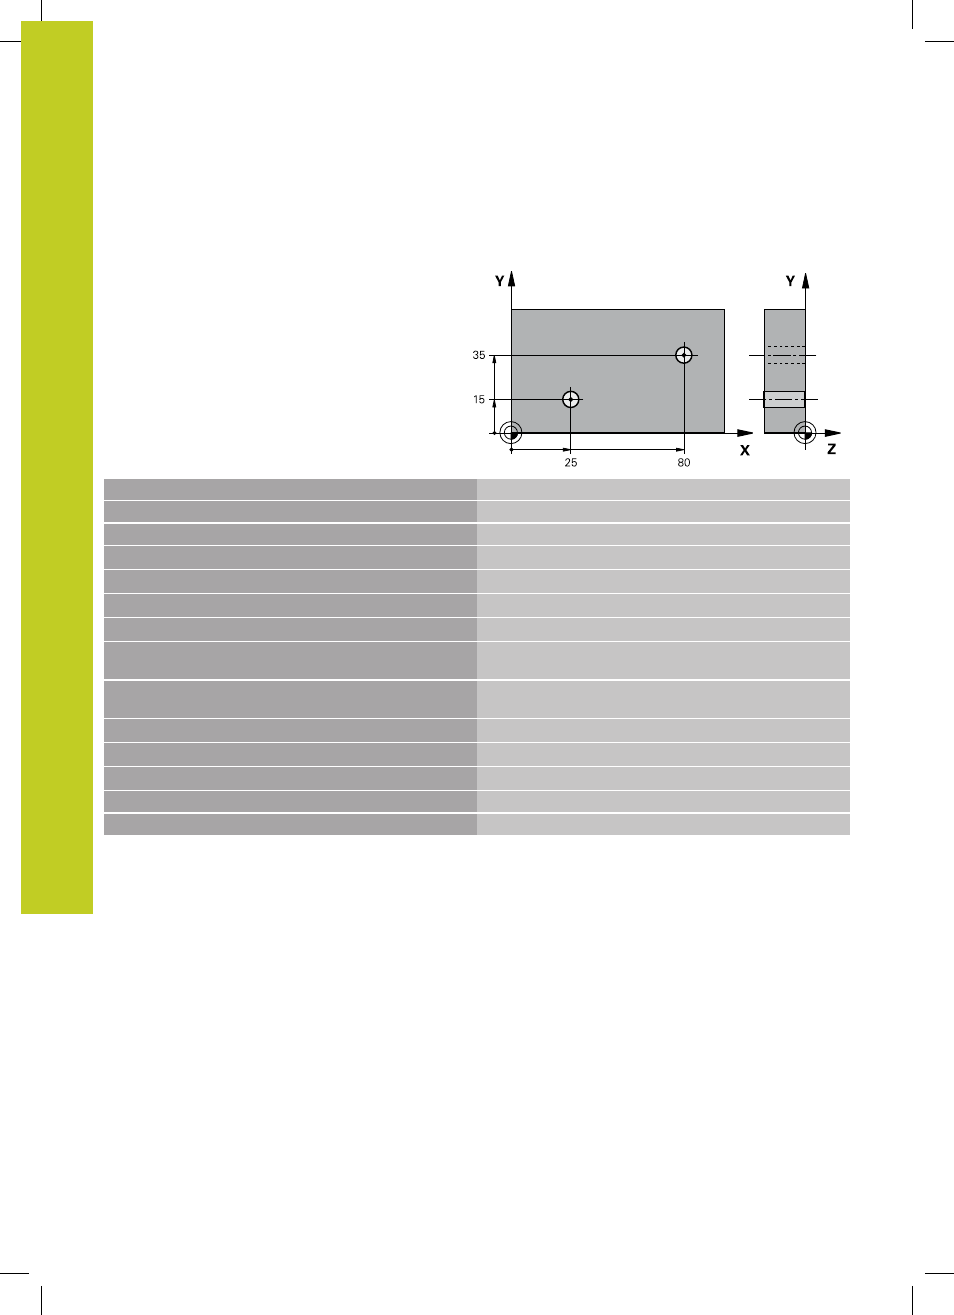
Example: Determining a basic rotation
from two holes
0 BEGIN PGM CYC401 MM
1 TOOL CALL 69 Z
2 TCH PROBE 401 ROT OF 2 HOLES
Q268=+25
;1ST CENTER 1ST AXIS
Center of the 1st hole: X coordinate
Q269=+15
;1ST CENTER 2ND AXIS
Center of the 1st hole: Y coordinate
Q270=+80
;2ND CENTER 1ST AXIS
Center of the 2nd hole: X coordinate
Q271=+35
;2ND CENTER 2ND AXIS
Center of the 2nd hole: Y coordinate
Q261=-5
;MEASURING HEIGHT
Coordinate in the touch probe axis in which the
measurement is made
Q260=+20
;CLEARANCE HEIGHT
Height in the touch probe axis at which the probe can
traverse without collision
Q307=+0
;PRESET ROT. ANGLE
Angle of the reference line
Q402=1
;COMPENSATION
Compensate misalignment by rotating the rotary table
Q337=1
;ZERO RESET
Set the display to zero after the alignment
3 CALL PGM 35K47
Call part program
4 END PGM CYC401 MM
- TNC 122 User Manual (63 pages)
- TNC 122 Technical Manual (70 pages)
- TNC 360 Service Manual (157 pages)
- TNC 416 Technical Manual (510 pages)
- TNC 335 Technical Manual (581 pages)
- TNC 360 User Manual (237 pages)
- TNC 360 ISO-Programmierung (2 pages)
- TNC 415 (280 540) User Manual (227 pages)
- TNC 370D (92 pages)
- TNC 416 (289 pages)
- TNC 415 (280 540) Technical Manual (752 pages)
- TNC 415 (259 96x) Service Manual (195 pages)
- TNC 407 (280 580) User Manual (376 pages)
- iTNC 530 (340 420) Pilot (104 pages)
- TNC 407 (280 580) ISO Programming (333 pages)
- TNC 415 (280 540) Service Manual (252 pages)
- PT 880 Installation (112 pages)
- ND 100 User Manual (116 pages)
- ND 287 User Manual (147 pages)
- ND 280 Quick Start (12 pages)
- ND 200 (156 pages)
- ND 282 (10 pages)
- ND 287 Quick Start (26 pages)
- ND 282 B (39 pages)
- ND 281 A (44 pages)
- ND 281 B v.1 (53 pages)
- ND 281 B v.2 (65 pages)
- ND 221 v.2 (10 pages)
- ND 231 B v.2 (56 pages)
- ND 231 B v.1 (44 pages)
- ND 221 B v.2 (45 pages)
- ND 550 v.2 (8 pages)
- NDP 560 (10 pages)
- ND 523 (93 pages)
- ND 570 (8 pages)
- ND 750 v.2 (46 pages)
- ND 760 v.3 (72 pages)
- ND 770 v.1 (40 pages)
- ND 770 v.3 (41 pages)
- ND 760 E (44 pages)
- IOB 49 (21 pages)
- NDP 960 (68 pages)
- ND 780 Installation (132 pages)
- ND 970 (47 pages)
- ND 1100 Quick Start (36 pages)
