Grass Valley Xbuilder Vertigo Suite v.4.8 User Manual
Page 57
Vertigo Suite v.4.6 Release Notes (GA)
5-11
Performing Quality Control (QC) and Media Check (MC)
Using AE Plug-in and the Make List to create and ingest
graphics
The QC workflow uses the Vertigo After Effects Plug-in’s M
ERGE
M
ODE
to create and ingest the
graphics files (clips and/or cel animations) into the Xmedia Server. Using the Make List
spreadsheet as an input, Merge Mode creates the graphics files from the specified Adobe After
Effects Project composition(s) and then ingests them to the destination categories on the XMS.
To use the After Effects Plug-in and Make List to create and ingest graphics files:
1.
Launch Adobe After Effects and select the F
ILE
>E
XPORT
>M
IRANDA
A
NIMATION
(M
ERGE
M
ODE
) menu command.
A message appears warning you that the project you currently have open will be closed
without saving. To continue, simply click OK.
The E
XPORT
M
IRANDA
A
NIMATION
dialog box appears (figure
5-10
).
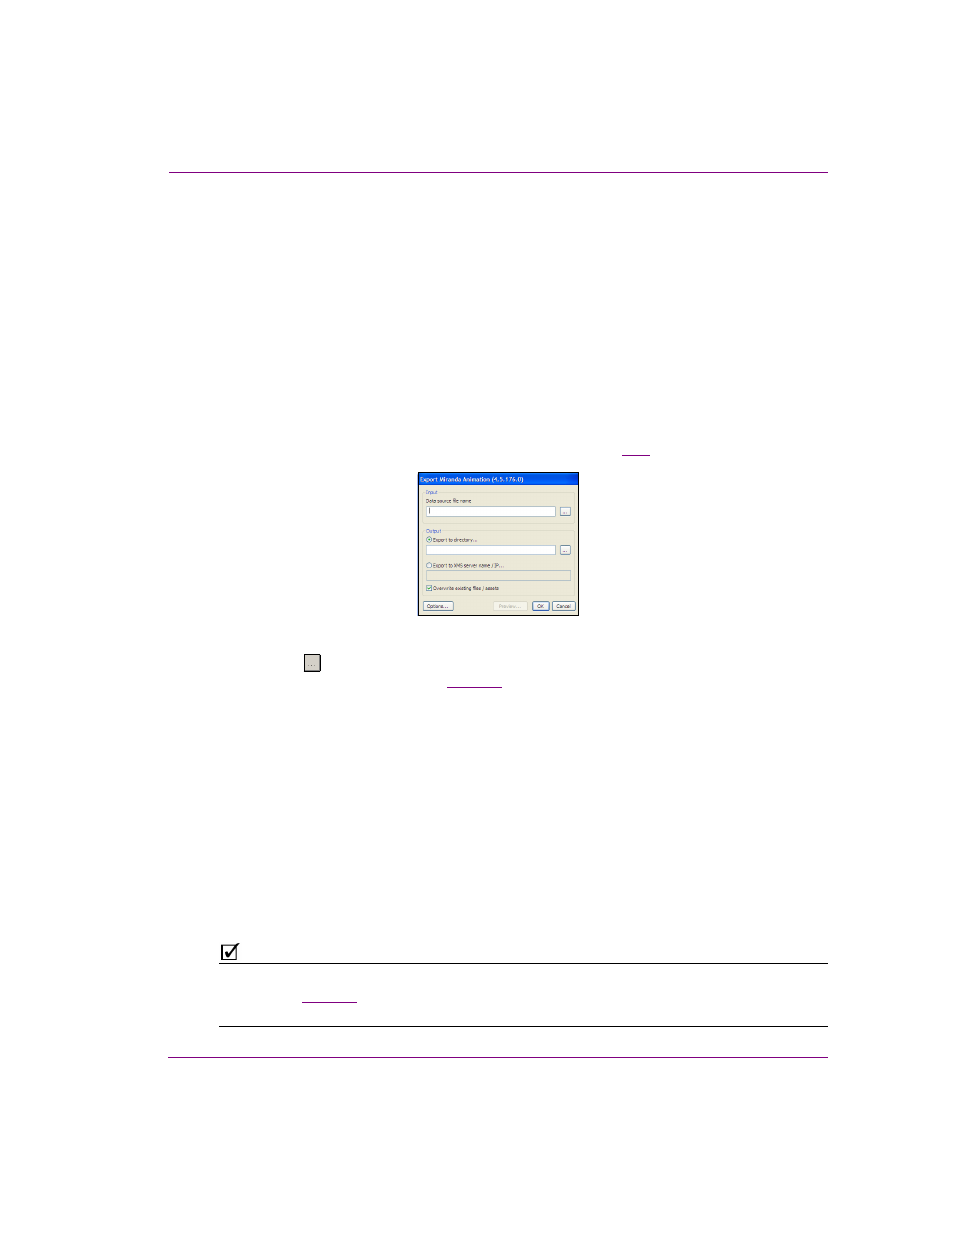
Figure 5-10. The Export Miranda Animation dialog box
2.
Click the
button in the I
NPUT
- D
ATA
SOURCE
FILE
NAME
field to navigate to and select
the Make List spreadsheet (see
).
3.
In the Output destination section, enable E
XPORT
TO
XMS
SERVER
NAME
/ IP and then
type either the Xmedia Server’s hostname or the IP address of the XMS device where
the output files will be ingested to.
4.
Enable O
VERWRITE
EXISTING
FILES
/
ASSETS
if you wish to automatically replace an existing
file that may already exist using the exact same name in the exact same location.
5.
Select the O
PTIONS
button to expose advanced options, which specify how the
graphics files will be created, including specifying the looping behavior. See the “A
FTER
E
FFECTS
P
LUG
-
IN
U
SER
M
ANUAL
” for more information.
6.
Create the graphics files by clicking OK.
The E
XPORT
M
IRANDA
A
NIMATION
dialog box closes and the E
XPORT
P
ROGRESS
dialog
box appears to track the graphics files’ creation.
7.
Verify that the files were ingested into the Xmedia Server by opening Xbuilder and navigate
through the Asset Browser to the expected destination category and subfolder.
N
OTE
If the subfolders were not previously set to automatically publish the assets to the target
devices (see
), you must open Xplorer and manually publish the assets to the
preview and verify devices before proceeding.