Grass Valley Kayak HD Installation v.6.8.8 User Manual
Page 43
Kayak HD — Installation and Service Manual
43
8 RU Frame
Make sure to provide adequate ventilation for the Kayak HD Frame. When
installing the frame in the rack, take care that no ventilation holes are
blocked. This can prevent cooling air from reaching the frame and cause it
to overheat.
There are air intake holes on the right side of the frame (as you face the
frame front) and air exhaust holes on the left.
CAUTION A minimum vertical clearance of 7.62 mm (0.3-in.) above the Kayak HD 8 RU
frame door is required to remove the door. When installing the Kayak HD 8
RU frame in the rack, take care to leave room for removal of the front door.
The front door lifts off vertically and must have sufficient clearance room in
order to remove it. If you have equipment mounted too close to the Kayak HD
8 RU Frame, you may not be able to remove the door.
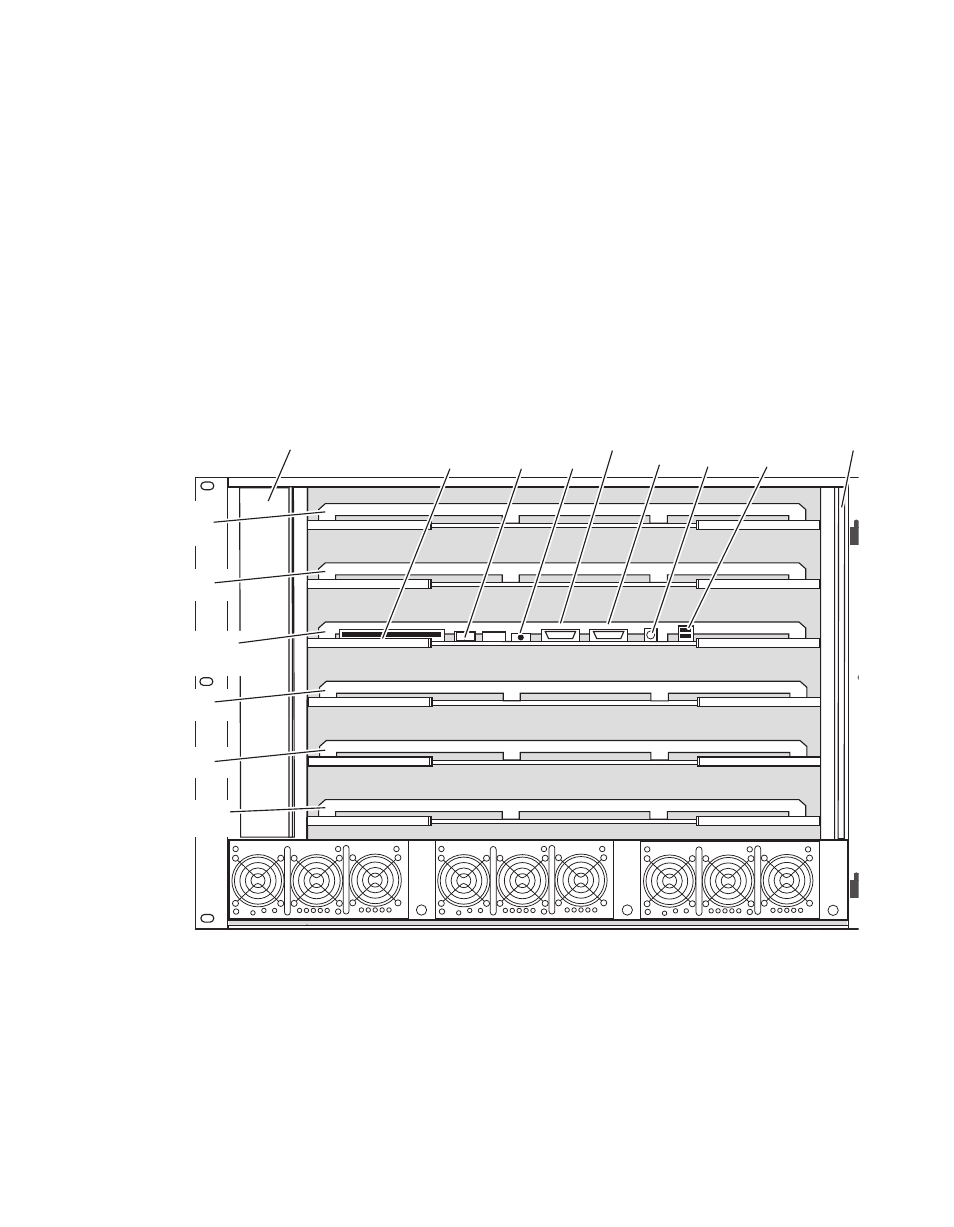
Figure 21. Kayak HD 8RU Frame, Front View with Door Removed
ON
OFF
M/E 0
(PP)
M/E 1
M/E 2
M/E 3
Expansion
Slot
Controller
(and 0.5 M/E)
Fan Assembly
Flash
Memory
Power
Switch
Reset
Button
2 USB
(unused)
Air Fi
Power Supply Unit 1
Power Supply Unit 2
Power Supply Unit 3 (Optional)
RS-232
PS2
Keyboard
VGA