Configure network communications, 2 configure network communications – RLE LD2100 V.2.6 User Manual
Page 21
rletech.com
LD2100 User Guide
21
2
Installation
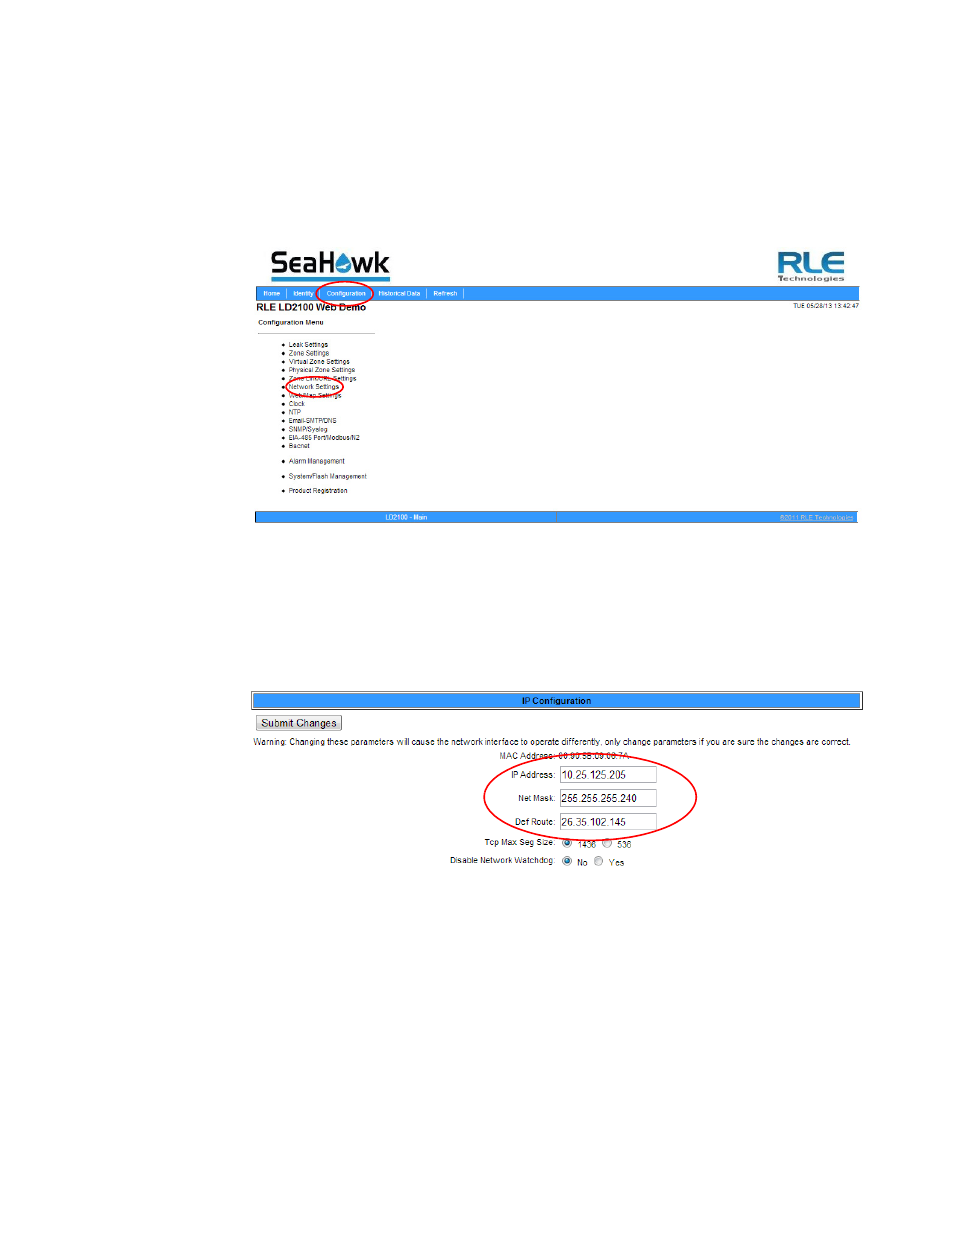
2.7.2 Configure Network Communications
To configure network communication, set the IP address for the LD2100 to the address
assigned by your IT administrator.
1
From the home page of the LD2100’s web interface, select the Configuration Menu link.
Then, select Network Settings from the Configuration Menu.
2
The Network/IP Configuration page displays. Enter the values for IP Address, Net Mask
(subnet mask), and Def Route (default gateway) provided by your IT administrator.
Once you enter the values and click the Submit Changes button, the LD2100 saves the
changes and reboots. The system status LED on front of the LD2100 stops flashing.
Figure 2.7
Network/IP Configuration Page
3
Reset the computer that’s connected to the LD2100 to its original IP address and subnet
mask. Disconnect the crossover cable.
The computer and the LD2100 are now both configured to communicate on the network.
4
To verify that the IP address on the LD2100 has been successfully changed, type the new IP
address of the LD2100 into any web browser.
5
When prompted, enter the user name and password to verify network access to the LD2100
(as you did in step 4 in the previous section).
Figure 2.6
Configuration Menu