Powermax – Hypertherm Powermax105 Service Manual User Manual
Page 77
Machine Torch SeTup
powermax
105 Service Manual
6-5
Converting a full-length machine torch to a mini machine torch
You can convert a full-length machine torch to a mini machine torch by removing the positioning sleeve.
Note: If you are converting a full-length machine torch to a mini machine torch and mounting the torch at the same
time, skip this section and follow the instructions on page 6-7 Mount the torch.
Refer to the figures on page 6-4 Machine torch components and follow these instructions.
Note: While disconnecting and reconnecting the torch parts, maintain the same orientation between the torch
head and torch lead. Twisting the torch head in relation to the torch lead can cause damage.
1. Disconnect the torch lead from the power supply and remove the consumables from the torch.
2. Unscrew the strain relief body from the strain relief nut and slide the strain relief body back along the torch lead.
3. Unscrew the strain relief nut from the positioning sleeve and slide the nut back along the torch lead.
4. Unscrew the positioning sleeve from the coupler.
5. Unscrew the coupler from the mounting sleeve.
6. Remove the three screws from the consumables end of the mounting sleeve and slide the mounting sleeve off the
front of the torch body.
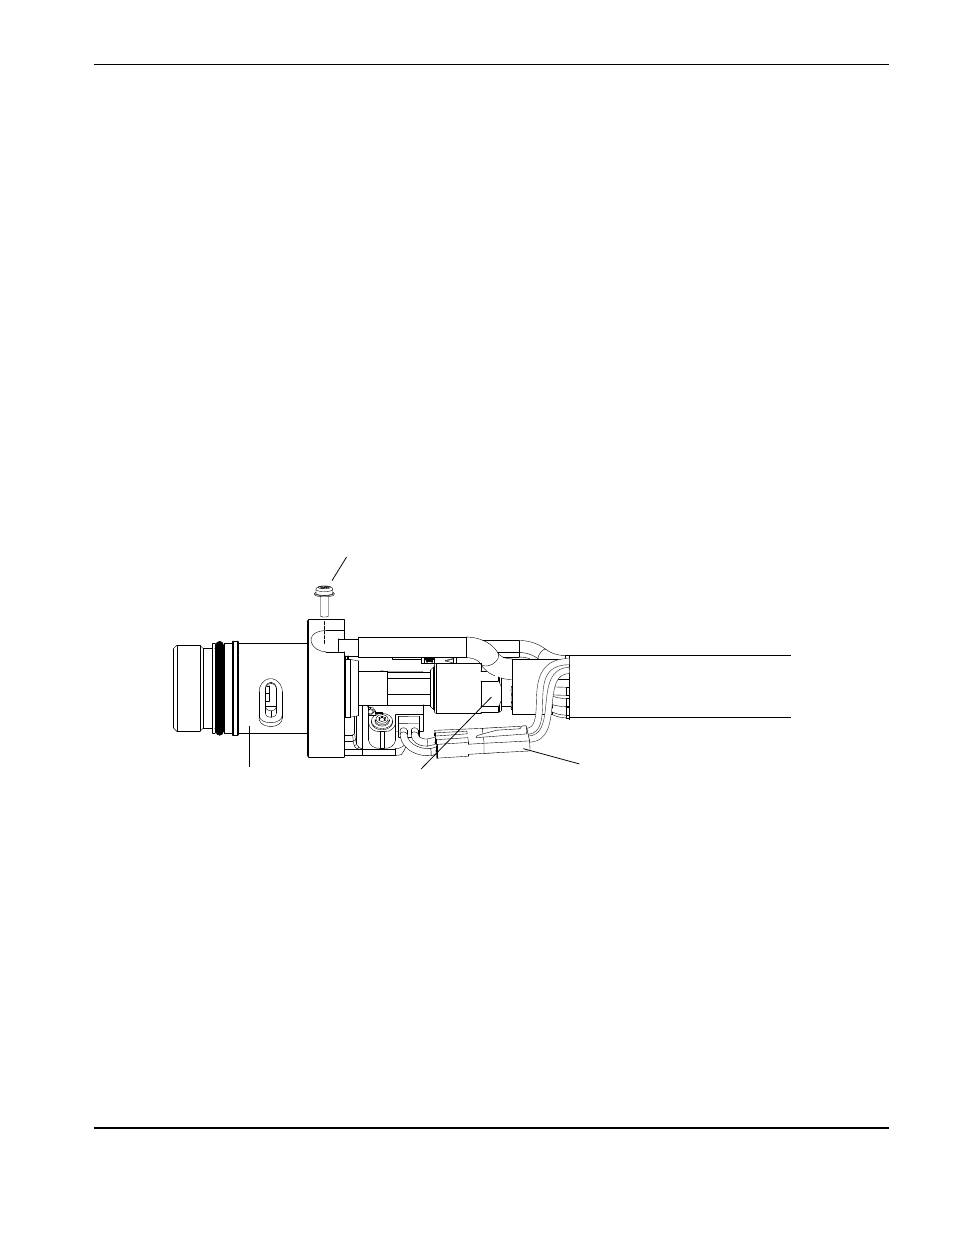
7. Disconnect the wire connector for the cap-sensor switch.
8. Use a #2 Phillips screwdriver to remove the screw that secures the torch’s pilot wire to the torch body.
Gas supply line
connection
Torch head
Pilot wire terminal screw
Wire connector for
cap-sensor switch