Replace the control board, Powermax – Hypertherm Powermax105 Service Manual User Manual
Page 237
Power SuPPly ComPonent rePlaCement
powermax
105 Service Manual
9-39
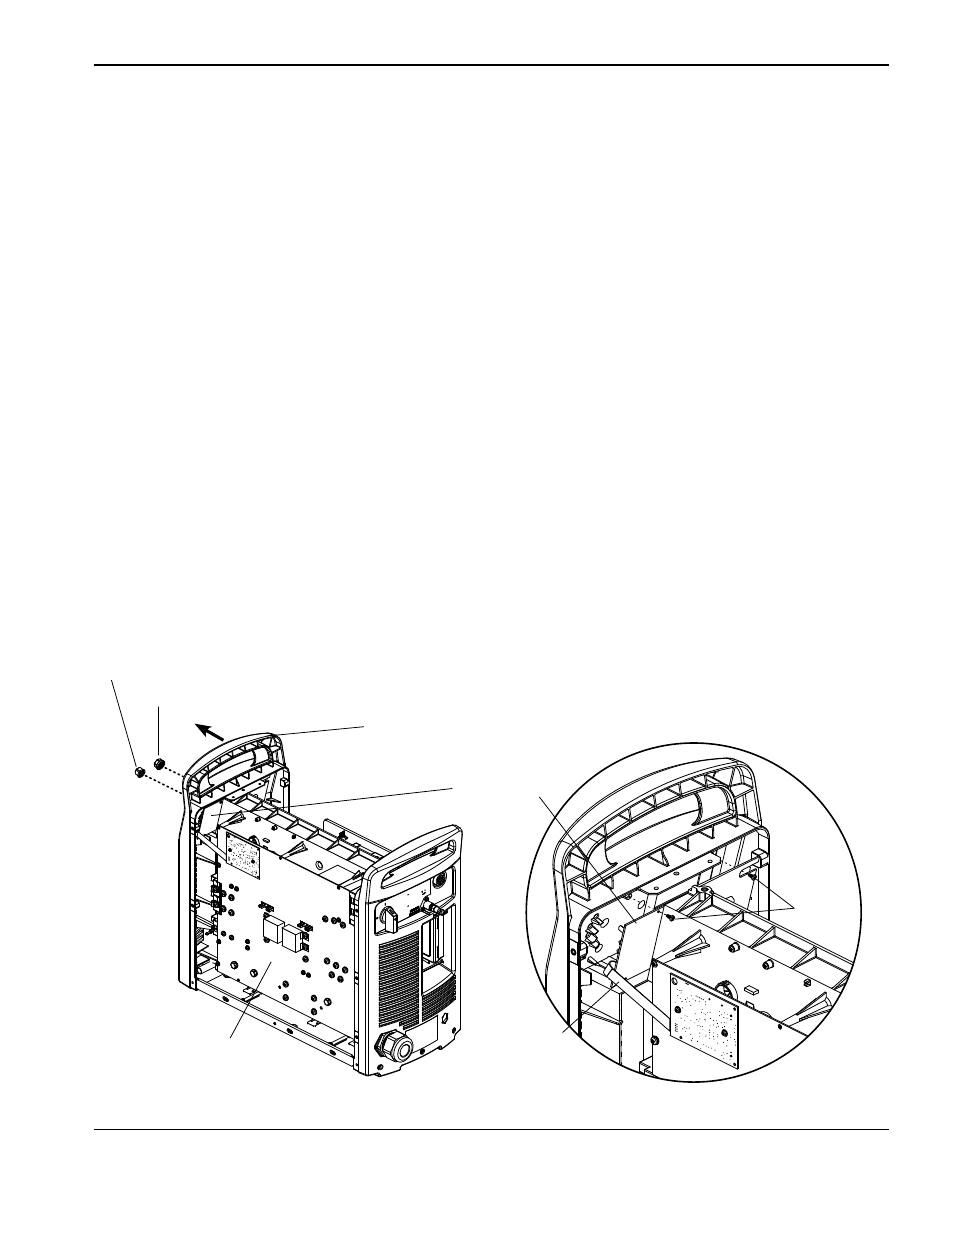
Replace the control board
1. Remove the current adjustment knob and operating mode switch knob from the front panel by pulling them straight
off their respective posts.
2. Carefully pull the top of the front end panel away from the power supply. The front panel is still attached to the
bottom of the power supply and can only move a short distance.
3. Remove the three screws that secure the control board to the front panel. Two screws are installed at the top of the
control board, one at each end. The third screw (not shown) is installed in the middle of the control board along the
bottom edge.
4. Carefully slide the control board from behind the front end panel toward the power board side of the power supply.
5. Disconnect the ribbon cable from the control board and set aside the control board.
6. Plug the ribbon cable into the J6 connector on the new control board.
7. Carefully pull the top of the front end panel away from the power supply and slide the control board into place.
8. Secure the control board to the front end panel by tightening the three supplied mounting screws to 8.1 kg cm
(7 in.-lbs).
9. Align the inside flat edge of the new operating mode switch knob (with the white line) with the flat side of the control
board post and push the knob straight onto the post.
10. Align the inside flat edge of the new current adjustment knob with the flat side of the control board post and push
the knob straight onto the post.
Control board
Front end panel - top
Operating mode knob
Current adjustment knob
Power board
Ribbon cable
Top
mounting
screws