Replace the torch body, Powermax – Hypertherm Powermax105 Service Manual User Manual
Page 302
Torch componenT replacemenT
10-12
powermax
105 Service Manual
Replace the torch body
Refer to the appropriate figure on the previous page and complete the following instructions.
1. Use a Phillips screwdriver to remove the screw that secures the torch’s pilot arc wire to the torch body.
2. Use two wrenches to loosen the gas fitting that secures the torch body to the torch lead.
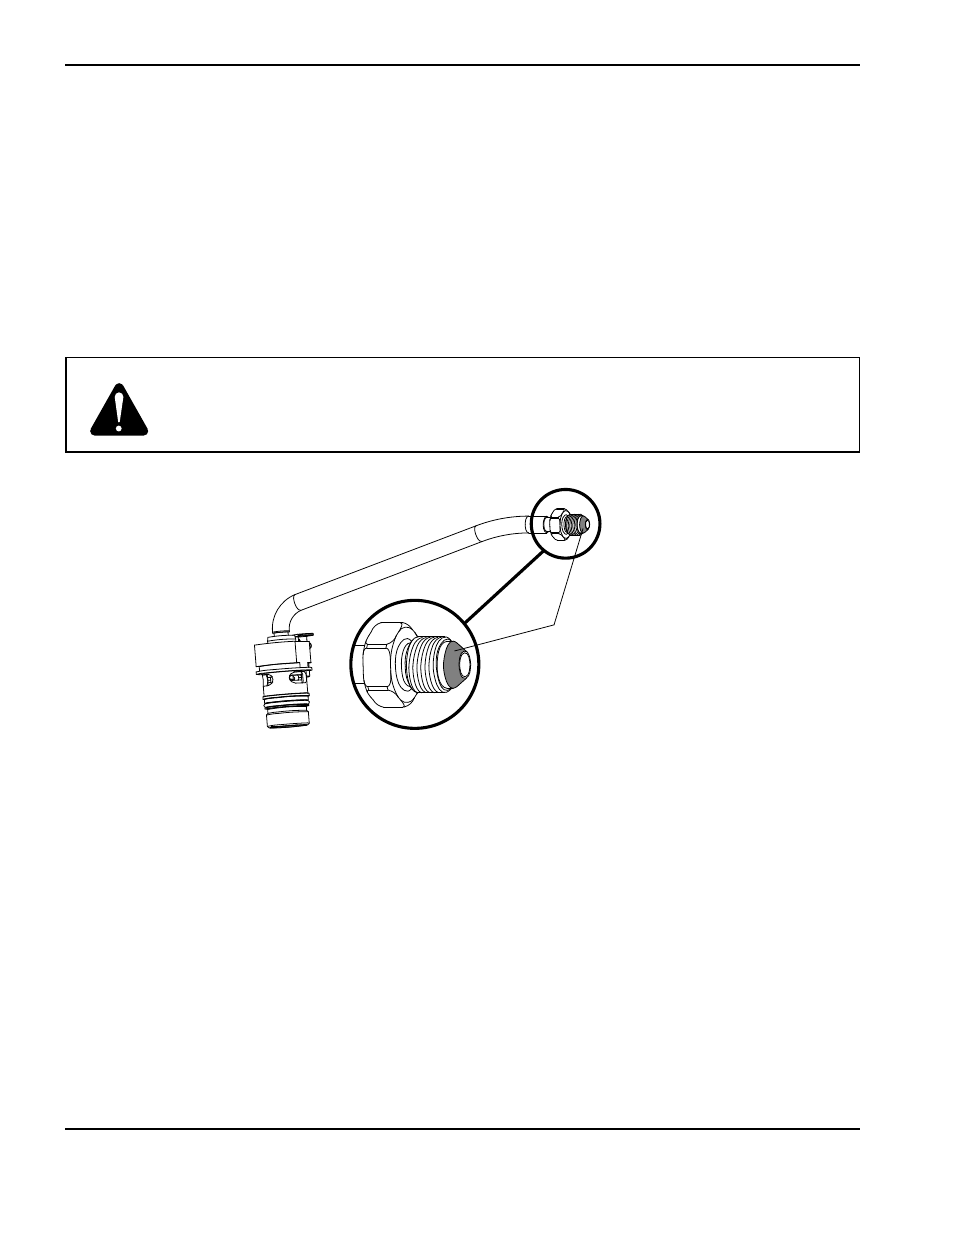
3. Apply Loctite® 263 (Part # 330103) to the threads of the gas tube fitting on the torch body. Be very careful not to
get any Loctite on the conical surface of the gas tube fitting to avoid damage to the torch. See the figure below.
4. Thread the torch body into the torch lead until snug.
5. Use two wrenches to tighten the gas fitting that secures the torch body to the torch lead to 69.1 kg cm (60 in.-lbs).
6. Use a Phillips screwdriver to tighten the screw that secures the torch’s pilot arc wire to the torch body to
5.76 kg cm (5.0 in.-lbs).
Note: To prevent the pilot arc wire from being pinched between the handles, angle the pilot arc wire terminal
so it is below the torch body gas tube.
Caution:
Do not get any loctite on the conical surface of the gas tube fitting to avoid causing
damage to the torch. If any loctite does get on this surface, clean it off immediately.
Conical surface of the
gas tube fitting