Installation procedure, Installation procedure -3 – Maytag Atlantis User Manual
Page 11
Attention! The text in this document has been recognized automatically. To view the original document, you can use the "Original mode".
DO NOT LOWER OR RAISE THE WASHER
BY THE CONTROL PANEL
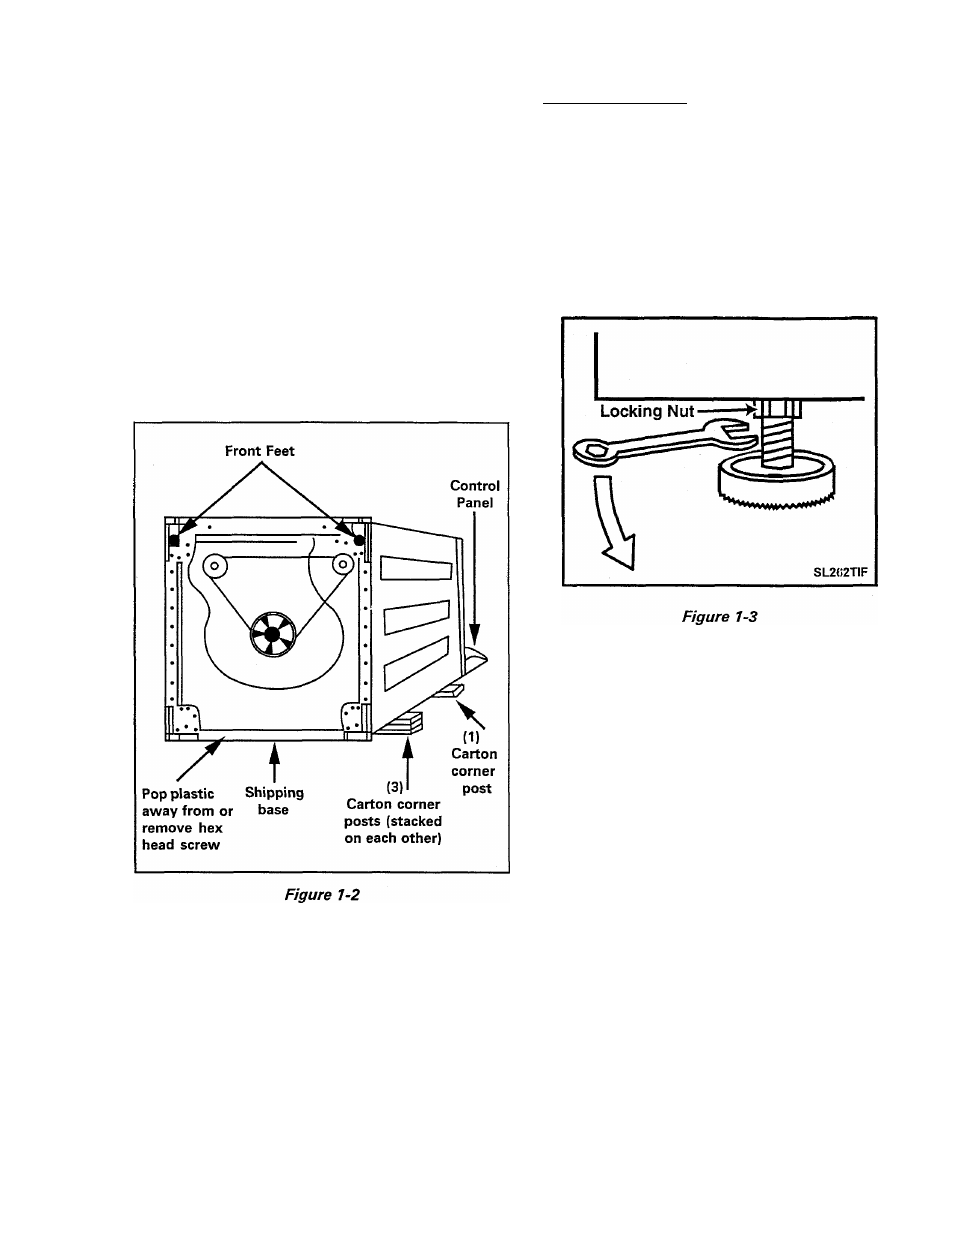
5. Remove the crate bottom from the washer.
Pop the plastic loose from the screw lo
cated between the back feet, or remove the
screw entirely with a screwdriver (Figure
1-2). Pull the plastic base away from the
back feet. Grasping the plastic base on the
sides, pull down and toward you to release
the front feet from the slots and remove
the base. Discard the base (it can be re
cycled). RETURN THE WASHER TO THE
UPRIGHT POSITION.
INSTALLATION PROCEDURE
NOTE: Proper installation is the respon
sibility of the purchaser.
Service calls performed as a result of im
proper setup, adjustment and connection
are the responsibility of the installer.
Proceed as follows:
1. Place the washer as close to its final oper
ating location as possible.
2. Make sure rear feet move up and down
freely.
3. Place washer in final location.
4.
5.
6
.
When the machine is in place, screw front
feet out of base against the floor until the
machine is level across the top front of
the washer.
While holding foot still, turn the adjust
ing locknut clockwise until the nut is tight
ened firmly against base (Figure 1-3).
Tilt machine forward until rear of cabi
net is approximately 4 inches off the floor.
Lower the machine back to the floor on
the rear feet. This operation causes the
rear stabilizing feet to conform to the con
tour of the floor and seat them solidly.
Push washer with hands on opposite
corners to check stability (Figure 1-4).
16009485-01
©1999 Maytag Appliances Sales Company
Section 1. General Information
1-3