To setup analog camera, 3 to setup analog camera – AVer EH11116H-4 series user manual User Manual
Page 81
71
CHAPTER 3
3.2.3
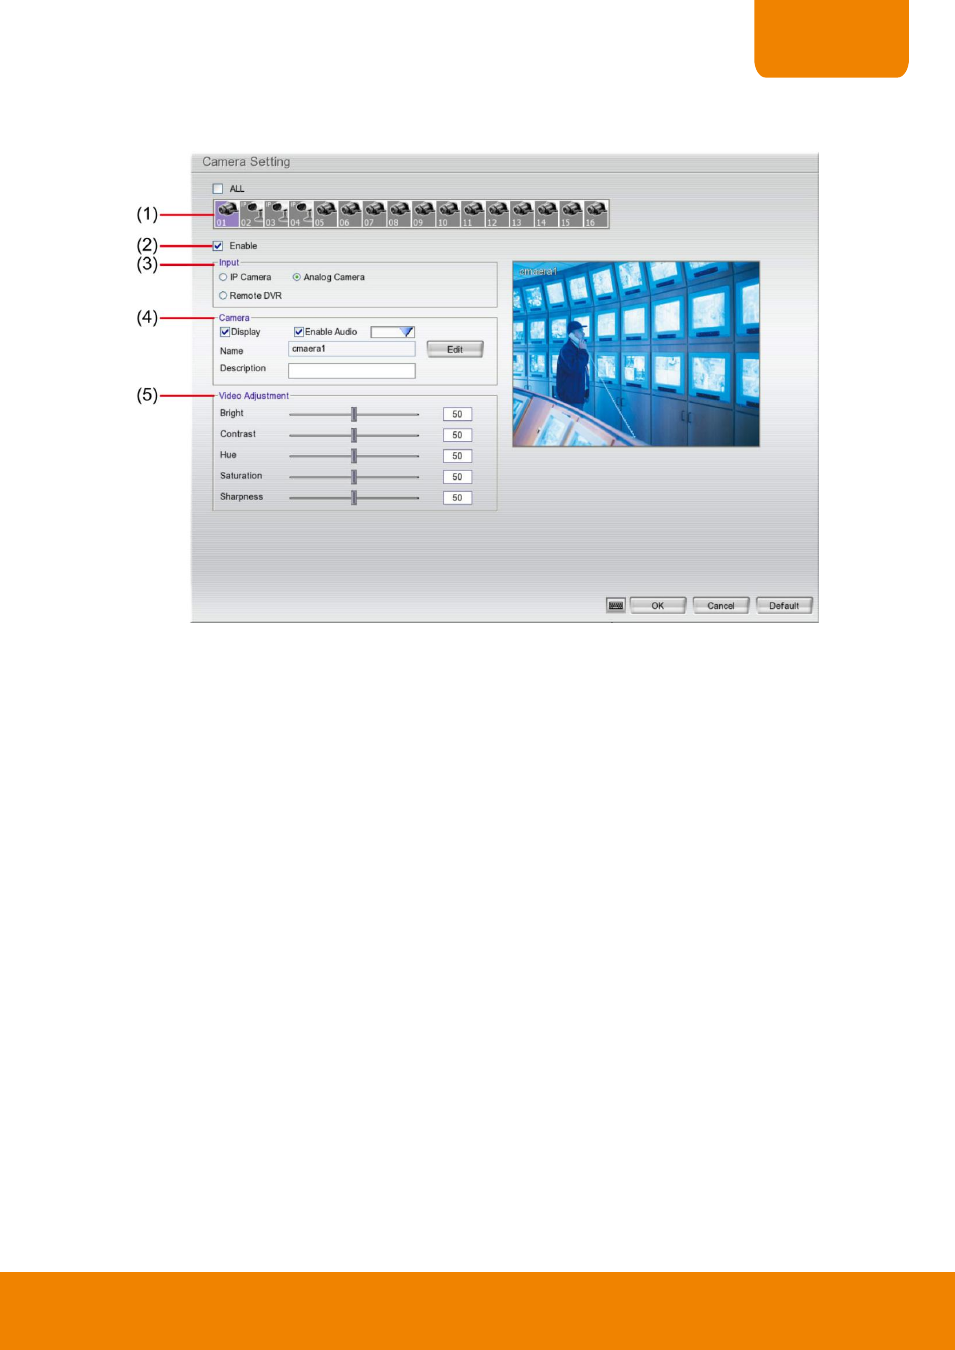
To Setup Analog Camera
Click Default will back to the factory default value.
(1) Camera Icons
Select the camera number you want to view. To enable/disable all cameras, click ALL check box.
(2) Enable
Set to enable/disable the selected camera. When there is no video source on the camera, we suggest disabling
it so that the system won’t detect it as video loss error.
(3) Input
Select the camera type as Analog Camera.
(4) Camera
- Display
Enable/disable to show the video. Even if the video of the selected camera is hidden you can still record
the video and preview it in playback mode.
- Enable Audio
Mark Enable Audio will allow recording the sound that received from selected audio input channel (audio
input channel located on back panel of DVR). For example: user has enabled audio and select audio input
channel 1 on the camera 4. Therefore, DVR will record the video of camera 4 and sound that received
from audio input channel 1 together. While playback, user will hear sound that received by audio input
channel 1 on camera 4.
- Name
Change the camera name
- Description
Add a short comment
(5) Video Adjustment
Adjust the Brightness, Contrast, Hue, Sharpness, and Saturation of the camera.