AVer EH11116H-4 series user manual User Manual
Page 110
100
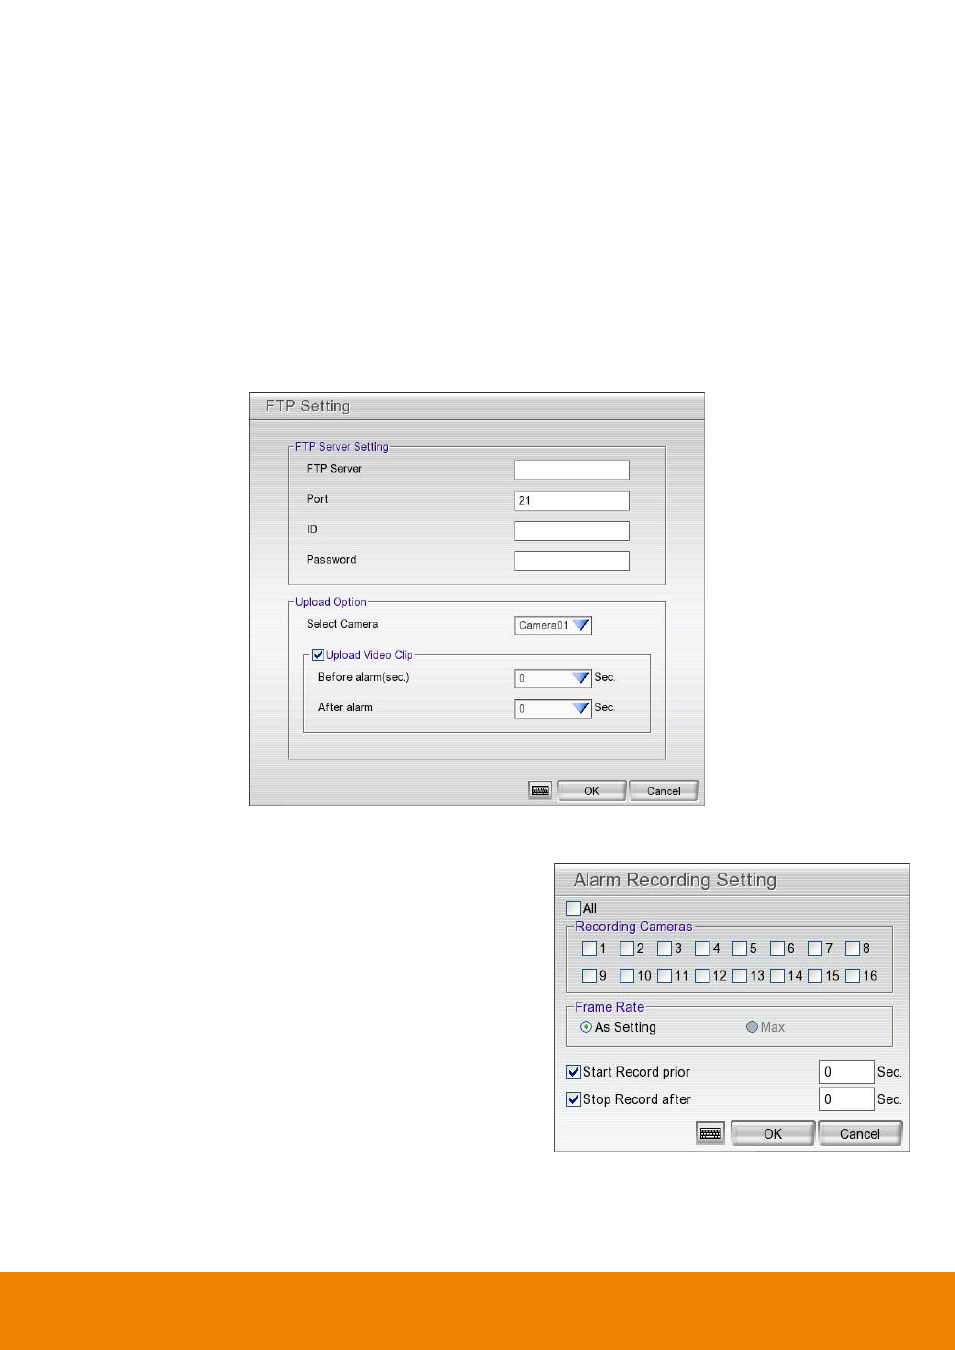
- File Transmission via FTP
Upload file to remote computer thru FTP (File Transfer Protocol).
FTP Server Setting
FTP Server: Enter FTP server
’s IP address
Port: Enter the port number of FTP connection.
ID& Password: Enter the ID and Password that use to login FTP server.
Upload Option
Select Camera: Select the camera that the images will be captured and send when the any alarm
is triggered.
Upload Video Clip: Mark to enable the send the recorded image before and after alarm occurs,
enter the time (in second) that before and after alarm occurs in Before alarm(sec.) and After
alarm.
-
Start Recording
Record the video from the selected camera.
1. Beside the Start Recording check box, click Detail.
2. In the Alarm Recording Setting dialog box, select the
camera to enable/disable video recording. Enable All
to select all cameras.
3. In the Frame Rate selection, select As Setting to
record the number of frames based on the Recording
Setting.
4. In the Start Record prior text box, mark and set the
number in second for the program to begin recording
before the alarm has been trigger. The time range is
1~10 seconds.
5. In the Stop Record after text box, mark and set the
number in second for the program to continue recording after the alarm has ended. The time range is
1~999 seconds. If user doesn
’t mark and set the time, the alarm recording will continue recording until
alarm is reset.
6. Click OK to accept the new settings and Cancel to exit without saving.