Record setting, 3 record setting – AVer EH11116H-4 series user manual User Manual
Page 128
118
- Port
The port for connection
- User ID
Enter the user id that for connecting authority
- Password
Enter the password that is for connecting authority
- Channel
Select the channel of connected camera
4.1.4.3
Record Setting
In the Recording setup windows, click OK to accept the new settings, click Exit to exit without saving, and click
Default to revert back to original factory setting.
IP Camera
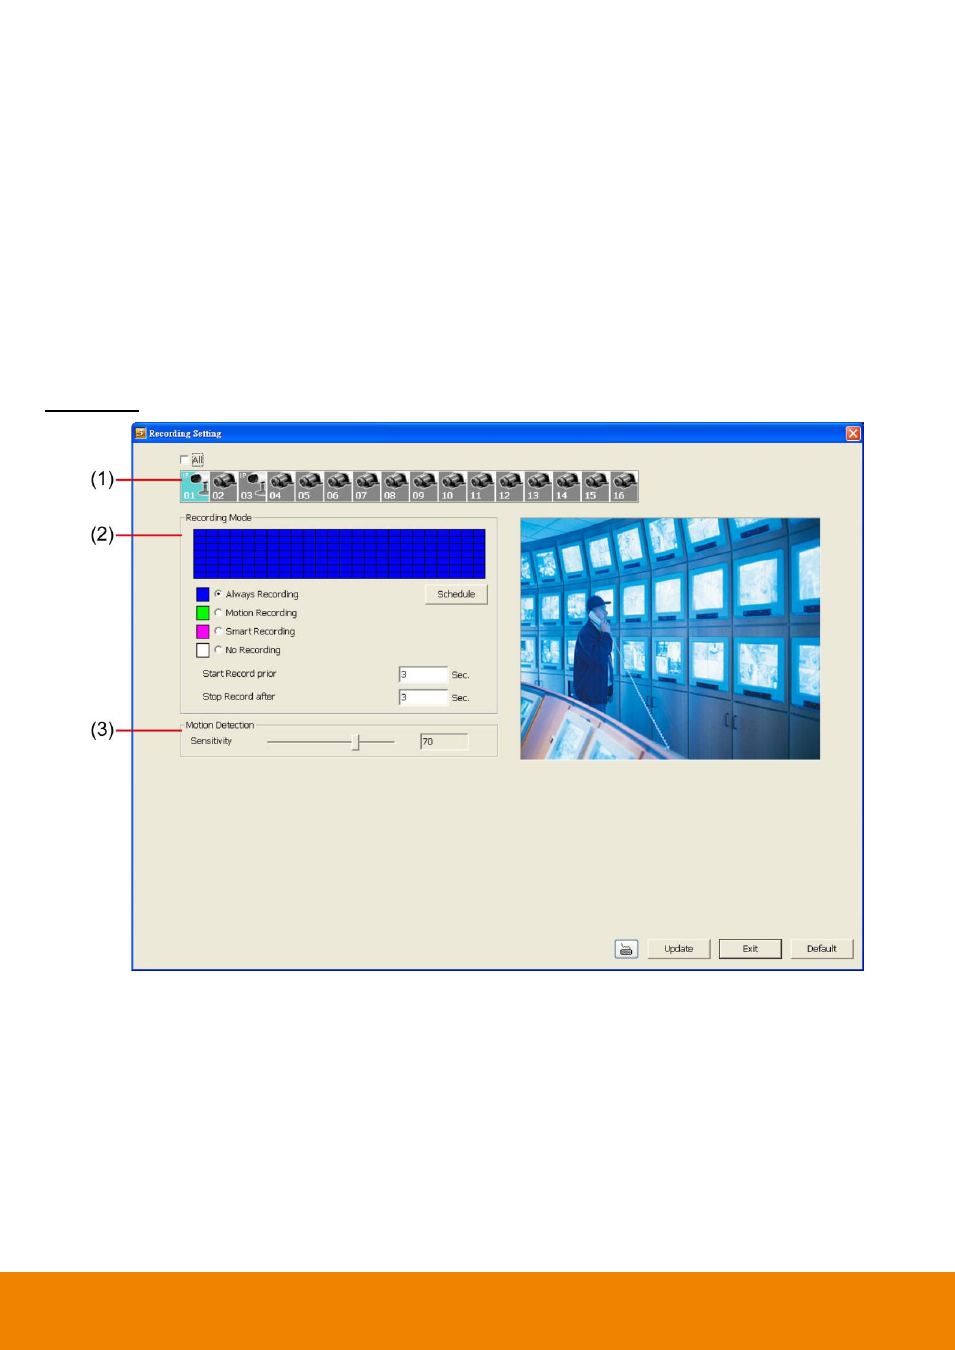
(1) Camera Icons
Select the camera number you want to set the recording setting. To select all the cameras, enable the ALL
check box. To select more than one camera, Right click on the camera icon. To select one camera only, Left
click on the camera icon. The camera icon turns red when it is selected.
(2) Recording Mode
The horizontal blocks from 00 to 23 represent the time in 24-hour clock and the vertical block 1 to 7 represent
the day in the week block (Sunday to Saturday). To record in full 24 hours and 7 days a week, select the
recording mode and click the button. If you want to only record at a particular time or day, click Schedule
button and select the Recording Mode , and then click on the time or day blocks. When the system starts
recording a red triangle mark would appear at the upper left corner of the screen.
The recording modes are listed below: