Setup the ip ptz camera, Chapter 2.2.3.2, 2 setup the ip ptz camera – AVer EH11116H-4 series user manual User Manual
Page 53
43
CHAPTER 2
2.2.3.2
Setup the IP PTZ Camera
When IP PTZ camera has successful connected with the DVR system, user can use the PTZ function directly
without any configuration. To make connection of IP PTZ camera, please refer to
In PTZ control panel, user can setup the preset position of the camera. The number of preset positions is
depending on the IP PTZ camera has supported. For example: A brand of IP PTZ camera only supports 4
preset positions. Therefore, user only can setup 4 preset positions. User can refer to the user
’s manual of the IP
PTZ camera to make sure the number of the preset positions has supported.
Please follow the below steps to configure the preset position.
i
The gray out functions are not supported.
1. In preview mode, select the channel that is an IP PTZ camera channel.
2. Click PTZ button on preview UI and PTZ control panel will show up.
3. In the PTZ control panel, using the arrow button to adjust the position of IP PTZ camera.
4. And then, click Setup (see also
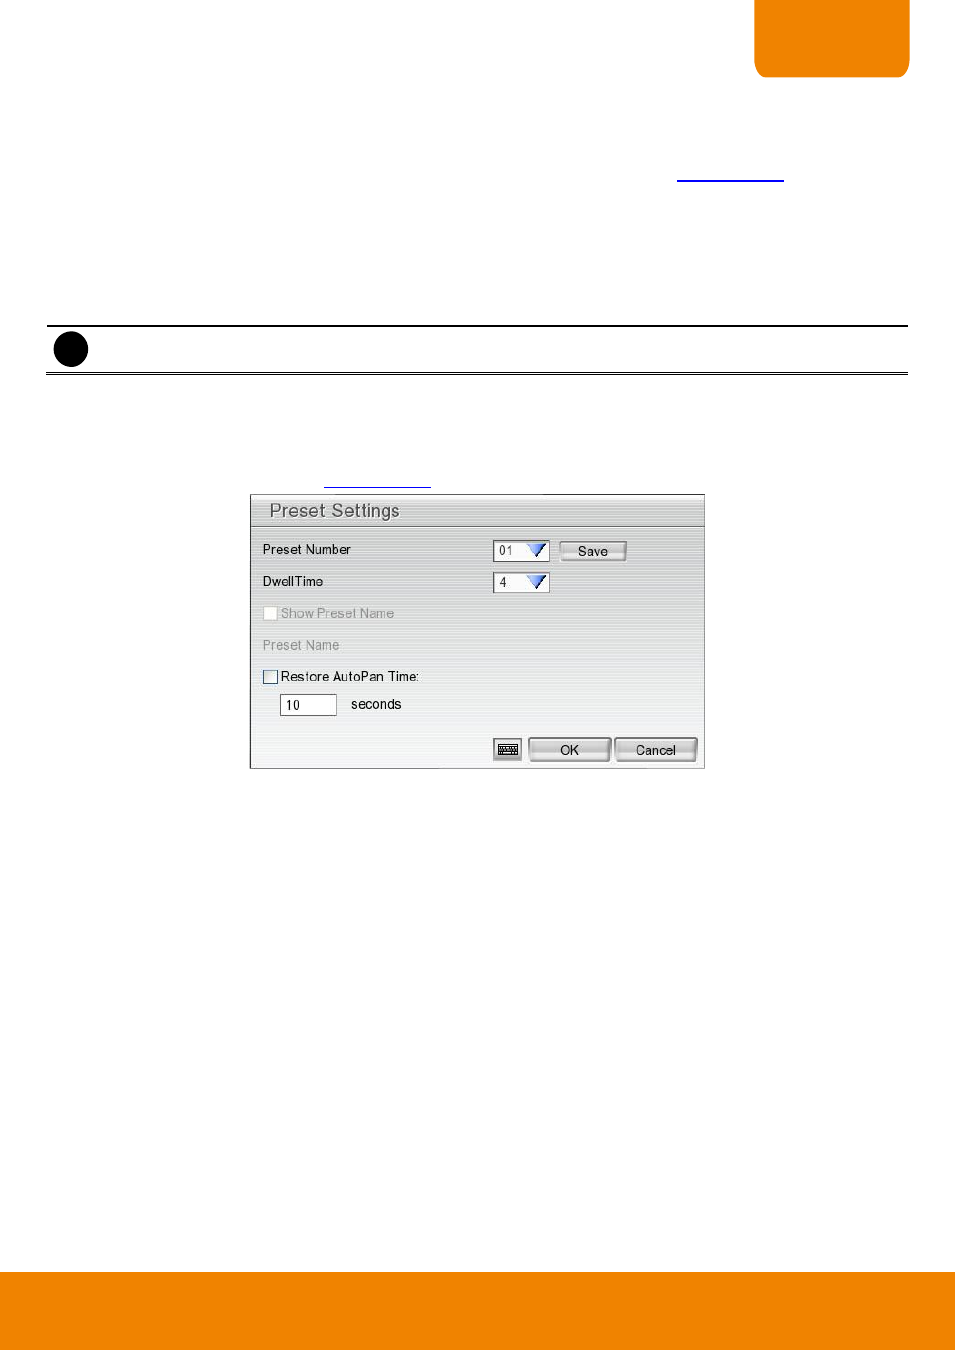
). The Preset Settings window will show.
5. Select the Preset Number to assign a number as the PTZ camera current position. And then, click Save to
save the setting.
6. Set the DwellTime for how long the PTZ camera stays in that position before it moves to the next one.
7. Repeat step 3 to 6, if you want to save another preset position.
8. Restore AutoPan Time: set a time period for restoring auto path function after the PTZ camera has been
moved manually. Mark the check box and set the time period in second.
9. Click OK to complete the setting.